
 Home >


Summary: This article will show you how to recover photos, videos, files and other data from a damaged SD card memroy card. This method is very simple. You will gain a lot after reading the introduction.
SD card (secure digital memory card) is a semiconductor flash memory device based on a new generation of memory. It is widely used in portable devices, such as digital cameras, personal digital assistants (PDAs) and multimedia players. SD card was jointly developed by Panasonic, Toshiba, SanDisk and the United States of America in August 1999. In terms of size, SD memory card is like a stamp. It weighs only 2G, but it has high storage capacity, fast data transmission speed, great mobility and good security.
Because of its characteristics, many smart phones use SD as one of the essential parts of smart phones. Because smart phone users will produce many data files in the process of daily use, and some important data need to be stored, SD card is used as the carrier to store these data. But occasionally some smart phone users delete some data from the SD card due to careless operation. What is the way to retrieve these data?
To recover lost data or deleted files from the SD card, you need to use professional SD card data recovery software. This data recovery is for the SD card. The memory card allows you to recover various lost files from the SD card, such as photos, videos, music and other lost data. Now you can download and try for free:


| Part 1: Recover from Android |
| Part 2: Recover from Broken Android |
| Part 3: Recover from SD Cards |
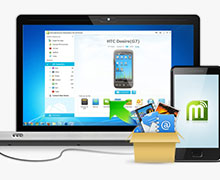
Launch Dr.Fone on your computer, and select "Data Recovery".
.jpg)
Connect your Android phone to the computer using a USB cable. Please make sure you have enabled USB debugging on your Android phone. When your device is detected, you will see the screen as follows.
.jpg)
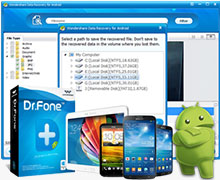
After the phone is connected successfully, Dr.Fone for Android will display all the data types it supports to recover. By default, it has checked all the file types. You can just select the type of data that you'd like to recover.
And then click "Next" to continue the data recovery process. The program will analyze your device first.
.jpg)
After that, it will continue scanning your Android phone to recover deleted data. This process will take a few minutes. Just be patient. Precious things are always worth waiting for.
.jpg)
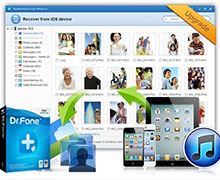
When the scan is complete, you can preview the found data one by one. Check the items you want and click "Recover" to save them all on your computer.
.jpg)
Launch Dr.Fone on your computer and select "Data Recovery".
Connect your Android phone to computer using a USB cable. Then choose "Recover Data from Android" from the program's screen.
.jpg)
By default, Dr.Fone already selects all the data types. You can also select the data types you want only. Click on "Next" to continue.
Please note that this function only helps you extract the existing data on the broken Android phone yet.
.jpg)
There are two types of fault of the Android phone, which are Touch does not work or cannot access the phone, and Black/broken screen. Just click on the one which you have. Then it will lead you to the next step.
.jpg)
Then on the new window, choose the correct device name and the device model for your phone. Currently this function only works for some Samsung devices in Galaxy S, Galaxy Note and Galaxy Tab series. Then click on "Next".
(2).jpg)
Please make sure you have selected the correct device name and the device model for your phone. The wrong information may lead to bricking your phone or any other errors. If the information is correct, put in "confirm" and click on the "Confirm" button to continue.
.jpg)
Now, just follow the instructions on the program to get the Android phone into the Download Mode.
◆ Power off the phone.
◆ Press and hold Volume "-", "Home" and "Power" button on the phone.
◆ Press "Volume +" button to enter download mode.
.jpg)
After the phone is set in Download mode, Dr.Fone will start to analyze the phone and download the recovery package.
.jpg)
After the analysis and scanning process, Dr.Fone toolkit for Android will display all the file types by categories. Then you will be able to select the files to preview. Choose the files you need and hit "Recover" to save all the precious data you need.
.jpg)
.jpg)
.jpg)
.jpg)
.jpg)
.jpg)
.png)
.png)
Tips: If you also want to recover documents more than videos, photos and audio files, such as Office documents, PDF files, Archives, Emails, etc. from computer or other devices, you need to choose the higher version: Data Recovery tool or Data Recovery for Mac, which does more than the Photo Recovery.


 Copyright © 2012 Z0DOWNLOAD.COM. All rights reserved.