Step 1. Install and launch Aiseesoft Video Converter Ultimate on your computer. Register with the email address and registration code you have received from us.
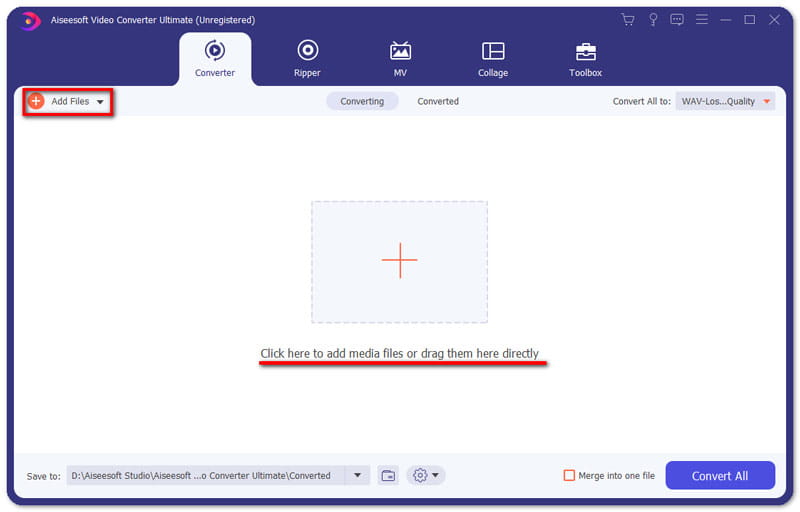
Step 2. Click Add File and select the Add File or Add Folders to add files. Or directly drag multiple video and audio files to this program.
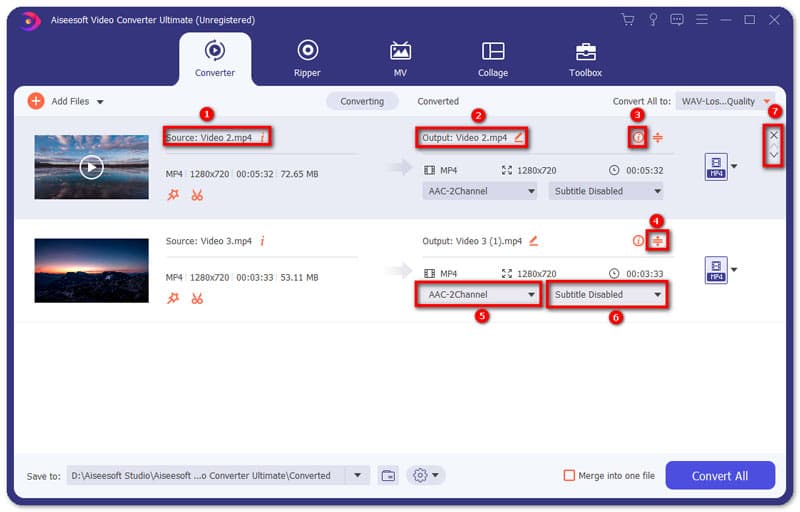
After adding files, you can see its information on the interface, like the original format, the screen size and the time length. And here are some options you can choose.
1. See the information of the video
2. Rename the files
3. Edit Metadata
4. Compress the file
5. Add audio track or not
6. Add subtitle or not
7. Put the video on the first or the last
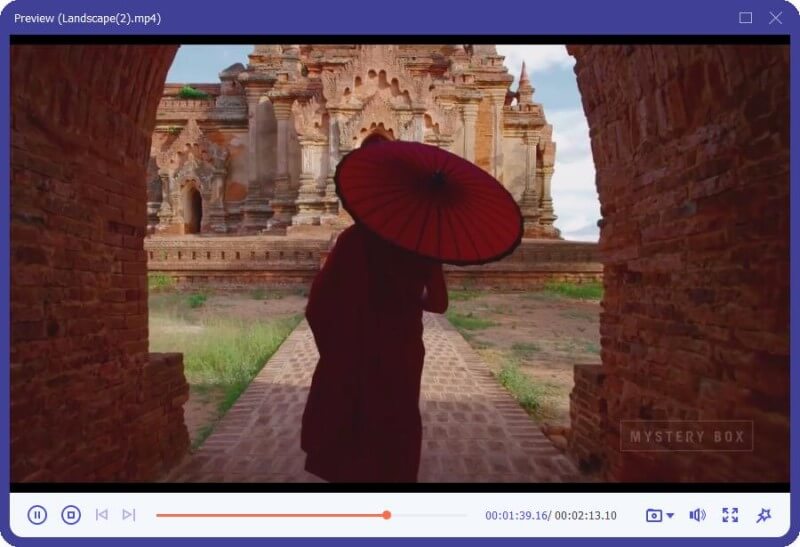
You can click the video to play it. On the playing interface, you also can take snapshot and edit the video.
If you want to edit videos or cut them, you can click the Cut icon or the Edit icon. Click here to see what you can get.
Step 3. Click on the format icon on the right side of the video file. Then you can see a list of presets. Choose a preset and adjust the profile settings according to your need.
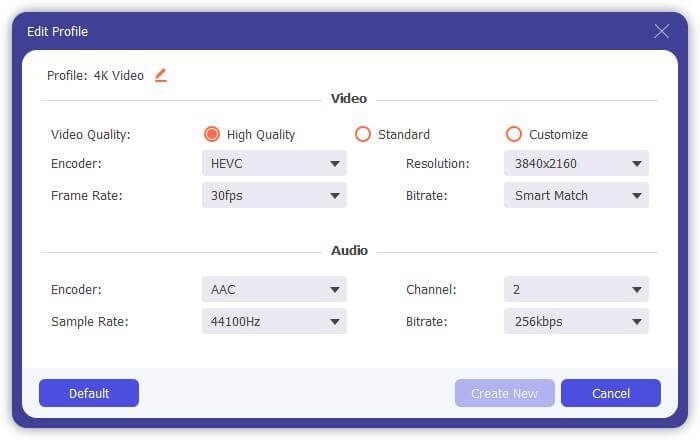
If you want to change the format settings, you can click the Gear icon on the right to custom profile. In the pop-up-window, you can change settings as follows.
Video: Quality, Encorder, Resolution, Frame Rate and Bitrate.
Audio:Encorder, Channel, Sample Rate and Bittrate.
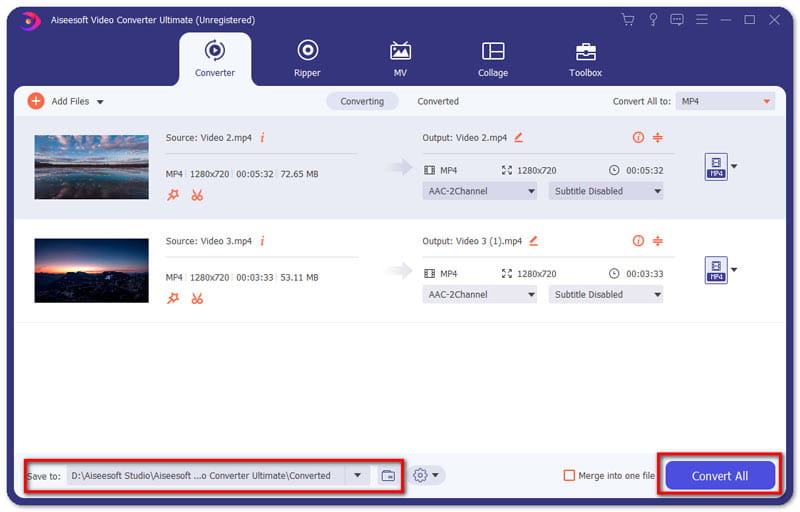
Step 4. Select a path for the converted files on the bottom bar. And then click the Convert All button on the main interface to start converting on your computer.
Note: If you want to merge them into one, tap on Merge into one file on the left of Convert All.
Step 1. Insert a DVD disc to the DVD drive on your PC. Click Ripper on the top. Then click the Load DVD button to load the DVD disc, ISO file or DVD folder. If your computer has no DVD drive, just use the external DVD drive to connect your computer.
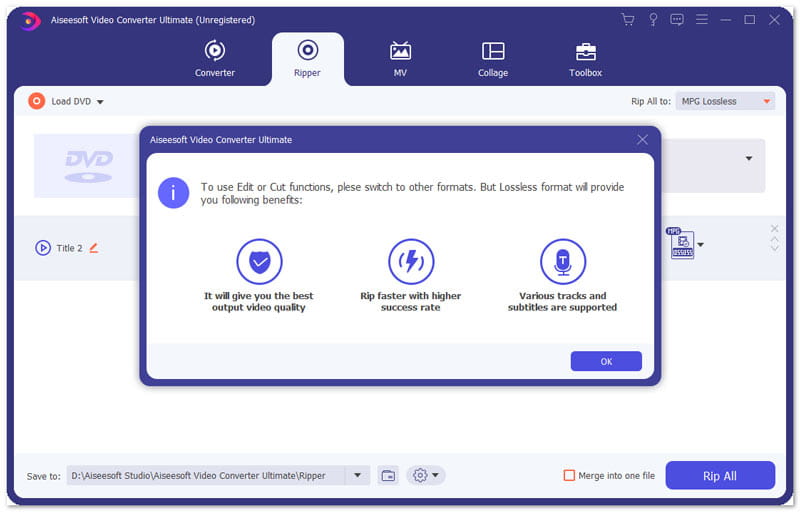
Step 2. The default output format for this ripper is MPG Lossless which can preserve the lossless output quality.
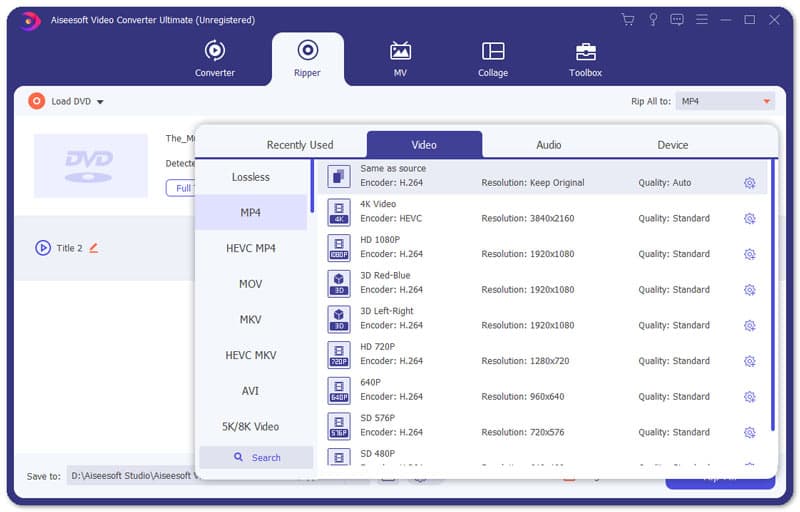
If you want to rip DVD to digital formats for easy playback on devices, just find the Rip All to option to select suitable output format from its drop-down list.
You also can decide each video by click the format icon on the right side of the video file.
If you want to edit videos or cut them, you can click the Cut icon or the Edit icon. Click here to see what you can get.
Note: You should make sure the output format is not MPG Lossless when you edit the DVD.
Step 3. Select a path for the files on the bottom bar. And then click the Rip All button on the main interface to start ripping.
Note: If you want to merge them into one, tap on Merge into one file on the left of Rip All.
The program also has an MV maker that enables you to make a stunning video using video footages and pictures.
Step 1. Choose MV feature
After launching the program, choose the MV tab and then you will enter into the MV creating interface.
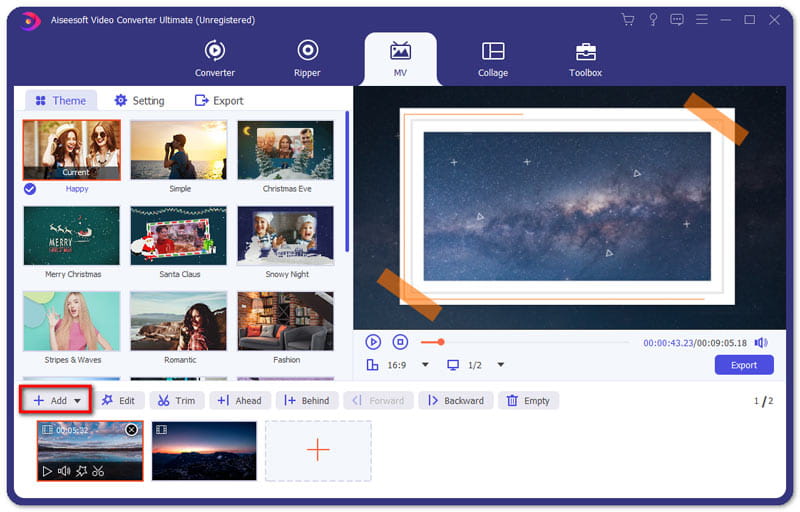
Step 2. Add file
Click the Add button from the lower left of the window to import your video footages or pictures to this MV maker. The file will be displayed instantly in the player on the top right section where you can play and preview the MV you make before saving it.
After importing your files, you are able to adjust the order with the mouse.
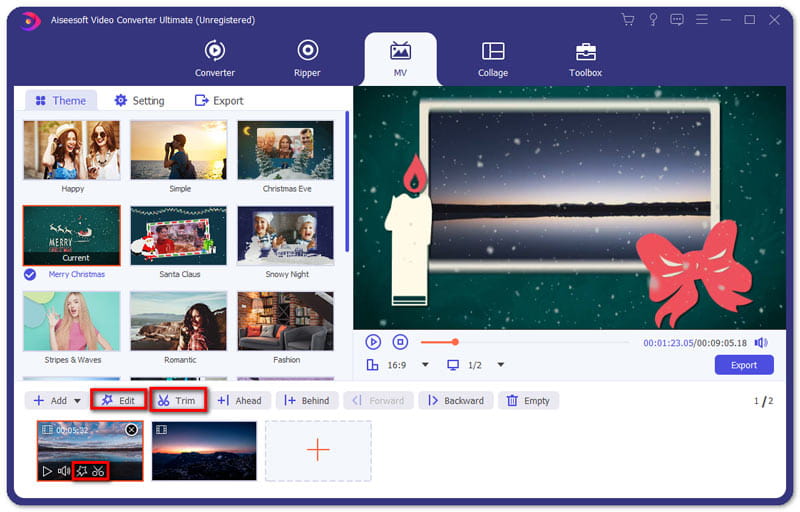
Step 3. Edit videos
Before making your files into MV, you can edit or trim the whole video by clicking the Edit button or Trim button, or you can edit or trim your videos or pictures separately.
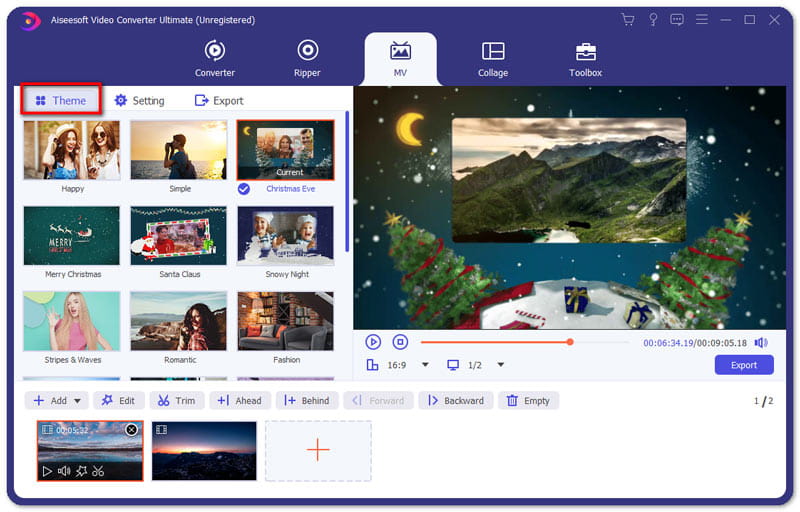
Step 4. Select a theme
When you finish editing, you can select a theme for your MV. On the left section, click the Theme tab and then choose your desired theme for your MV. Then, the theme will be applied to the MV automatically and you can preview the video on the player.
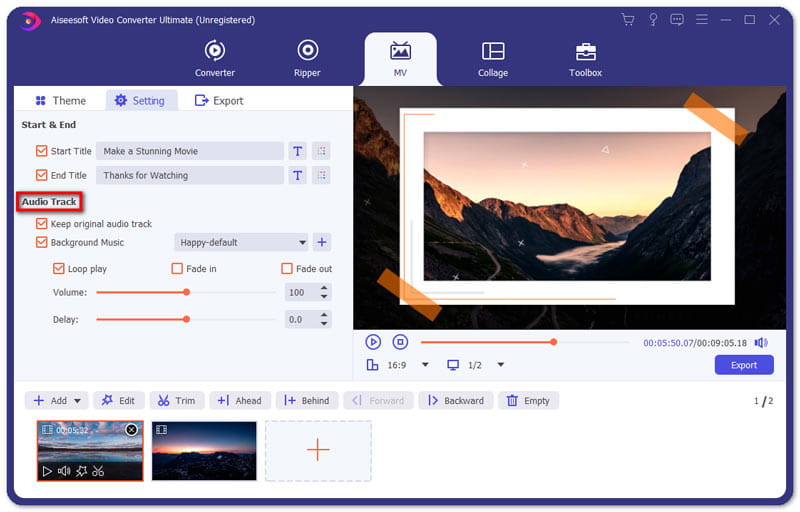
Step 5. Configure the title and audio track settings
If you would like to add the title in the beginning or end, just click the Setting tab, navigate to the Start & End option, and then tick off the box behind the Start Title, End Title, or both to enter your text.
Additionally, you can choose to add the background music for your MV while maintaining the original audio track. And, you can enable Loop Play to let your MV play a continuous loop of your background music. To configure audio transition, you can enable Fade in, Fade out, or both.
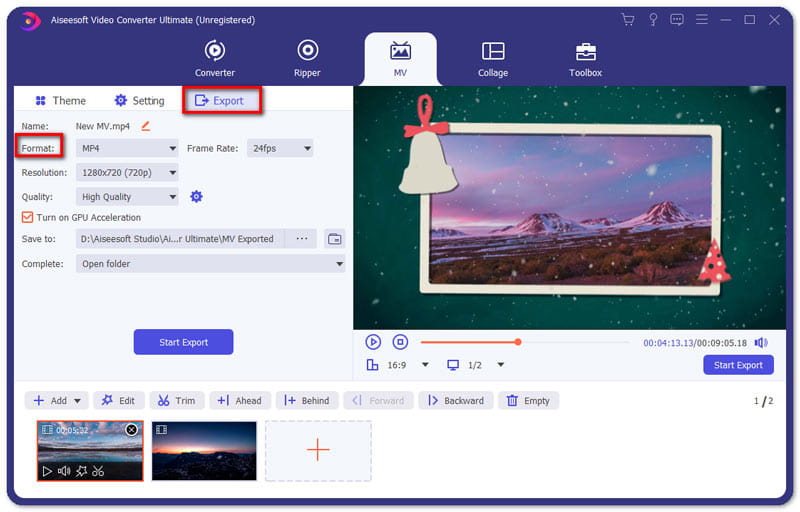
Step 6. Export MV
By default, the output format is MP4. If you’d like to save it in other video formats, you can choose your preferred format by clicking on the arrow down located beside the format icon.
Once you are ready to export your MV, you can go to the Export tab to give a name for your project, and set the path to store it. You can also enable the Turn on GPU Acceleration option to speed up the exporting process. In the end, click on the Start Export button to produce your MV.
Combining more than one shot into the one video screen could be a creative and engaging thing to impress your viewers. In this program, you can use its built-in split-screen video editor to perform the task of putting vides side by side and play them at once.
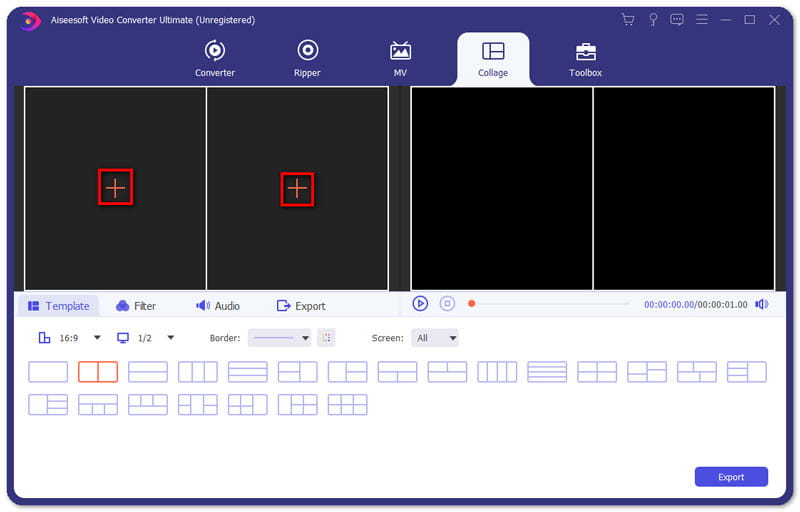
Step 1. Choose split-screen style
Launch the program and choose the Collage feature from the main menu bar. Then, go to the Template tab to select a split-screen layout.
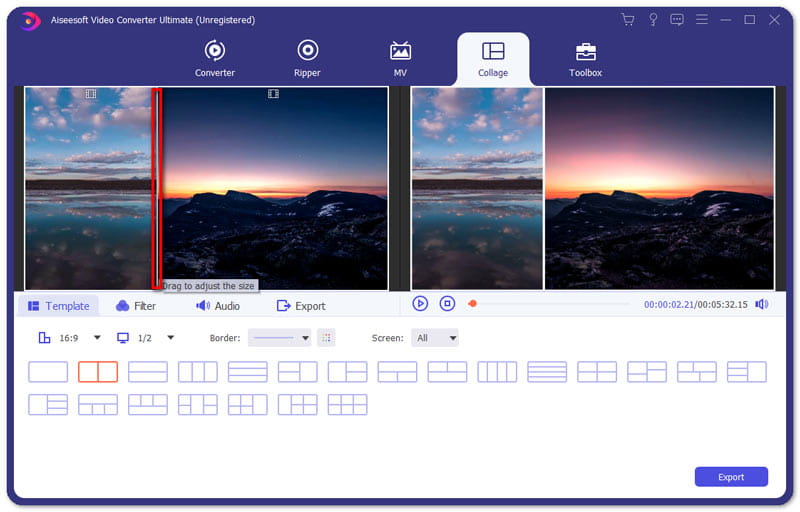
Step 2. Add files
Click + to add the video files you want to position onto the one video screen.
After importing your files, you can resize your videos by dragging the split line.
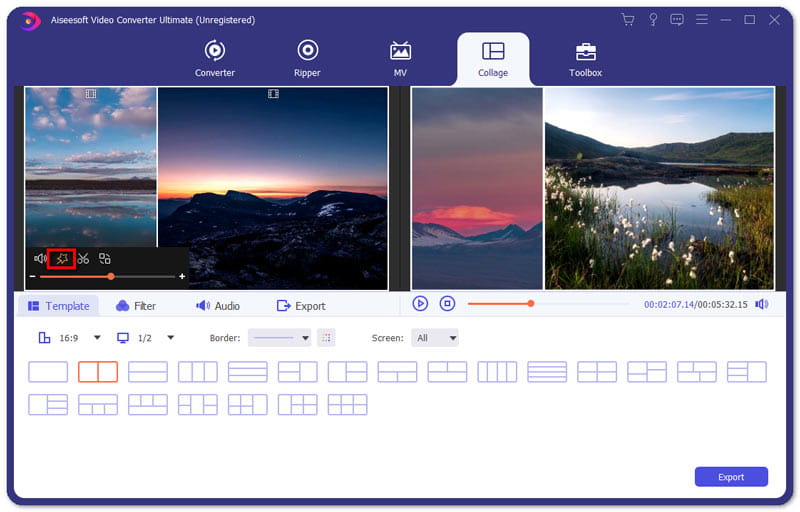
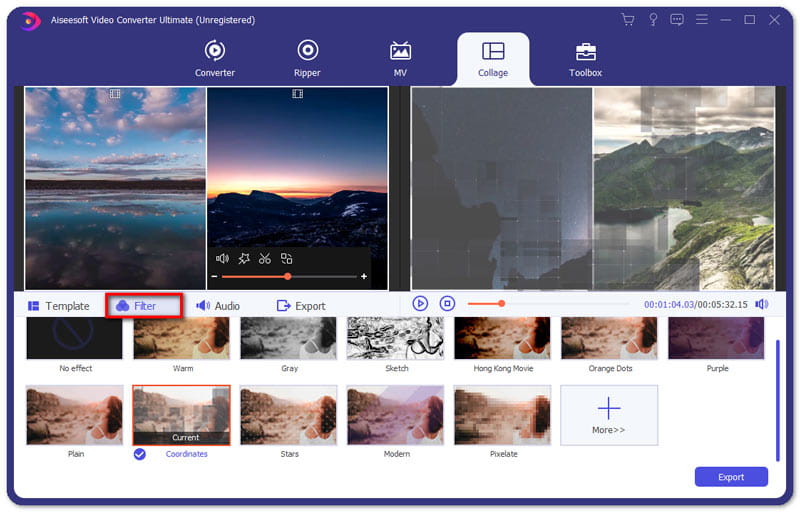
Step 3. Edit and apply filters
This split-screen video editor also allows you to edit your video clip. Select the video clip you want to edit and then click the Edit icon. Then, you can crop, rotate, add watermark, add subtitle, and more.
After editing your video clips, you can select a filter to use based on your video content by going to the Filter tab.
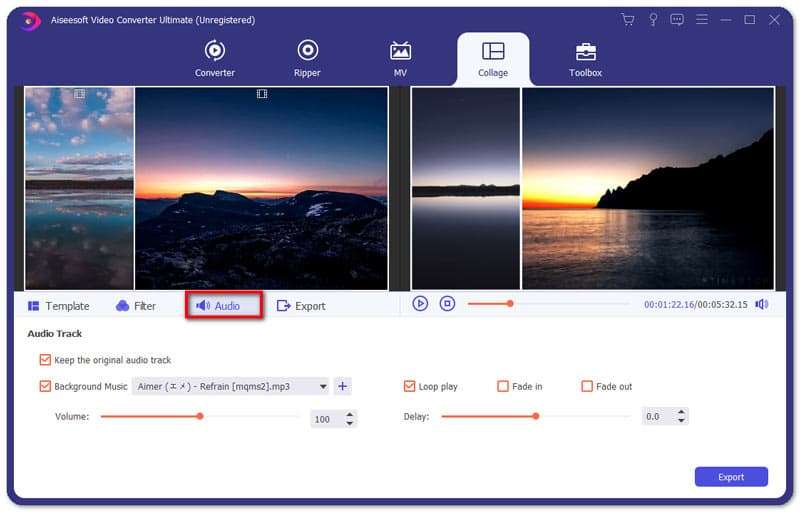
Step 4. Add background music
To keep the original audio in the video, you should enable the Keep original audio option. If you want to add a song as the background music, navigate to the Audio tab. check the box next to Background Music and then choose the song from your computer. It also offers other audio settings to configure, such as loop play, fade in or out, volume, etc.
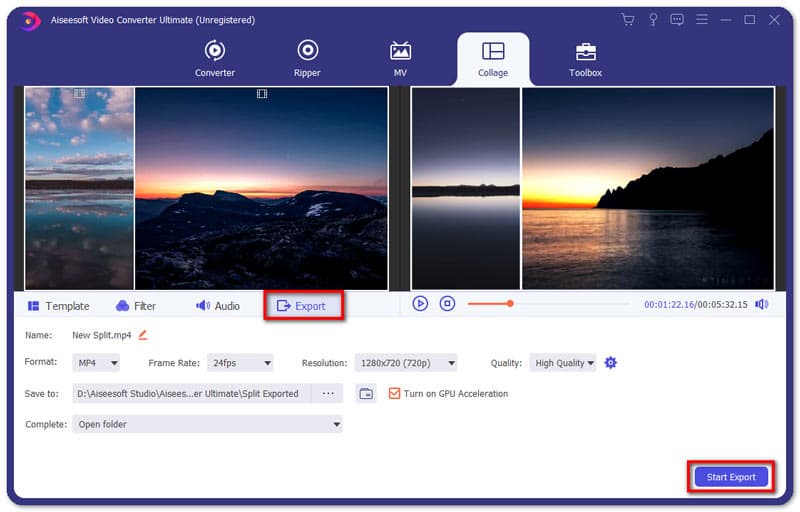
Step 5. Produce and share
Find the Export tab, and then you can change project name, select output format, resolution, destination folder, and turn on hardware acceleration.
When the video is ready, click Start Export to save the split-screen video to your computer. Or you can choose to share it to social media platforms directly.
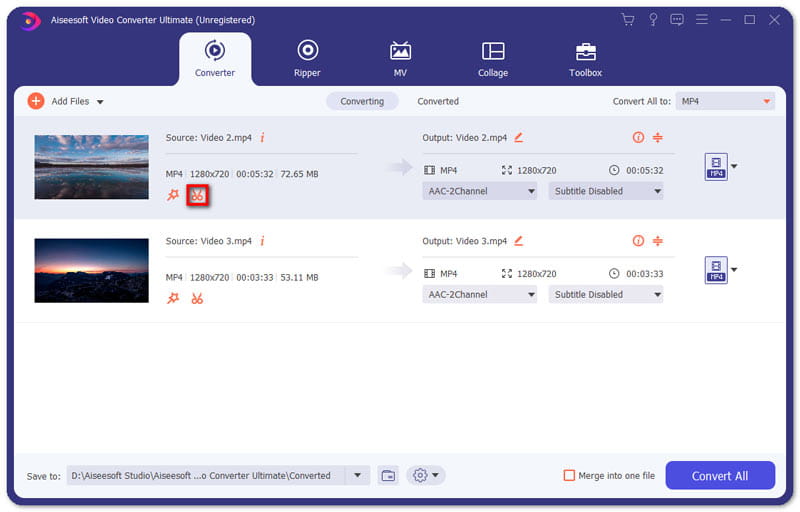
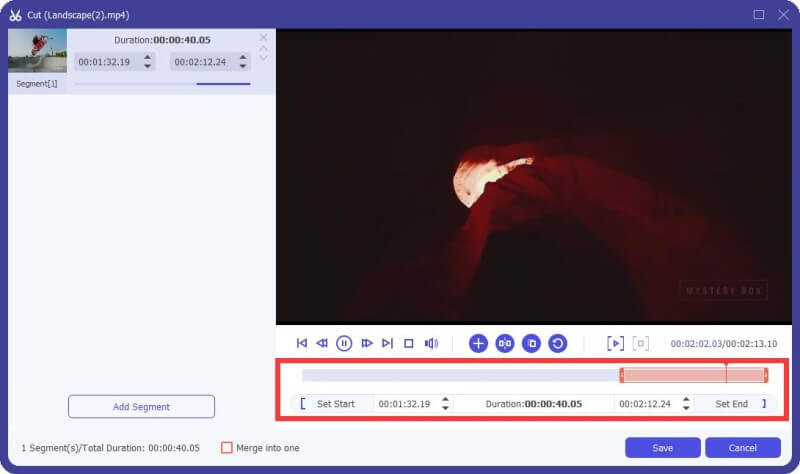
Trim & Split Video
Step 1. Select a video file and click the Cut icon.
Step 2. To cut off unwanted parts, you can drag the clipper on the progress bar or enter the start and end time directly on the bottom Duration bar. The part you chose is what will be left. If you want more segments, click Add Segment and a new clip will be created. Choose another wanted part in the same way.
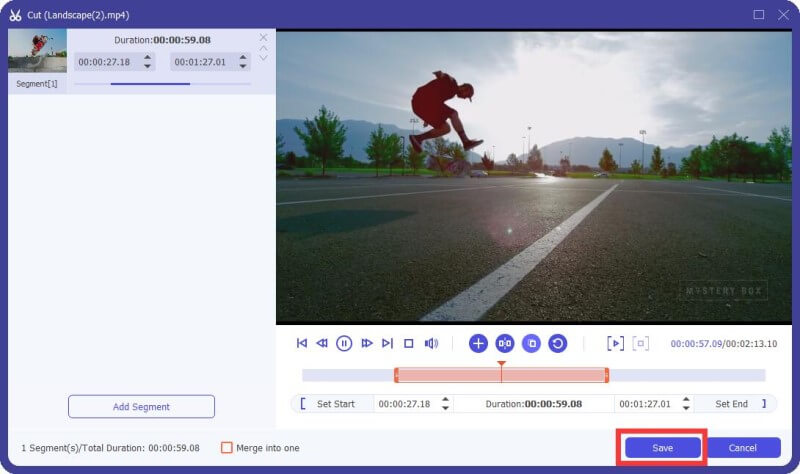
Step 3. After you make all right, you can click Save. If you want to merge them into one, check on Merge into one on the bottom left of the Cut window.
Step 4. Now you are back to the main interface. Preview the video by clicking the thumbnail. If that’s just what you want, Click Convert All. If you still need to modify the video, click the scissor icon again, the segments are still there.
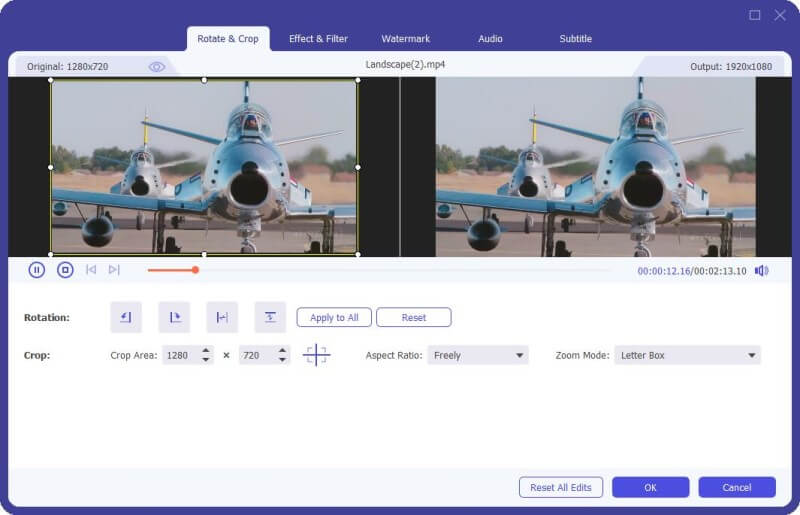
Rotate & Crop Video
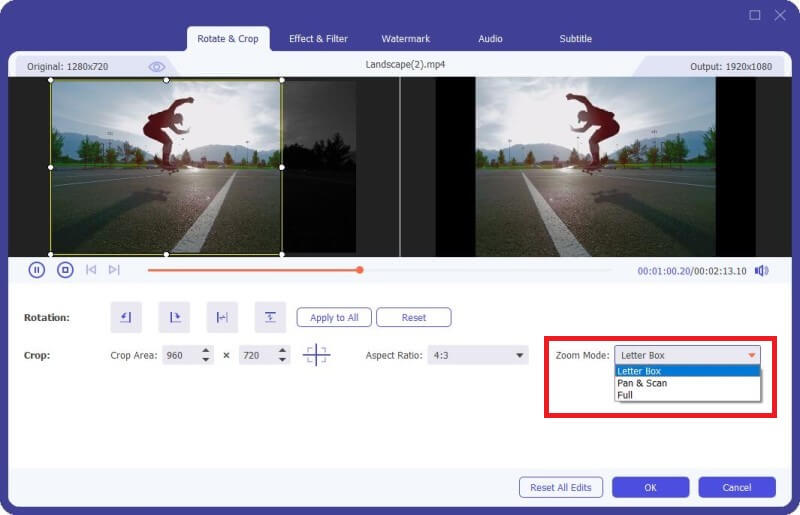
Step 1. Click the Edit icon. Find Rotate & Crop in pop-up window. And you can see other editing features in this window.
Step 2. Here you can flip video vertically and horizontally, rotate 90 degrees, rotate 180 degrees or rotate 270 degrees. Then, you can check the result in the preview.
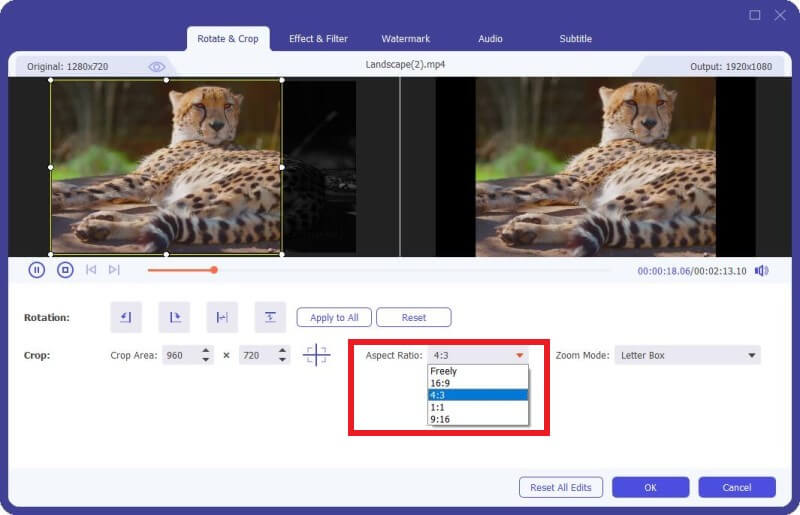
Step 3. Below the Rotate option is the Crop option. there are several types in Aspect Ratio, like 16:9, 4:3, 1:1 and 9:16. It can help you quickly get the size you want.
If you have other size needs, you need to select Freely in Aspect Ratio first, then input number in Crop Area to set the size. Dragging the frame of the left playing screen is also the same. If you want the center screen, click Cross icon after setting the size and it will put the cropped screen in the center.
Besides Ratio, you can also select the right Zoom Mode to get the best effect.
Full Mode: Make the selected screen become the biggest size, which would stretch the screen.
Letter Box: Add black edges up and down.
Pan & Scan: Make the screen size to 16:9. But it would not show left and right edges in 16:9 or up and down in other size.
It is up to your needs.
Step 4. Click the OK button to save the changes.
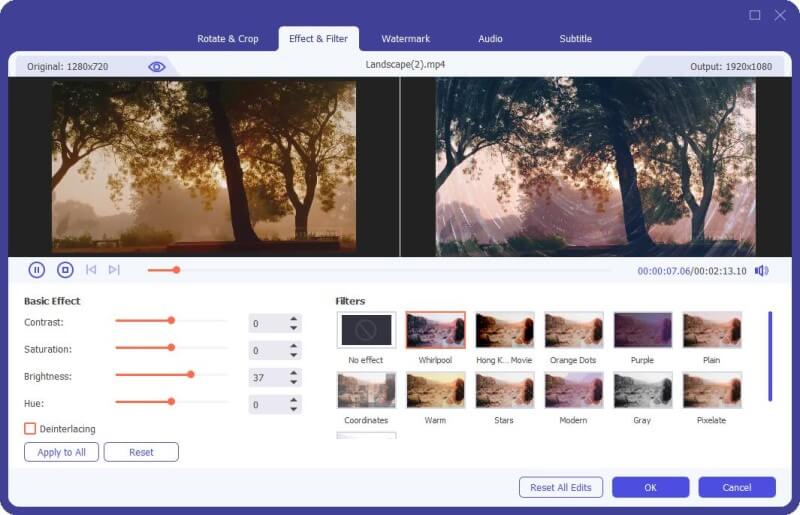
Effect & Filter
Step 1. Find Effect & Filter in the Edit window. You can adjust brightness, contrast, saturation, hue and select deinterlacing as you need. Besides, you can choose a filter to beautify your video.
Step 2. Click the OK button to save the changes.
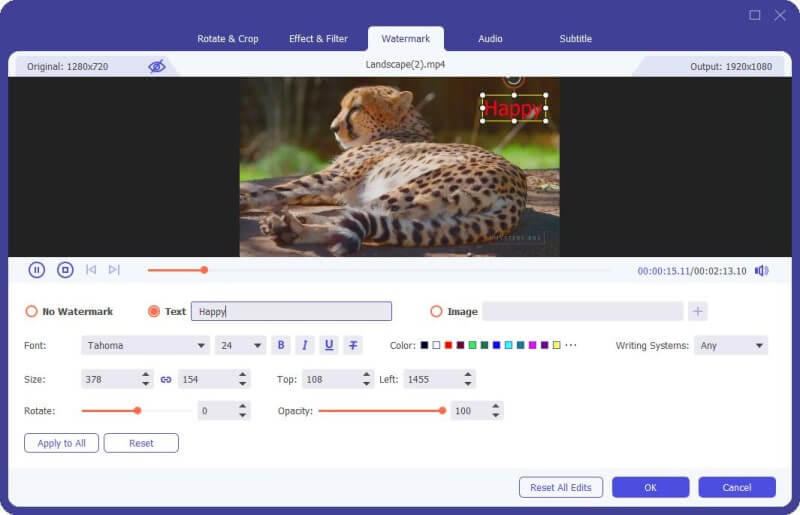
Watermark
Step 1. Find Watermark in the Edit window. If you want to add a text watermark, check Text and enter the text to the blank. You can adjust the text fonts, colors, writing system and size. Then place the text watermark by dragging or setting size.
Furthermore, you also can rotate text and set opacity.
If you want to add an image watermark, check image and click the Add icon to select an image. And then adjust the size and place it on your video. You can also rotate text and set opacity.
Step 2. Click the OK button to save your settings.
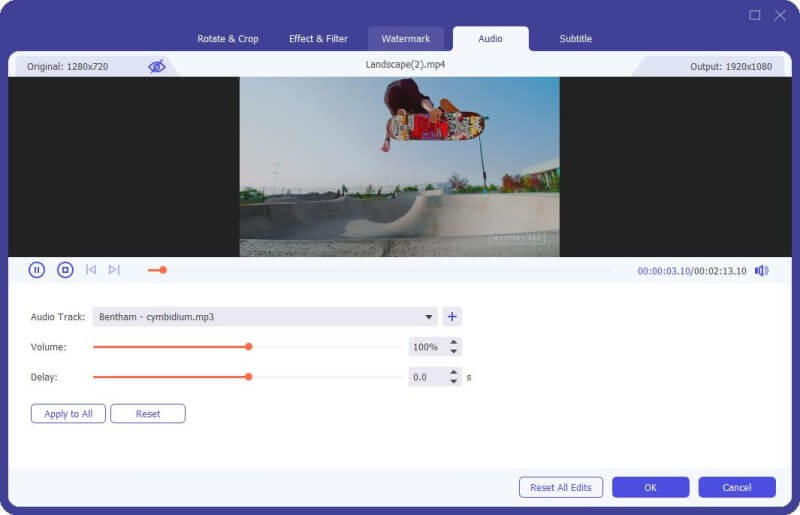
Audio
Step 1. Find Audio in the Edit window. Select the audio track you would like to play. Or click the Plus icon besides the Audio Track bar. You can adjust the audio volume and change the delay time to decide when to play audio track.
Step 2. Click the OK button to save your settings.
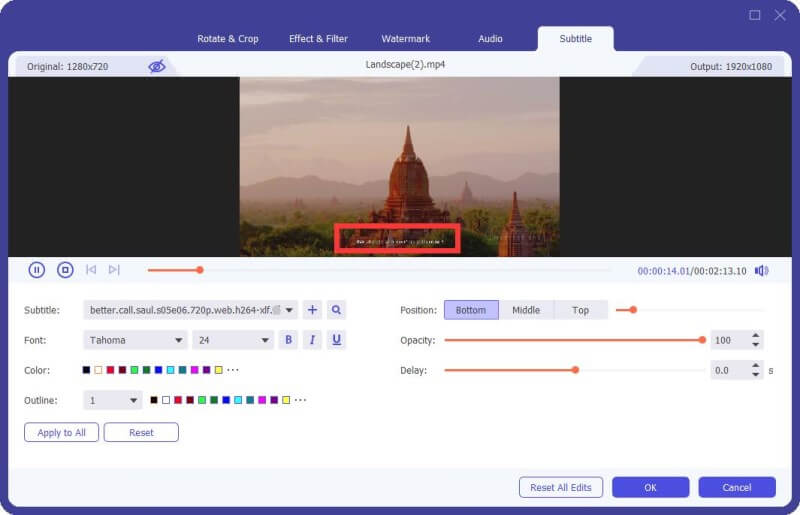
Subtitle
Step 1. Find Subtitle in the Edit window. Click + to import the subtitle file (*.srt; *.ssa; *.ass) from your computer. After that, you can adjust the position, font, color, opacity, delay time and outline.
Step 2. Click OK to save the adjustments.
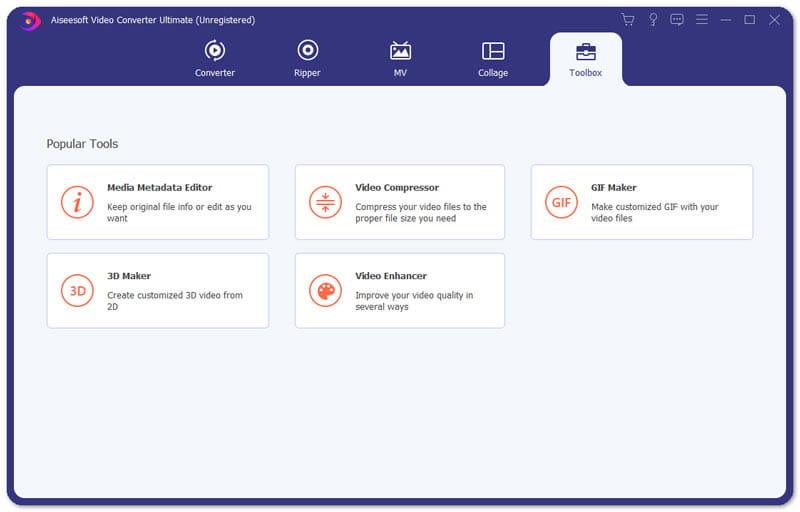
Step 1. Click Toolbox on the top and find Media Metadata Editor. And there are also Video Compressor and GIF Maker.
Step 2. Add a file in supported format, such as MP4, M4A, M4R, M4P, 3G2, M4V, MOV, MP3, WMA, ASF, WMV, and AVI.
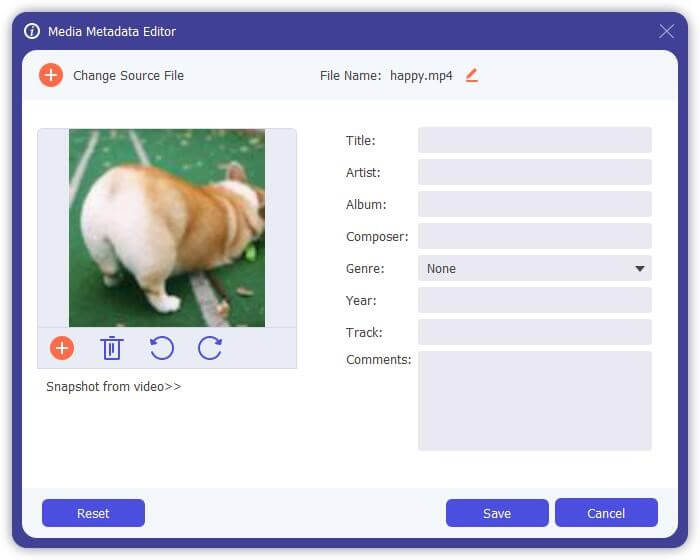
Then you can edit the cover, file name, cover, artist, album, composer, genre, year, track, comments.
Step 3. After editing, click the Save button.
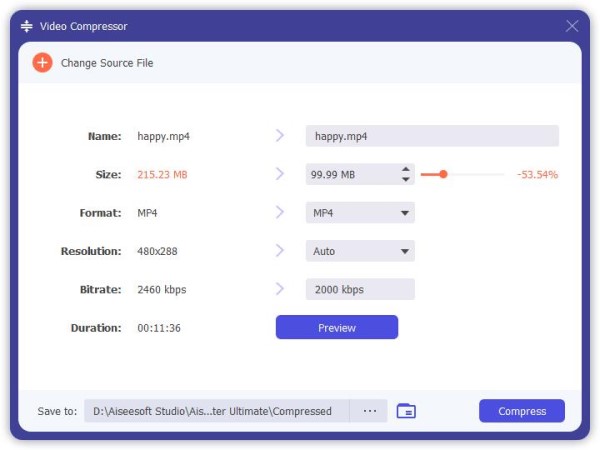
Step 1. Find Video Compressor in Toolbox. Add a video to compress. After adding files, you can change the size, name, format, resolution, bitrate of the target file.
Step 2. Then set the path to save your compressed file, and click the Compress button.
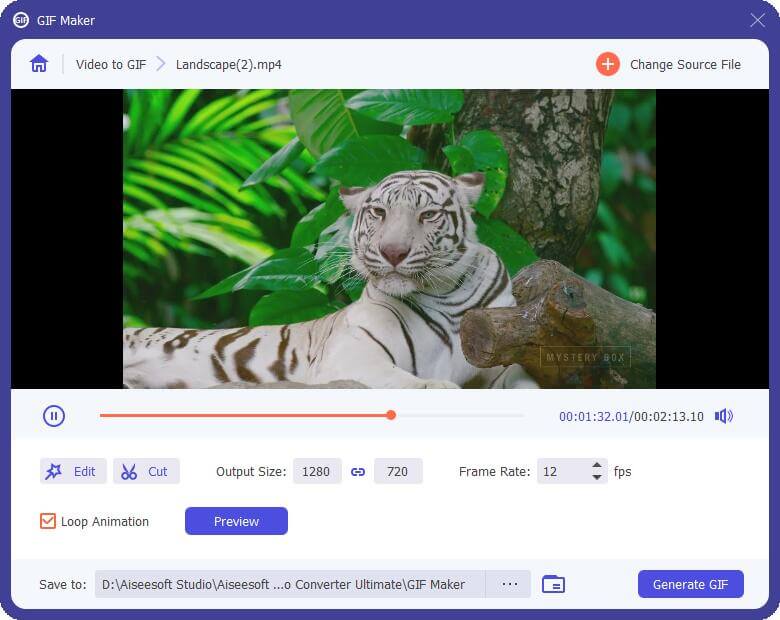
Step 1. Find GIF Maker in Toolbox. Add a video to GIF Maker. As you see, you can edit the video with various features, such as Rotate & Crop, Effect & Filter, Watermark, Audio, and Subtitle.
Or cut the video and save the part you want to make a GIF. And you also can set the output screen size and Frame Rate.
Step 2. Click Generate GIF to create your own GIF.
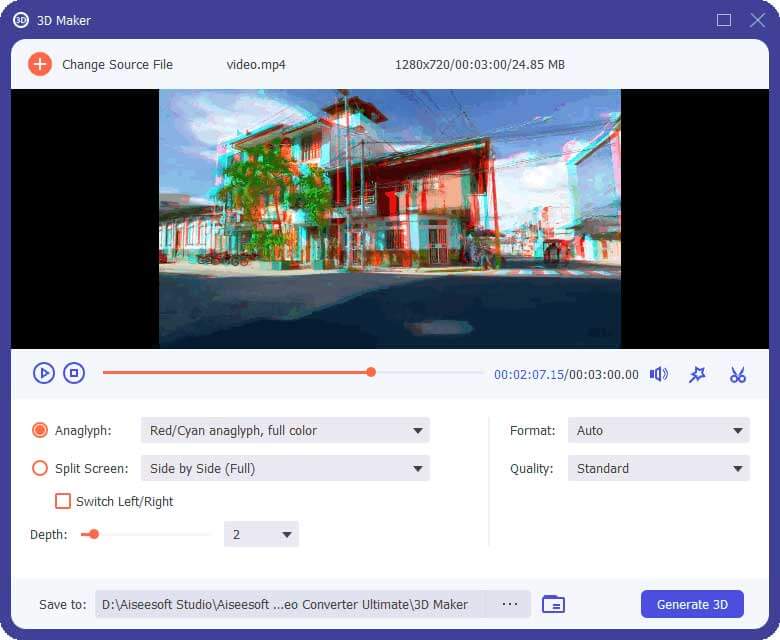
Step 1. Find 3D Maker in Toolbox. Add the video to 3D Maker.
Step 2. It offers various options to make 3D video.
Anaglyph: You can choose one 3D anaglyph effect from Red/Cyan anaglyph, monochrome/half color/full color/quality Dubois; Green/Magenta anaglyph/half color/full color; Amber/Blue anaglyph, monochrome/half color/full color.
Split Screen: Side by Side (Half-Width), Side by Side (Full), Top and Bottom (Half-Height), Top and Bottom (Full)
Depth: You can change the depth of an anaglyph 3D image from 0 to 15.
Switch Left/Right: Use the Switch Left/Right option to change from Left/Right to Right/Left or Right/Left to Left/Right.
Step 3. Click Generate 3D to create your 3D video.
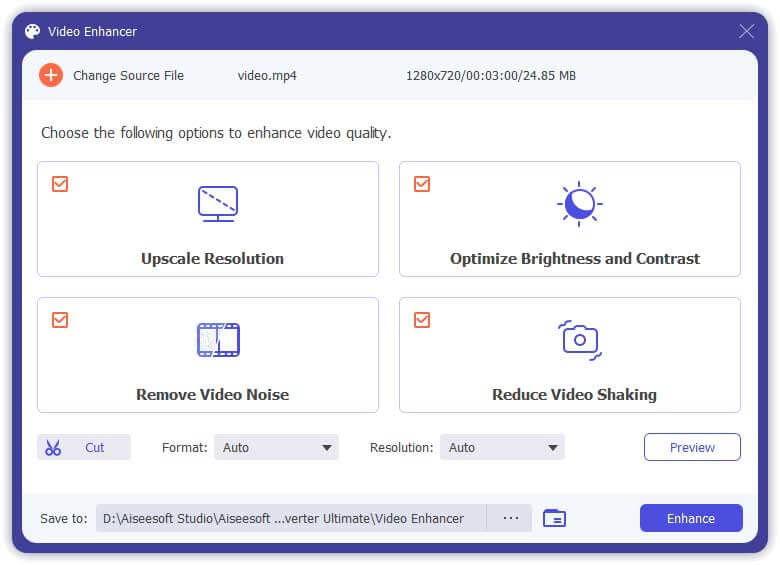
Step 1. Find Video Enhancer in Toolbox. Add the video to Video Enhancer.
Step 2. There are 4 options you can choose to enhance your video file.
Upscale Resolution: With this function, you will get a high-resolution video from a low-resolution video.
Optimize Brightness and Contrast: It will optimize the brightness and contrast automatically to make your video more enjoyable.
Remove Video Noise: This feature can remove dirt-like video noise from your video.
Reduce Video Shaking: It can stabilize your shaky video footage to make it more smoother and more watchable.
Step 3. Click Enhance button to enhance your video.
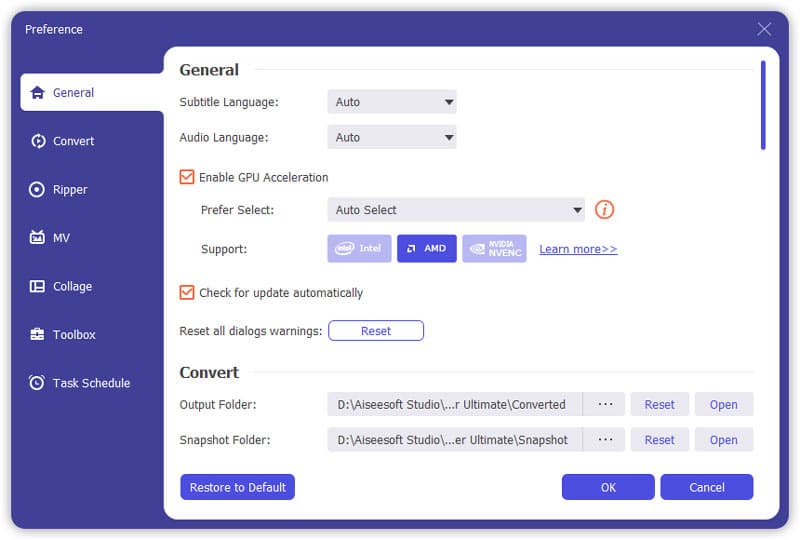
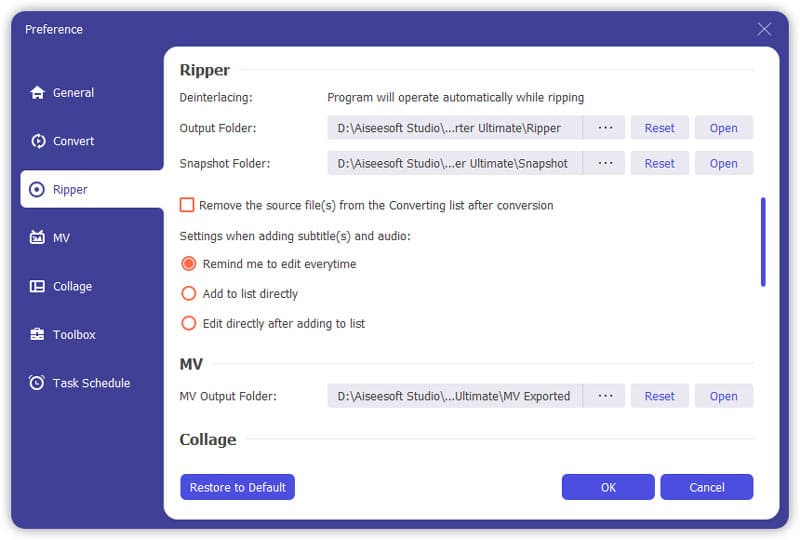
When you are using converter function or ripper function, you can click the Gear icon on the bottom on the interface. This is the button of Preferences.
There are five options in it.
1. General
In General option, you can set Subtitle Language, Audio Language, GPU Acceleration and Update settings.
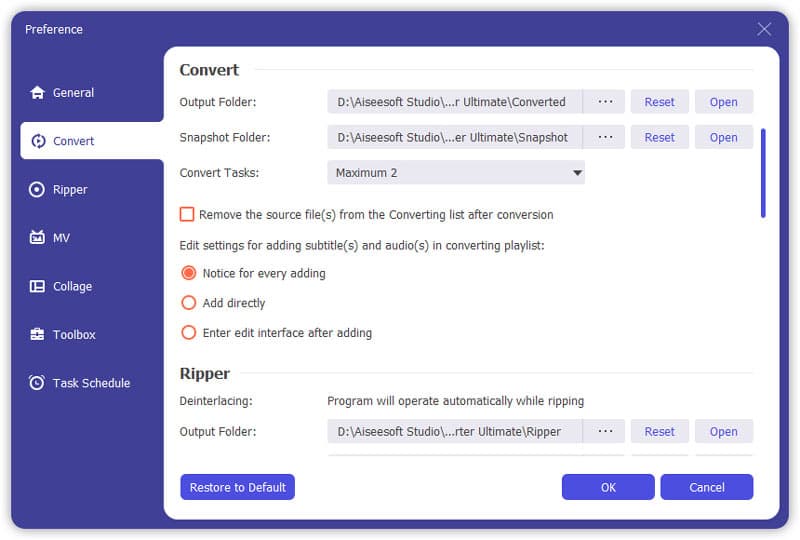
2. Convert
In Convert option, you can set output folder, snapshot folder, convert tasks, etc.
3. Ripper
In Ripper option, you can set output folder, snapshot folder, convert tasks, etc.
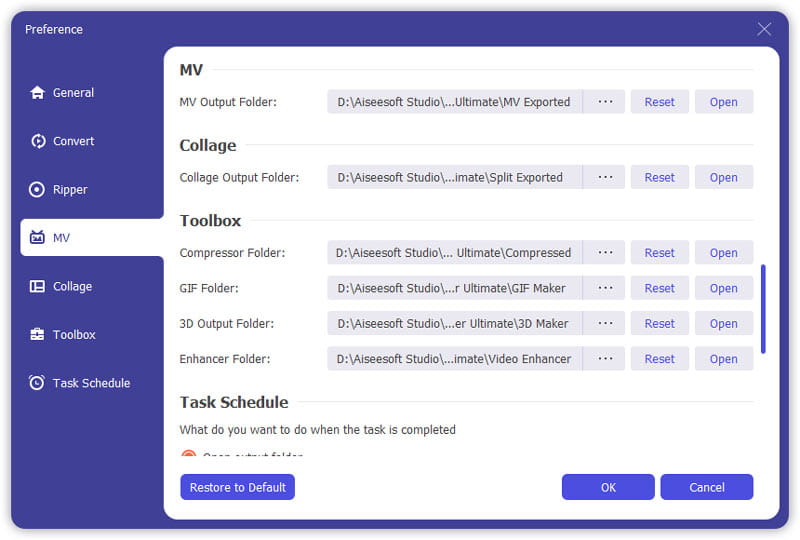
4. MV
In MV option, you can change the MV output folder.
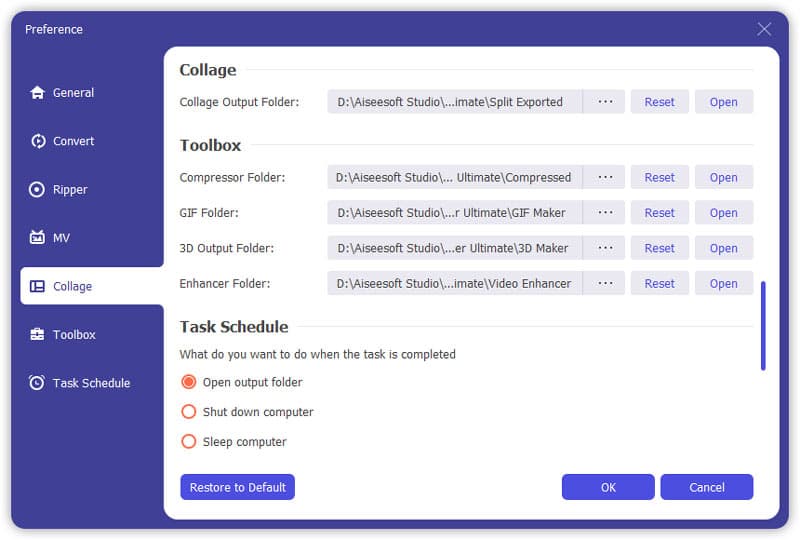
5. Collage
In Collage option, the Collage output folder can be reset.
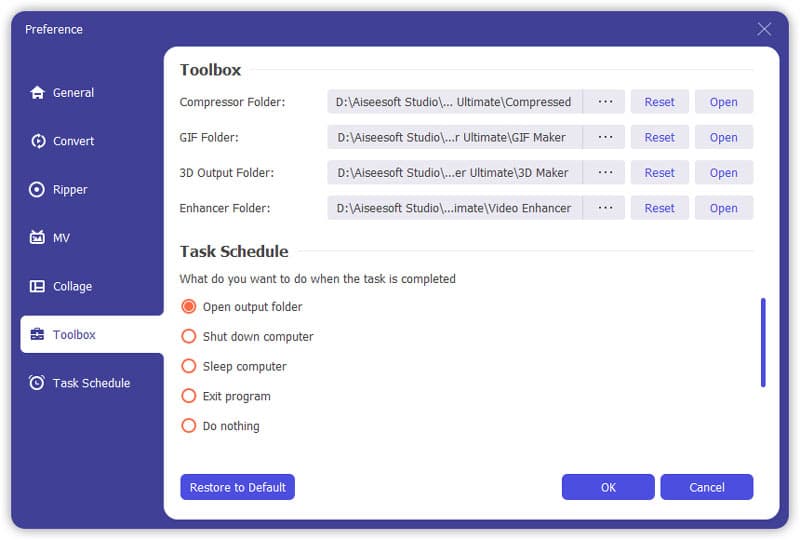
6. Toolbox
In Toolbox option, you can set the saving path for compressed files and GIF files.
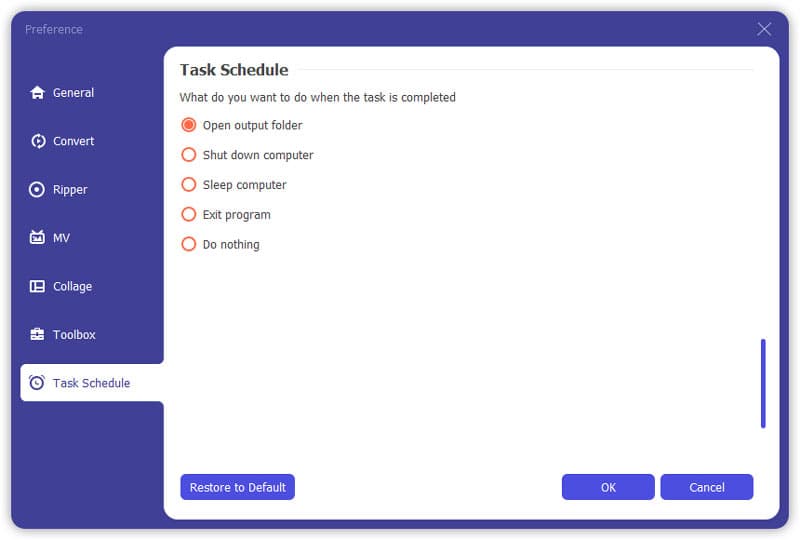
7. Task Schedule
In Task Schedule option, you can choose the action when the task is completed.

 Home >
 Products
 Price:$39.20


 Key Features
 How to use Video Converter Ultimate
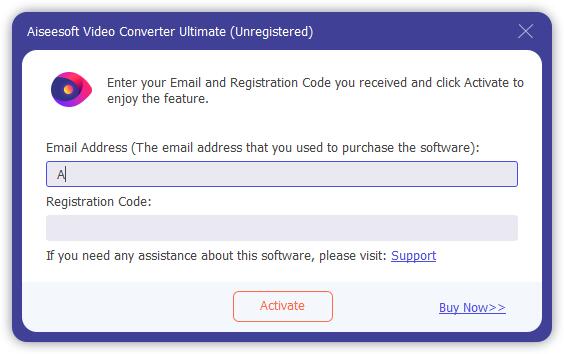


 Related Articles

 Retail Price: $
 Buy Now
 Download


 Copyright © 2012 Z0DOWNLOAD.COM. All rights reserved.