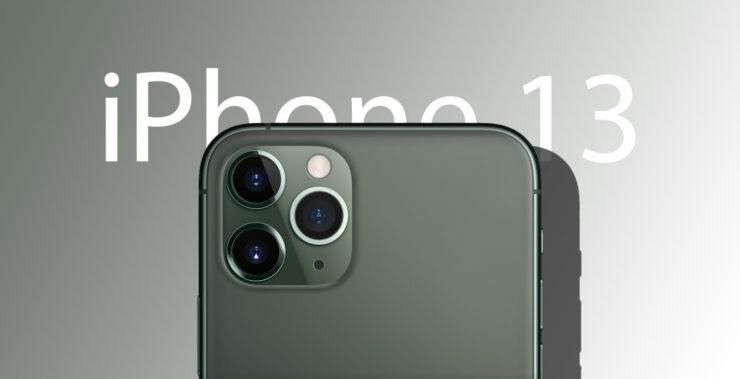
"I replaced my iPhone XR because I think it can't keep up with the times! I now use the iPhone 13, but it's smooth! But in addition to being happy, I have another worry: that is, there are many important contacts stored in my old iPhone XR. I really want to transfer contacts to iPhone 13 at one time in the most time-saving way. Can you help me? "
Obviously, contacts are an important intermediary for us to communicate with customers, friends and family. Many times, our friendship and business rely on contacts for communication. Therefore, many times after we change the iPhone, our first thought is to transfer our contacts to the new iPhone 13. In this article, I will provide you with the easiest and time-saving way to transfer contacts to iPhone 13.
The Best Way to Sync Contacts between iPhones
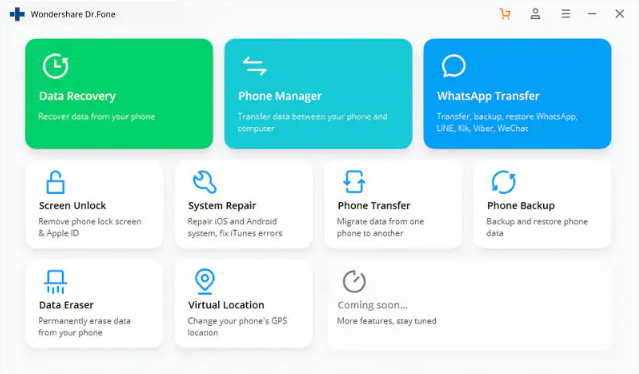
To transfer contacts between iPhones, I strongly recommend that you use iOS Data Switch. This is a very excellent and professional data transfer tool. With it, you can transfer contacts from IOS to another IOS in the most time-saving and efficient way. In addition to contacts, it can also transfer photos, videos, music, WhatsApp message, app data, message and other data between IOS and IOS, and between IOS and Android. It applies to all iPhones, including the latest iPhone 13. If you need, you can download the trial version.
Next, let's check how to use dr.fone - Switch in detailed steps.
Step 1. Connect your device to the computer
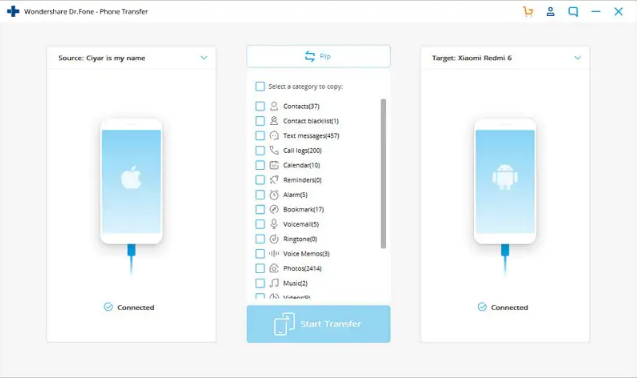
Open Dr.Fone on your computer, and select "Phone Transfer" among the modules.
Then get both of your devices connected. Here let's take an iOS and an Android device as an example.
The data will be transferred from the source device to the destination one. You can use the "Flip" button to exchange their position.
Step 2. Choose the file and start to transfer
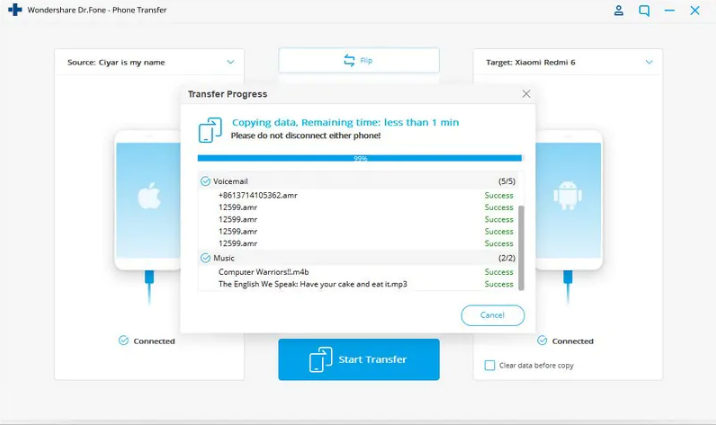
Select the file types you would like to transfer. Then click on Start Transfer to begin the process. For efficiency, don’t disconnect the devices until the process is complete.
You can check the "Clear Data before Copy" box if you want to erase data on the destination phone before transferring the data to the target phone.
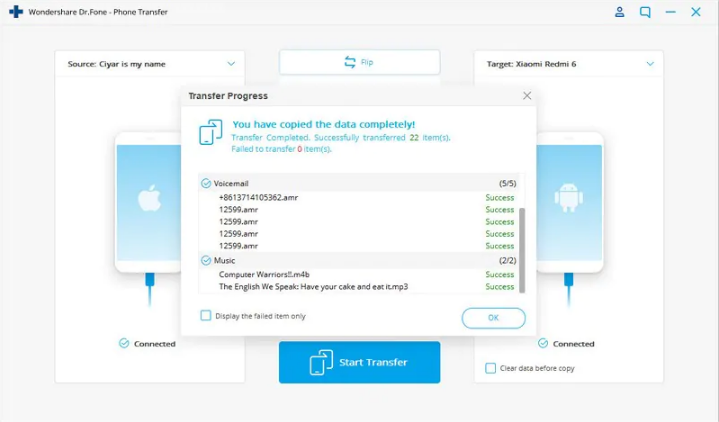
Within a few minutes, all selected files will be transferred to the target phone successfully.
Want to transfer iPhone data to Android but have no computer? Just relax! Dr.Fone - Phone Transfer also provides an Android app to help transfer data from iPhone to Android (including Huawei, Samsung, Xiaomi, etc.) in the following ways:
◆ Log in to the iCloud account on Android to download data.
◆ Use an iOS-to-Android adapter to connect iPhone to Android for direct data transfer.
Now here we shall explore how to transfer data from iPhone to Android in detail. First of all, download the Android version of Dr.Fone - Phone Transfer from Google Play.
How to sync data from the iCloud account to Android
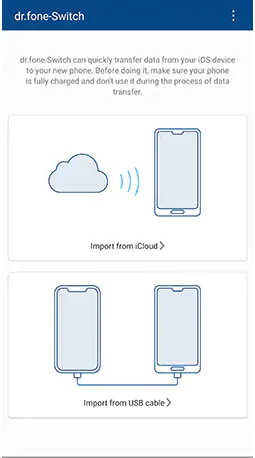
Step 1. After installing the Android version of Dr.Fone - Phone Transfer, touch "Import from iCloud".
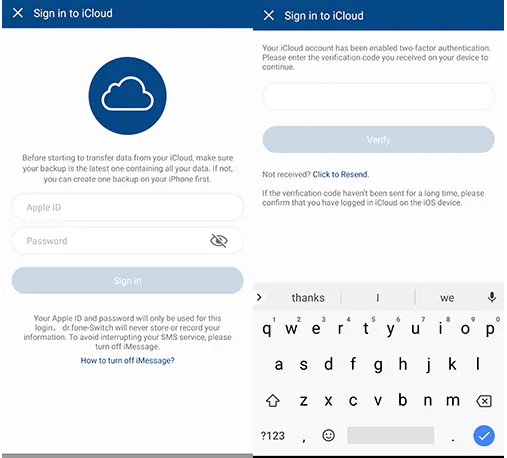
Step 2. Log in to the iCloud account with your Apple ID and passcode. Enter the verification code if you have enabled the two-factor authentication.
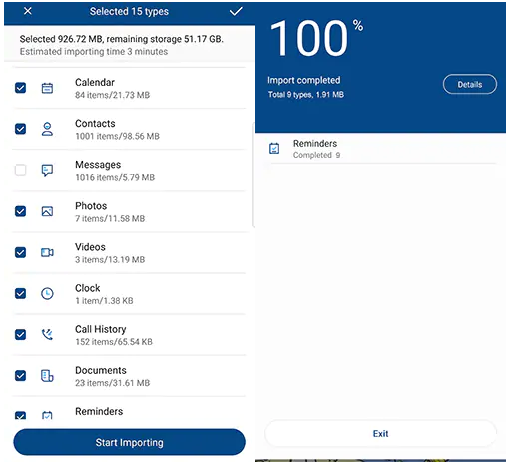
Step 3. A while later, all types of data can be detected from your iCloud account. Select some or all of these types, and touch "Start Importing".
Step 4. Sit back and wait until data importing is complete. Then you can exit this app and check the data synced from iCloud on your Android phone or tablet.
How to transfer data from iPhone to Android directly
Step 1. Open the Android version of Dr.Fone - Phone Transfer, and touch "Import from USB cable". Then use an iOS-to-Android adapter to connect your iPhone to Android.
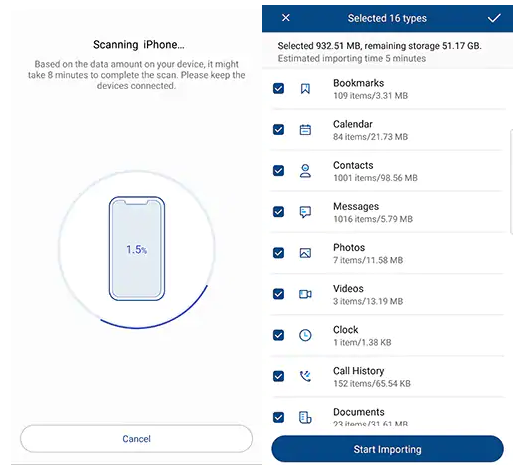
Step 2. Dr.Fone - Phone Transfer now starts scanning the data on your iPhone. The actual scanning time depends on the amount of data stored on your iPhone.
Step 3. After all the data are detected, select some of all of the data types and touch "Start Importing".

 Home >


 Copyright © 2012 Z0DOWNLOAD.COM. All rights reserved.