
 Home >


Do you plan to selling your old iPhone and purchase an new bigger, faster, and thinner iPhone/iPad (like the iPhone 12 or iPhone 11, iPad Pro or iPad mini)? Before taking a gander at our tips for reselling, look at this check list to make sure you've deleted all important data from your iPhone. Don't leave anything behind!
Connect your iPhone to your computer and open your phone using the file viewer. Copy your photos and videos to your computer. Then, manually shred files using your computer's file shredding program.
If you still have your iOS device
Before you sell or give away your device, you should remove your personal information. You shouldn't manually delete your contacts, calendars, reminders, documents, photo streams, or any other iCloud data while you're signed in to iCloud with your Apple ID. This would delete your content from the iCloud servers and any of your devices signed in to iCloud.
Follow these steps:
1.If you paired an Apple Watch with your iPhone, unpair your Apple Watch.
2.Back up your iPhone Data.
3.Tap Settings > iCloud. Scroll down and tap Sign Out. In iOS 7 or earlier, tap Delete Account.
4.Tap Sign Out again, then tap Delete from My iPhone and enter your password.
5.Go back to Settings and tap General > Reset > Erase All Content and Settings. If you turned on Find My iPhone, you might need to enter your Apple ID and password.
6.If asked for your device passcode or Restrictions passcode, enter it. Then tap Erase [device].
7.Contact your carrier for help transferring service to a new owner. If you aren't using a SIM card with your device, you can contact them to get help transferring service to the new owner.
If you no longer have your iOS device
If the steps above weren't completed and you no longer have your device, use these steps:
1.Ask the new owner to erase all content and settings using the above steps.
2.If you're using iCloud and Find My iPhone on the device, sign in to icloud.com/find, select the device, and click Erase. After the device has been erased, click Remove from Account.
3.If you can't follow either of the above steps, change your Apple ID password. This won't remove personal information that's stored on your old device, but it will prevent the new owner from deleting your information from iCloud.
4.If you're switching to a non-Apple phone, deregister iMessage.
5.If you're using Apple Pay, you can remove your credit or debit cards at iCloud.com. Choose Settings to see which devices are using Apple Pay, then click the device. Next to Apple Pay, click Remove.
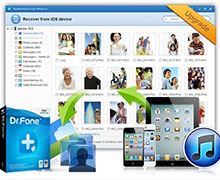
Here,we recommend you use this iPhone iPad Data Transfer or Phone Transfer to backup everyting from ios devices to computer,including contacts,text messages, photos, videos, call logs, music and more.
Use these steps to remove your personal information from a device, even if you want to give away your old ios devices.Another important tip! If your phone accidentally runs out of battery during the "restore to factory settings" step, use iTunes to erase data. Connect the device to your computer, then restore the backup. Connect your phone to power, go to Settings app > General > Reset > Erase All Content and Settings again.
Disadvantage: However, if you erase iPhone data by "restore to factory settings",some data recovery software can restored them easily. If you really cared about your person information from being leaked, you should make sure that there is no chance to restore such content when you selling or handling the device to someone else. It is highly recommend to use the following method I am gonna to mention in the next section, as the data will be deleted permanently even the military forces can’t get them back.
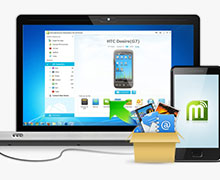
Step 1. Connect Your old iPhone to PC and Launch the iPhone Data Eraser
Once running the Dr.Fone on your computer and you'll see all features inside as following. Select "Data Eraser" among all the functions.
.jpg)
Next, let's check how to use Dr.Fone - Data Eraser (iOS) to erase all data on the iPhone in steps.
Step 2. Connect your device to the computer
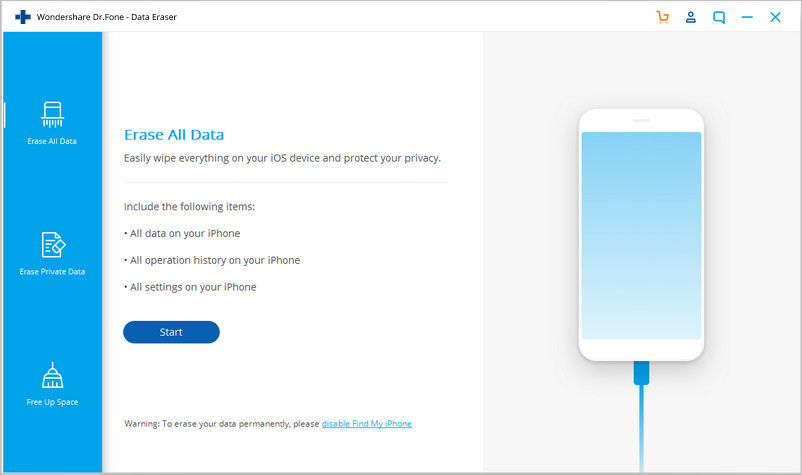
Connect your iPhone or iPad to the computer using a lightning cable. Once it recognizes your device, it displays 3 options for you. Choose Erase All Data to start the data erasing process.
Step 3. Start erasing your iPhone completely and permanently
When the program detects your iPhone or iPad, you can select a security level to erase iOS data. The higher the security level, the lower possibility your data can be recovered. Meanwhile, a higher security level takes a long time to erase.
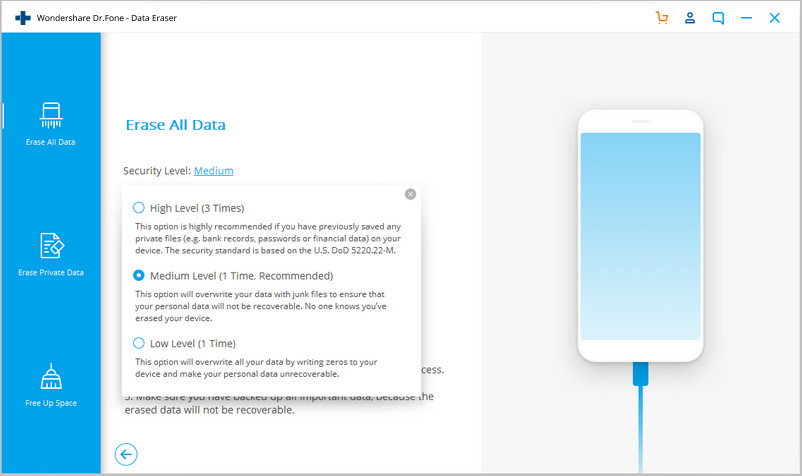
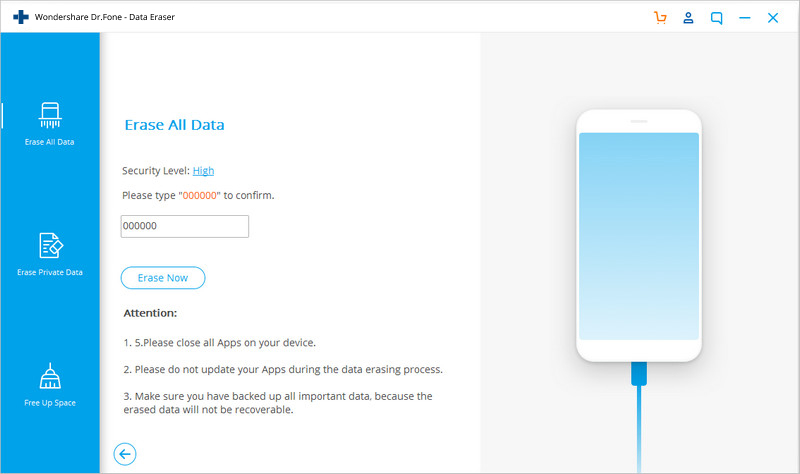
Since the erased data can't be recovered, you need to be careful and enter "000000" to confirm your operation when you are ready.
Step 4. Wait until the data erasure is complete
Once the erasure begins, you don't need to do anything, but wait for the end of the process, and keep that your device is connected during the whole process.
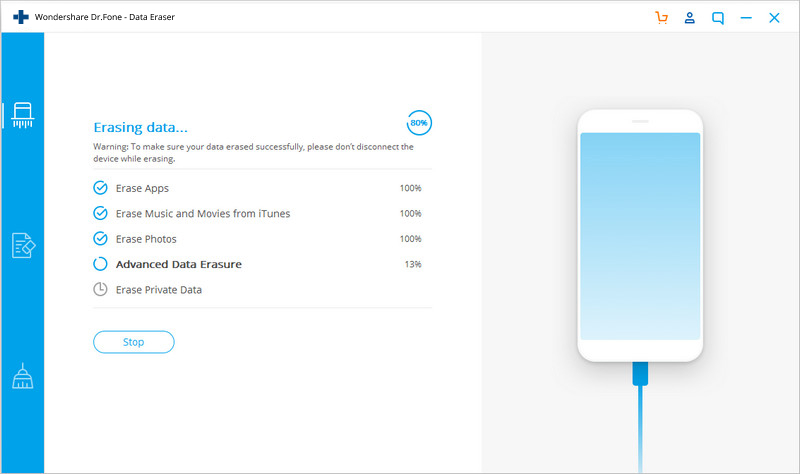
The program requires you to confirm the rebooting of your iPhone or iPad. Click "OK" to continue.
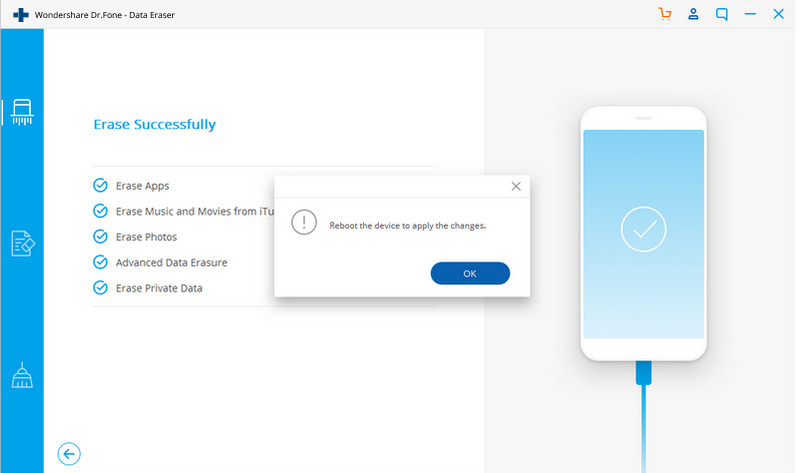
When the data erasure is complete, you will see a window appearing as follows.
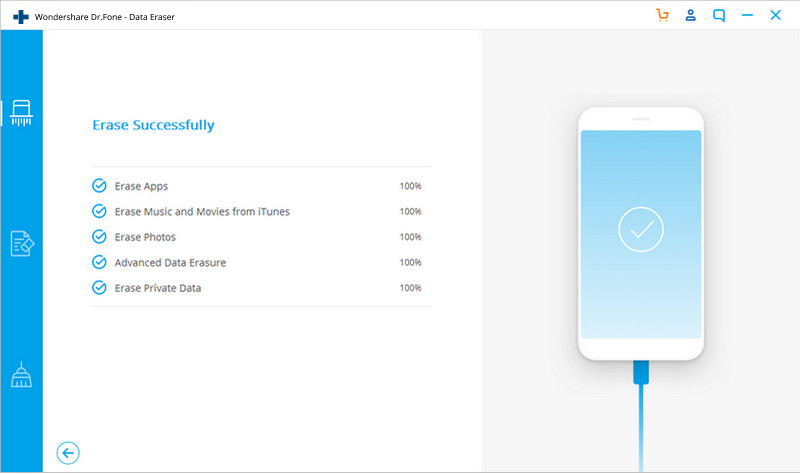
Now, your iPhone/iPad is fully erased and turns into a new device with no content, and you can begin to set it according to your need.


3. Turn iMessage off. Open the Settings app > Messages > iMessage > switch to off.
4. Turn FaceTime off. Open the Settings app > FaceTime > switch to off.
5. Disable your iCloud account. Open the Settings app > iCloud > tap "Delete Account" to delete the account from the device.
6. Log out of Apple ID. Open the Settings app > iTunes & App Stores > tap Apple ID and sign out.
7. Restore to factory settings. Open the Settings app > General > Reset > Erase All Content and Settings.
8. Unregister your device at supportprofile.apple.com.
9. Call your carrier and ask them to disassociate the device from your account. Some important numbers: Sprint: 1-800-SPRINT1; AT&T: 1-800-331-0500; Verizon: 1-800-VERIZON; T-Mobile: 1-800-T-MOBILE.
When you tap Erase All Content and Settings, it completely erases your device, including any credit or debit cards you added for Apple Pay and any photos, contacts, music, or apps. It will also turn off iCloud, iMessage, FaceTime, Game Center, and other services. Your content won't be deleted from iCloud when you erase your device.


 Copyright © 2012 Z0DOWNLOAD.COM. All rights reserved.