
 Home >


Forgot My iPhone Passcode and Left Them Locked. Need Help!
"I set the password on my iPhone X. Unfortunately, I forgot the password and entered the wrong password to my iPhone X for several times. Now the iPhone is disabled! Is it possible to get data out of the locked iPhone X device? Thank you in advance!"
"Please help! I forgot my iPhone 8 passcode and entered the wrong password multiple times. Now iPhone is locked. How can I access data from my locked iPhone 8? What can I do?"
Have you ever come across the same problem? Wrong passcode may lock an iPhone device after 6 times in a row and then the iOS device may become disabled. The ways to unblock a password locked iPhone, iPad Pro/Air/Mini, besides from entering the code, is to restore it to its factory settings. But if you proceed further with Restore Factory Settings then it will erase every data and settings on locked iPhone/iPad devices.
When you fail to access iPhone data and forget passocde, don’t be panic. In this article, we will show you 4 ways to recover locked iPhone data selectively.
| Part 1. Recover Data on a Locked iPhone via iTunes/iCloud Part 2. Selectively Recover Data from Locked iPhone via software Part 3. Backup and Restore Locked iPhone Data on the Computer |
You can also just as easily erase and then recover the data on your locked iPhone via either iTunes or iCloud if you had backed up your data on iTunes/iCloud.
Take iTunes as an example, if you have sync your iPhone with iTunes before and haven't restart your device after you connected to iTunes in the last time, then iTunes will remember the password. So you can backup locked iPhone with iTunes and then restore the backed up data to your iPhone 7/7 Plus, iPhone 6S/6S Plus, iPhone 6/6 Plus, iPhone 5S/5C/5, iPhone 4S/4, iPad and more iOS devices.
Step 1: Connect your iPhone device to the computer / Mac, and then launch iTunes.
Step 2: Tap on the "summary" on the left side of the window, and then click "Back Up Now" to start the backup process.
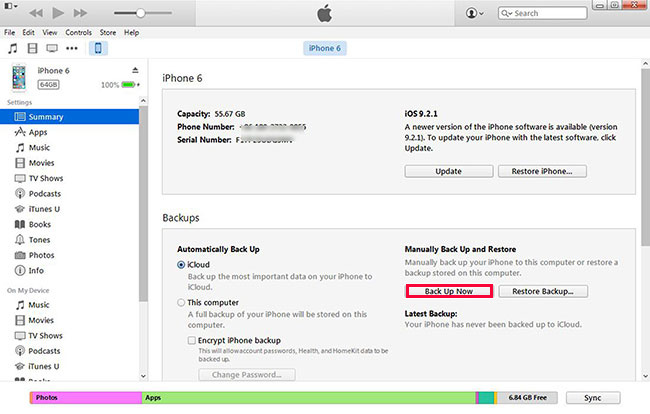
Step 3: Once completed, you can find your iPhone backup location and check your backup files.
Step 4: Click “Restore iPhone” after backing up iPhone data.
Follow the instructions until you enter the settings screen, and then click "Restore from iTunes Backup". Select the device in iTunes, and then select the latest backup to restore the device.
However, there are many iOS users who haven't sync their device with iTunes or they have restarted the locked iPhone after the last connection with iTunes, then it is impossible for iTunes to backup data on locked iPhone. Then what should we do? Let's check the next part.
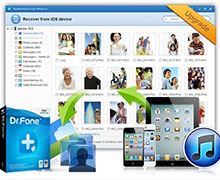
It’s highly recommended for you to don’t rush to erase your iPhone before getting important personal data out. You can extract data from locked iPhone/iPad for backup, what you need is an iOS data recovery tool. Here we recommend you this iPhone Data Recovery. This powerful application allows you to get access to locked iPhone 11/XS/XR/X/8/7/6s (Plus)/6 (Plus)/5S/5C/5/4S or iPad Pro, iPad mini 4/3, iPad air 2, etc. The program can access your iTunes backup to extract data, including contacts, messages, photos, call history, videos, notes, WhatsApp, etc. due to passcode forgotten or lock screen broken.
.png)
.png)
1 Launch Program
First of all, you should download and install the program on your computer. And then Launch it. Both PC and Mac versions are available.
2 Scan Data
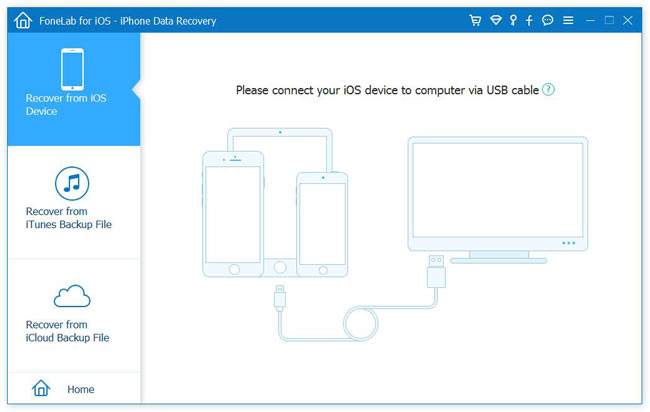
There are three recovery modes:
◆ For Recover from iOS Device mode, connect you device to computer via USB cable, and then click Start Scan.
◆ For Recover from iTunes Backup File mode, select an iTunes backup file from the backup list, and then click Start Scan.
◆ For Recover from iCloud Backup File mode, log in iCloud with your Apple ID and password, and then select an iCloud backup file from the backup list to scan.
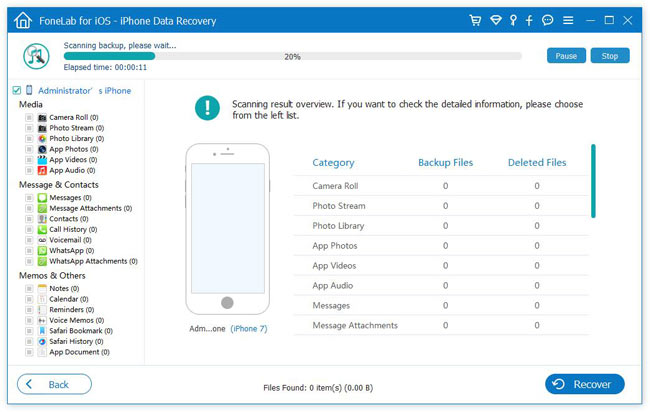
3 Select Data
Click the file type in the left panel to preview the details, and then check the boxes of the data which you want to recover.
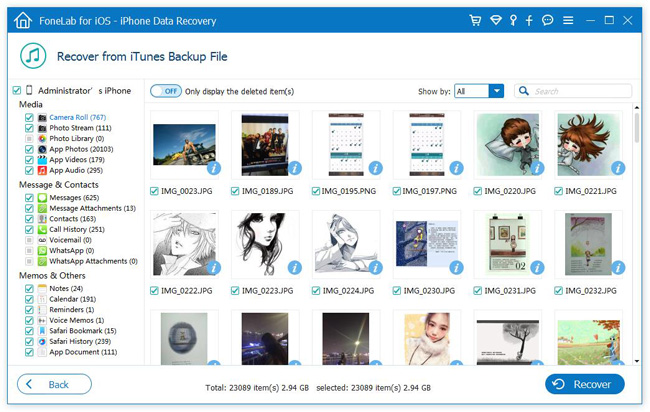
4 Recover Data
Click the blue Recover button in the bottom right corner. The retrieved data will be saved to your computer.
.jpg)
Free download the iOS Data Recovery:
Through the introduction above, we already know how to retrieve the locked iPhone data through iTunes synchronization or iCloud backup. But what if I haven't done both of these before? In this section, we will show you a powerful tool - iOS Data Backup&Recovery, which can directly backup locked iPhone data to PC and Mac computer, and then restore back to the device or another iPhone iPad from the backups.
The tool supports to extract or backup iPhone videos, call history, notes, messages, contacts, photos, iMessages, Facebook messages and many other data.


Step 1. Connect iOS Device to Computer
After launching Dr.Fone on your computer, select Phone Backup option from the tool list. Then use the Lightning cable to connect your iPhone, iPad or iPod touch to computer. By default, Dr.Fone will automatically detect your iOS device.
.jpg)
For iOS devices, Dr.Fone supports to backup most data types, including privacy data, social App data, such as WhatsApp, LINE, Viber, Kik data, etc. In this case, we select Device Data Backup & Restore.
.jpg)
Step 2. Select File Types to Backup
After your select Device Data Backup & Restore, Dr.Fone will detect the file types on your device automatically and you can select what file types to backup. Then click on "Backup".
.jpg)
You can also click on the folder icon below the file types to customize the backup file saving path.
The whole backup process will take a few minutes, depending on the data storage on your device. Then Dr.Fone will display all the supported data, like Photos & Videos, Messages & Call Logs, Contacts, Memos and other data.
.jpg)
Step 3. View What's Backed Up
When the backup is completed, you can click View Backup History to view all iOS device backup history. Click on View next to it to check the contents of the backup file in categories. You can choose one single file or mulptiple files to print them or export them to your computer.
.jpg)
It not only offers a solution to restore data from an locked iPhone without iTunes, but also can fix various iOS stuck problems such as stuck at white apple screen, black screen, screen unresponsive, reboot loop after iOS update without causing data loss. Don’t miss: Fixed: iPhone Stuck on Black Screen.
Related Articles:
How to Transfer iPhone Contacts to Android
3 Ways to Recover Lost iPhone Data
How to Recover Deleted Photos From iPhone Easily
Four Ways to Backup and Restore Data on iPhone
How to Manage Your iPhone 7/6S/6 on PC/Mac


 Copyright © 2012 Z0DOWNLOAD.COM. All rights reserved.