
 Home >


Summary: iPhone 8/7/6S contacts disappeared after update to iOS 14? Contacts disappeared from iPhone 8/7/6S after restoring to factory setting? Missing contacts on iPhone after jailbreaking? Deleted contacts on iPhone 7 by accidentlly?You can recover lost or deleted contacts on iPhone 8/7/6S with the below tutorial.
Among so many reason,you may lost iPhone contacts due to iOS 14/13 upgrade, jailbreaking or factory setting reset,contacts data disappear does not caused by one reason. It’s a complicated process and no one can tell clearly. And sometimes, you just delete your iPhone contacts by mistake.It may be mad of you when you find all your iPhone contacts get lost,that's really a nightmare for everyone.You can’t contact with others then you are bound to full of grief.Without you iPhone contacts, you have difficulties in both you work and your life.Don't worry,this article teach you three easy ways get lost contact back on your new iOS 14 device with the help of a third party program – iPhone Data Recovery.
This iPhone 8/7/6S contact recovery software - iPhone Data Recovery enables you recover missing contacts on iPhone 8/7/6S effortlessly.You can do recover job of retrieve missing contact on iPhone 8/7/6S in three methods:recover deleted contacts on iPhone directly,restore lost iPhone 8/7/6S contacts from iTunes backup,retrieve contacts from iCloud backup.It is the most reliable way to recover lost or deleted contacts from iPhone no matter you have backed up with iTunes/iCloud or not.The name and phone number, E-mail address in contacts will be saved in this effective way.Besides restoring iPhone 8/7/6S lost contacts,this iOS data recovery allows to recover text messages, iMessages, contacts, photos, videos, Safari history/bookmarks, WhatsApp messages, Kik messages, Viber messages, Line chat history, Skype messages and more document on iPhone 11/XS/XR/X/8/7/7 Plus/SE/6S/6/5S/5/4S/4,etc.
You can choose different versions according to your computer's operation system,simply download the free version and have a try.Just get more detail information from the following passages about get missing contacts on iPhone 8/7/6S with three methods.
.png)
.png)
New Features of iPhone Data Recovery:
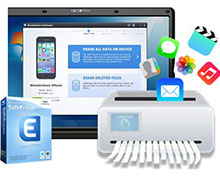
-Restore iPhone system to Normal(stuck in recovery mode/loop on Apple logo/can’t get out of black,white screen,etc);
-Backup and restore whatsApp; iOS data backup & export;
-The latest version supports to iOS 14/13/12 and iPad Air, iPhone 11/XS/XR/X/8/7/6S/6/5S/5/4S;
-Recover data from iPhone in recovery mode;
-Fix iPhone stuck in recovery mode without data loss;
-Fix iPhone with black screen and get data back;
-Recover data from dropped or broken iPhone;
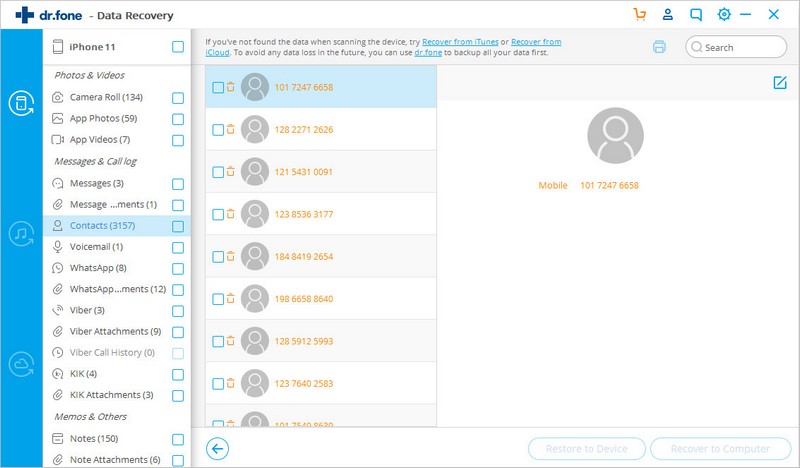
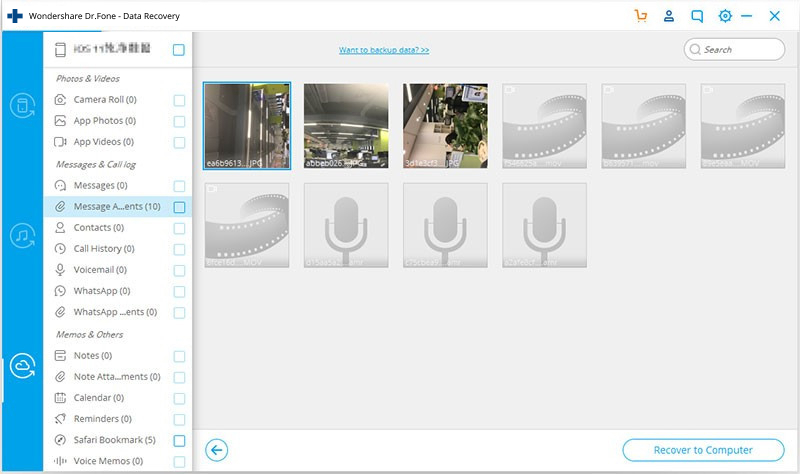
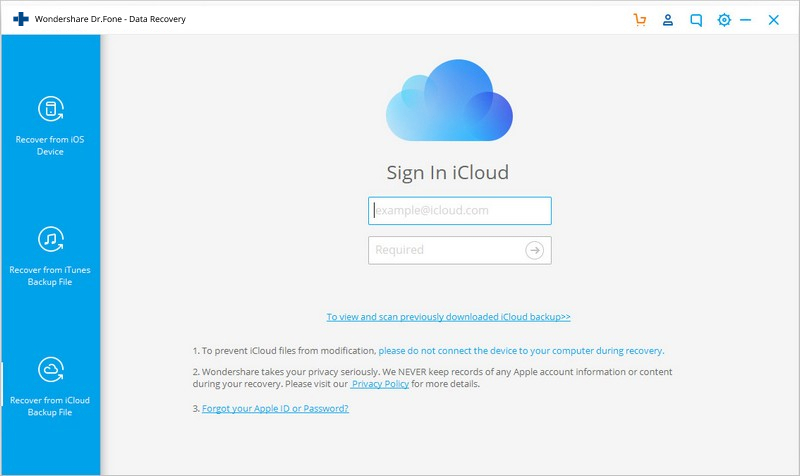
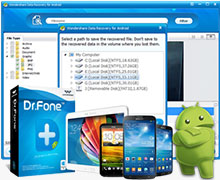
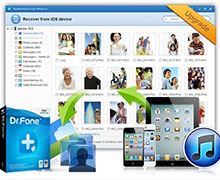
Step 1. Connect iOS Device with Computer Use the USB cable that comes with your iOS device to connect your iPhone, iPad or iPod touch, to your computer. Then launch Dr.Fone on your computer and choose "Data Recovery". Once the program detects your device, it will show you the window as follows. Tips: Before running Dr.Fone, you're supposed to download the latest version of iTunes. To avoid the automatically sync, don't launch iTunes when running Dr.Fone. I suggest you to disable the automatical syncing in iTunes beforehand: launch iTunes > Preferences > Devices, check “Prevent iPods, iPhones, and iPads from syncing automatically”. Step 2. Scan Your Device for Lost Data on It Simply click the "Start Scan" button to let this program scan your iPhone, iPad or iPod touch to scan for deleted or lost data. The scanning g process may last a few minutes, depending on the amount of data on your device. During the scanning process, if you see that the data you're looking for is there, then you can click the "Pause" button to stop the process. Step 3. Preview and Recover the Scanned Data The scan will take you some time. Once it's completed, you can see a scan result generated by the program. Data both lost and existing on your device are displayed in categories. To filter out the deleted data on your iOS device, you can swipe the option "Only display the deleted items" to ON. By clicking the file type in the left side, you can preview the found data. And you can see there is a search box on the top right of the window. You can search for a specific file by typing a keyword in the search box. Then save the data to your computer or your device by clicking the recovery button. Tips: About recovering data When you find the data you need, just put the check mark in front of the box to select them. After then, click the "Recover" button at the bottom right of the window. By default, the recovered data will be saved to your computer. As for text messages, iMessage, contacts, or notes, when you click Recover, a pop-up will ask you to "Recover to Computer" or "Recover to Device". If you want to put these messages back to your iOS device, click "Recover to Device". Step 1. Choose Recovery Mode After running Dr.Fone, choose "Data Recovery" and click on it. Then choose "Recover iOS Data". After that, you can see there options for you to do data recovery. Choose "Recover from iCloud Backup Files". Then you'll see the window below. Enter your iCloud account and password to login. Dr.Fone takes your privacy seriously. We never keep a record of any your Apple account info or content at any time during your sessions. Step 2. Download iCloud Backup File When you logged into iCloud, the program can find all iCloud backup files in your account. Choose the one where you're going to recover data and click on the "Download" button. And then in the pop-up, you can choose the type of files you would like to download. This will reduce the time of downloading the iCloud backup file. After that, you can scan the iCloud content now. Click on the "Next" button to start downloading. It will take you some time. Just wait for a moment. Step 3. Preview and Recover Data from iCloud Backup File The scan will be complete in a few minutes. Once it stops, you can preview almost all data in your iCloud backup file, like contacts, messages, photos, and more. Check them one by one and tick the item you want. Then click on the "Recover to Computer" or "Recover to your device" button to save them on your computer or your device with one click. Now contacts, messages and notes can be directly recovered to your iOS device if your iPhone, iPad or iPod touch is connected with your computer with a USB cable during the recovery process. Tips: Directly preview and recover data from downloaded iCloud backup files If you have downloaded iCloud backup files previously, you don't need to sign in and get off the iCloud backup file again. Click "To preview and scan previously downloaded iCloud backup file" under the account sign-in entrance. Then you can see all downloaded iCloud backup files displayed in a list. You can choose any of them to extract the content. All these downloaded backup files are located on your own computer. If you don't need them any more, you can click on the trash icon beside the scan button to delete them completely. Step 1. Choose Recovery Mode Launch Dr.Fone and click "Data Recovery". Then choose "Recover iOS Data". You can see three options on the side here. Choose "Recover from iTunes Backup File". After then, the iTunes backup recovery tool will detect all iTunes backup files on this computer and display them in the window. You can confirm which one is the one you need according to the date it has been created. Step 2. Scan Data from iTunes Backup File Choose the iTunes backup file that contains the data you want to recover and click "Start Scan". It will take a few minutes to extract all data from the iTunes backup file. Be patient. Step 3. Preview and Recover Data from iTunes Backup After a few seconds, all data in the backup file will be extracted and displayed in categories. You can preview them one by one before recovery. Then you can selectively mark and recover those you want by pressing the "Recover" button at the bottom. Now contacts, notes and messages can be directly recovered to your iOS device if you keep your iOS device connected with your computer via a USB cable during the recovery process. Tips: you can see there is a search box in the result window. From there, you can type in the name of a file to search for it. Tips: What if your iTunes backup file is located somewhere else? When your iTunes backup file comes from somewhere, such as moved from another computer with a USB drive, how can you preview and get the content from it? There is a way. When you are at the first step, click "Select" under the list of iTunes backup files, and you can flexibly choose the iTunes backup file no matter where you place it. Then in the pop-up window, preview and target your iTunes backup file. Then click "Start Scan" and you can move on with the step 2 above. It's pretty useful feature. Read More:
Part 1: Recover from iOS
Part 2: Recover from iCloud
Part 3: Recover from iTunes
.jpg)
.jpg)
.jpg)
.jpg)
.jpg)
.jpg)
.jpg)
.jpg)
.jpg)
.jpg)
.jpg)
.jpg)
.jpg)
.jpg)
.jpg)
.jpg)
How to Recover Lost Contacts on iPhone SE
How to Recover Contacts from iPhone 6/6S
How to Recover Data from iPhone Directly


 Copyright © 2012 Z0DOWNLOAD.COM. All rights reserved.