
 Home >
 Products
 39.00
Price:$31.20
39.00
Price:$31.20


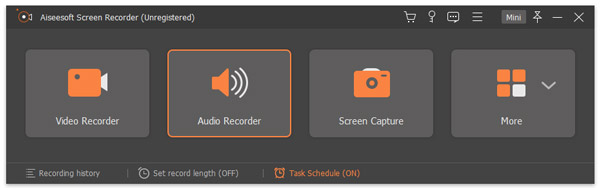
 Key Features
 How to use Screen Recorder
Screen recorder is the most professional recording software you can find. It can help you record video with high output video quality from anywhere. Below, we offer you a solution for recording any video / audio using screen record.
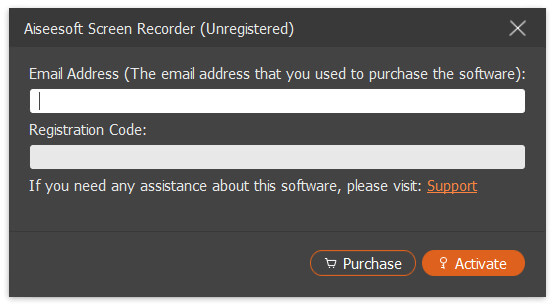
Step 1. Free download, install and launch Aiseesoft Screen Recorder on your computer. Register with the email address and registration code you have received from us.
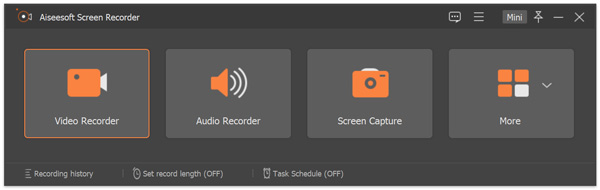
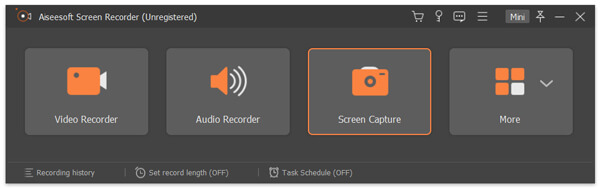
Step 2. Click Video Recorder option to enter the Video Recorder window. Here, you can record both video and audio.
Step 3. In the Video Recorder window, you can select a full screen or a fixed screen like 1920*1080, 1280*720, 854*480, 1024*768, 640*480. You can also click Customize > Select region/window to draw a recording area with your cursor.
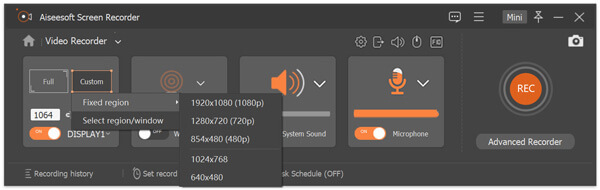
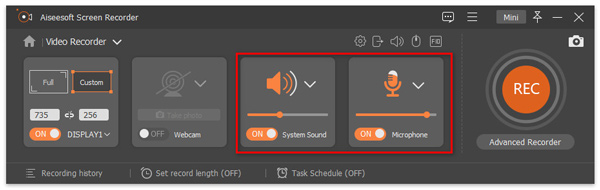
Step 4. Select the audio source by toggling on System Sound option, Microphone option, or both.
For recording online videos, music, lectures, you can only keep System Sound option on. For recording online games, webinar, meetings or video tutorial, you may need to turn on System Sound option and Microphone at the same time.
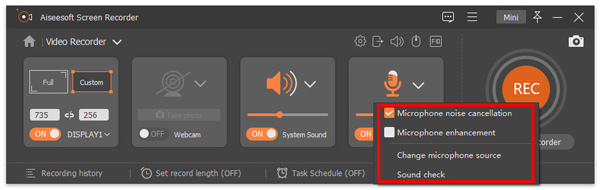
Moreover, while you toggle on the microphone audio recording, the drop-down next to it allows you to enable Microphone noise cancellation and Microphone enhancement. It can also let you change the microphone source and choose other microphones for recording.
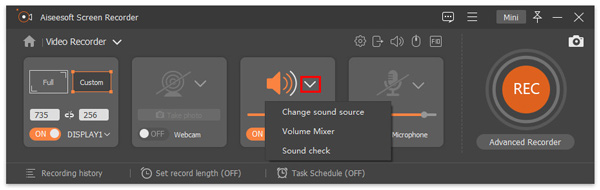
When you want to record computer speaker audio, the drop-down option next to it lets you change the sound source, open volume mixer to adjust the volume for other applications, and check the sound.
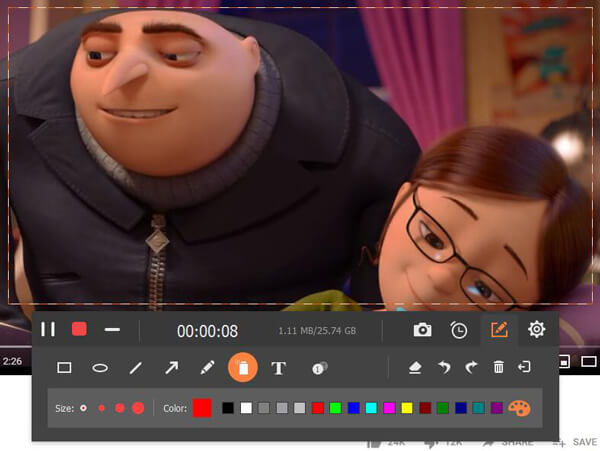
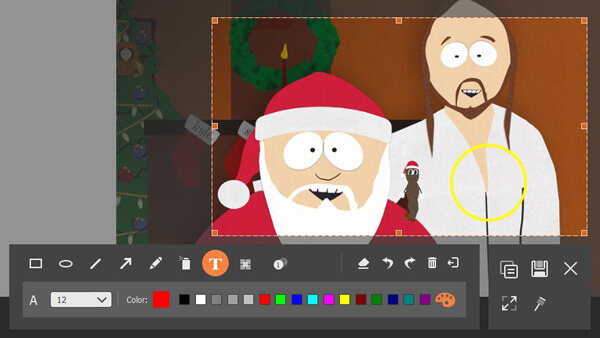
Step 5. During the recording, you are able to edit video and add text, line, arrow and specific labels to the captured video.
Step 6. Click REC button to start the screen recording on your computer. After recording, you can click the Stop button to preview the recorded video, and then click the Save button to save the recording to your computer.
Note: All your video or audio recordings are saved in the Recording history list. You can click the Recording history at the bottom to view, edit or delete them.
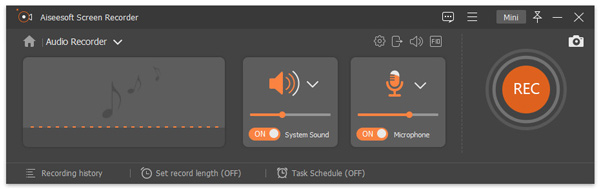
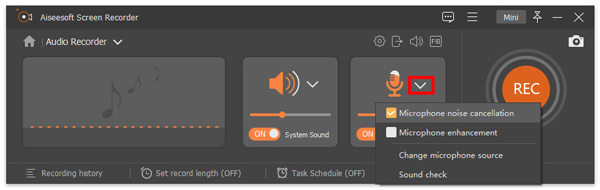
Step 1. Run Screen Recorder on your computer, and click Audio Recorder to enter the audio recording interface.
Step 2. Set recording audio from System Sound or Microphone voice according to your need. You can turn on the Microphone option and disable System Sound if you just want to capture your voice. If you want to capture the sound from your computer as well as your voice, you need to enable both Microphone and System Sound.
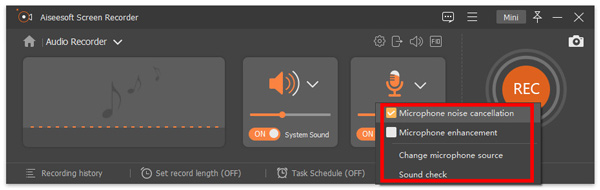
While recording audio from a microphone, do not forget to checkmark the option of Microphone noise cancellation and Microphone enhancement, which can reduce video noise and amplify audio to stop audio echo while recording.
If you have more than 2 microphone sources, just select Change microphone source" to select the one that you want to record.
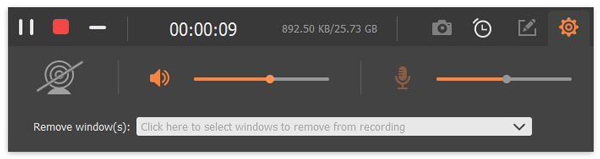
The drop-down option next to the speaker lets you change the sound source for recording. Moreover, you can click Volume Mixer to adjust the speaker audio for separate audio applications while recording.
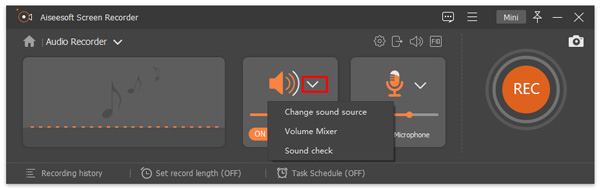
The "Sound check" option here will prompt you to the audio settings.
You can drag the slider to adjust the volume to the proper value.
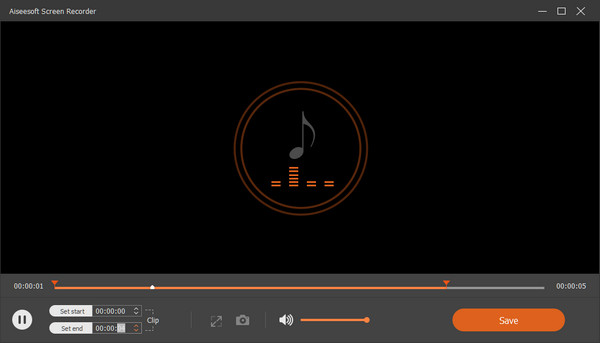
Step 3. When voice recording is complete, click the Stop button and you will be taken to the Preview window. Then click the Save button to save the audio recording to your computer.
Step 1. Open Screen Recorder and click Screen Capture to directly make a snaphot on your screen.
Step 2. You can freely set the screenshot area whether to capture an active window or a freehand area. Meanwhile, you can add your preferred labels like rectangle, circle, line, arrow, text, color paints to it.
Step 3. After editing, you can click Save icon to save the snaphot as a suitable image format.
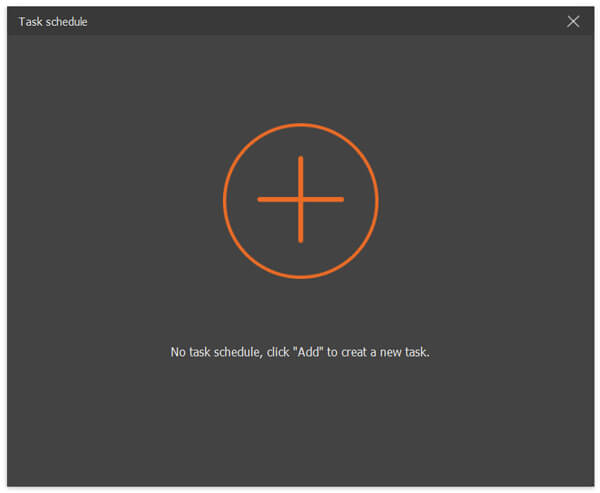
Step 1. Run Screen Recorder, and click Task Schedule at the bottom to start a task schedule recording.

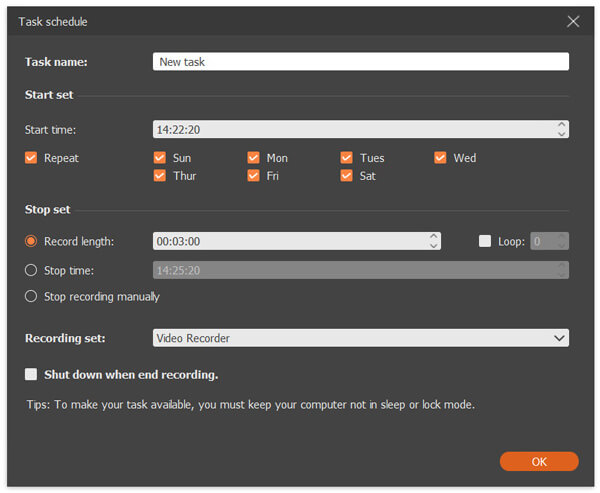
Step 2. In the Task schedule window, click the big plus add button to add a new task. You can enter a new name for the task. Click OK to move on.
Step 3. Then you can set the starting time, ending time, recording length and the recording set for the recording.
To get a desired recording, you’d better go to Menu and select Preferences to adjust settings for recording. Here are five recording options you can adjust.
In the Recording tab, you can make adjustments according to your needs like Show countdown before recording, Beep on start recording, Show recording boundary, Hide float bar when recording, etc.
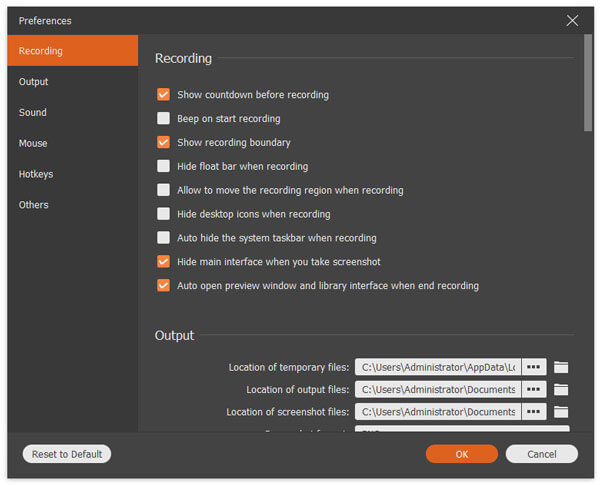
The Output tab gives you chances to set the output folder for temporary files, recording and screenshot files. Besides, you can set the video/audio format and quality, video codec and frame rate, and screenshot format.
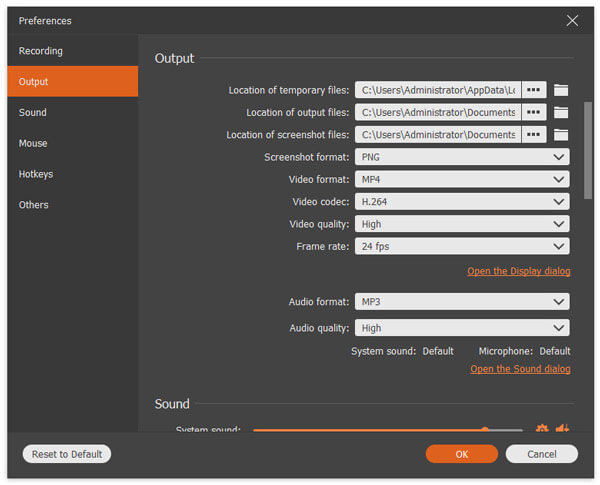
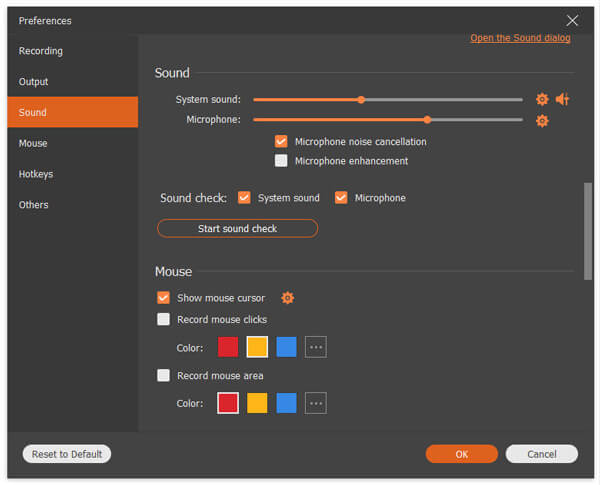
The Sound settings let you check the sound sources from system sound and microphone.
Moreover, you can adjust the system sound and microphone volume by moving the slide bar.
You can enable Microphone noise cancellation and Microphone enhancement here to create a microphone audio recording in high quality.
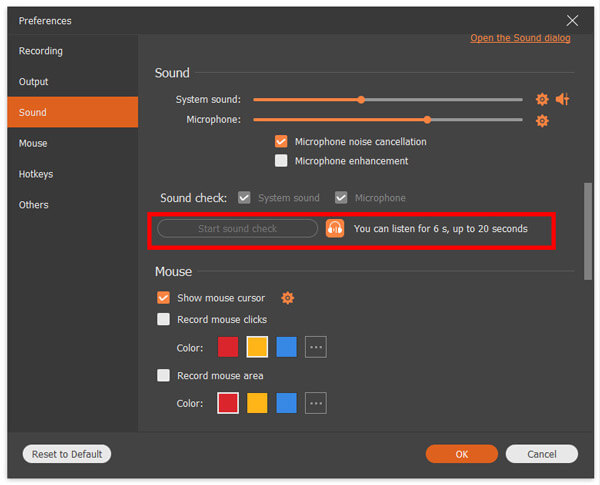
Before recording, you can test audio by click Start sound check.
Then it will start an audio recording. To click the microphone icon next to "Start sound check" to stop recording and click the icon again to listen to the audio recording.
In the Mouse section, you can choose to show the mouse cursor, adjust mouse clicks and mouse area flexibly.
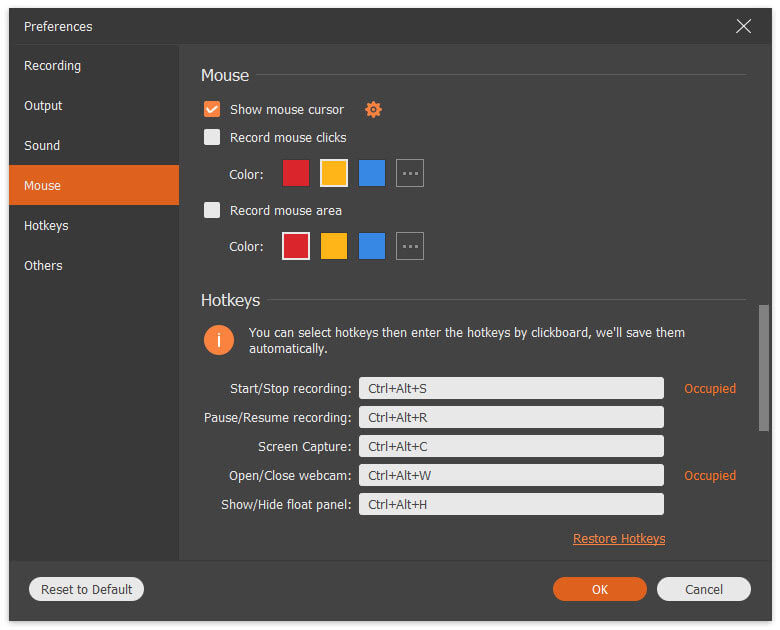
In the Hotkeys tab, you can enter the key combination as the hotkeys for Start/Stop record, Pause/Resume record, Screen capture, Open/Close webcam, Show/Hide float panel.
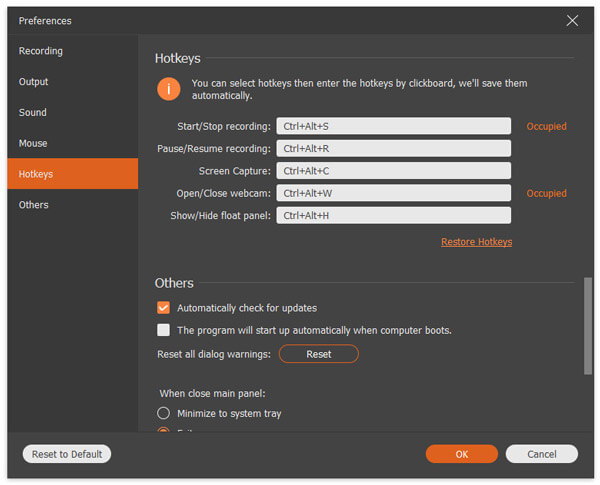
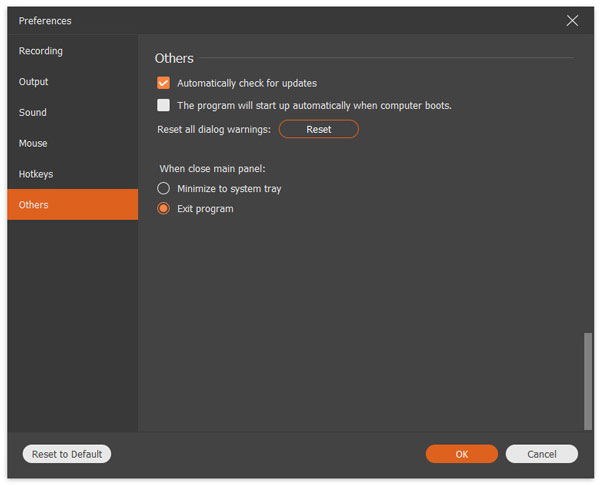
The Other” tab lets you enable hardware acceleration, automatic updates and more.
 Related Articles

 Retail Price: $
 Buy Now
 Download


 Copyright © 2012 Z0DOWNLOAD.COM. All rights reserved.