
 Home >
 Products
 45.00
Price:$36.00
45.00
Price:$36.00
Fone Eraser is the most powerful tool to permanently and completely delete all iPhone content and settings. Three erasure levels are available, and you can erase any data on iPhone / iPad / iPod to protect your privacy. Allows you to connect multiple IOS devices. You can delete all files and settings on multiple devices at the same time to save time (supports IOS 10.3, IOS 11, IOS 12, IOS 13, IOS 14, iOS 15).
◆ Three modes to clear IOS device data
Low level: you can quickly erase data only once, which can save you a lot of data file time.
Medium level: clear idevices context twice by covering, no trace will be left, and no one will know that the data on your device has been deleted.
High level: Completely destroy the data by rewriting the data three times, which is the safest and most thorough way to make the device from the beginning.
◆ The ability to clean up the entire iPhone's storage space in seconds frees up space and speeds up the device. For example: cleaning up unwanted temporary files or system junk files, unloading unused applications, deleting large media files, and lossless compression of photos
◆ Support multiple IOS devices to erase data at the same time, compatible with all IOS devices.


 Key Features
 How to Use FoneEraser
| Part 1. Erase All Data on iPhone |
| Part 2. Scan & Preview iPhone Data |
| Part 3. Free up iPhone Storage Space 1. Erase Junk Files 2. Uninstall Applications 3. Delete Large Files 4. Clean up Photos |
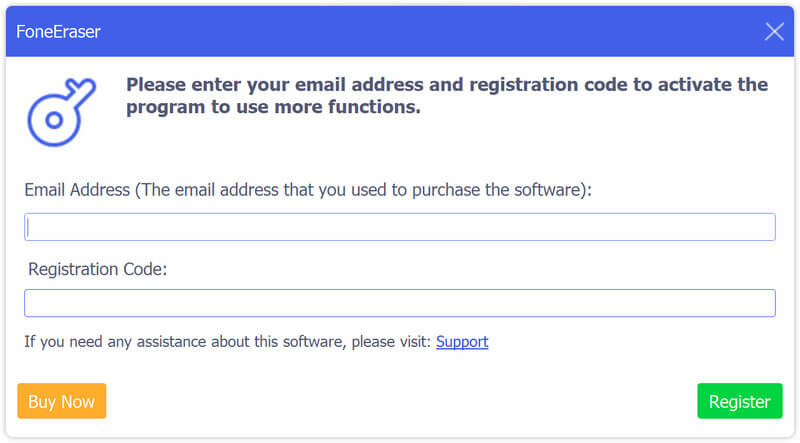
Step 1. Free download and install Aiseesoft FoneEraser on your computer. Then launch the program. Enter your email address and the registration code to activate the program if you want to enjoy full functions.
Step 2. Use a USB cable to connect your iOS device to computer. Then unlock your device. You may see a popup asking if you want to trust this computer. Just tap on the Trust option and enter your passcode to trust the computer.
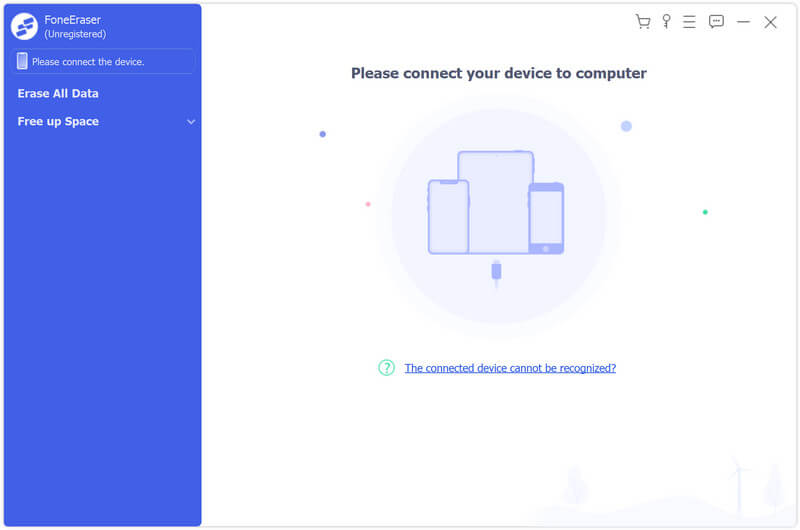
Note: If your computer doesn’t recognize your iPhone/iPad/iPod, you need to check whether you have installed the latest iTunes. If not, you can update iTunes to the latest version. You can also choose to install the software from Apple’s official website.
Step 3. There will be three erasing levels for you to choose: Low, Middle and High. The Low security level enables you to quickly erase all the data on your device, which is almost twice faster than other security levels. The Middle level will overwrite the erased data entirely to make sure the data cannot be recovered. As for the High security level, it is based on the U.S.DoD 5220.22-M wiping standard that can erase your private data like password and bank records.
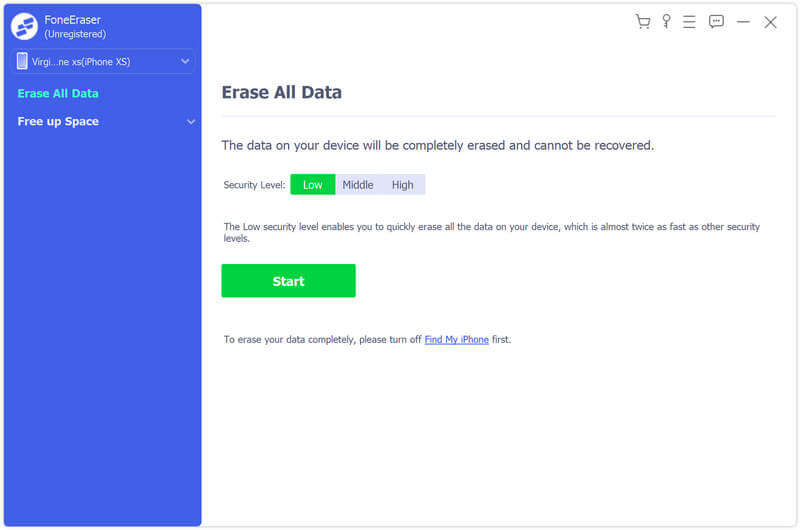
Note: This software will wipe out all iOS devices content and settings at a time without selective options. So, you'd better back up your important data before this process.
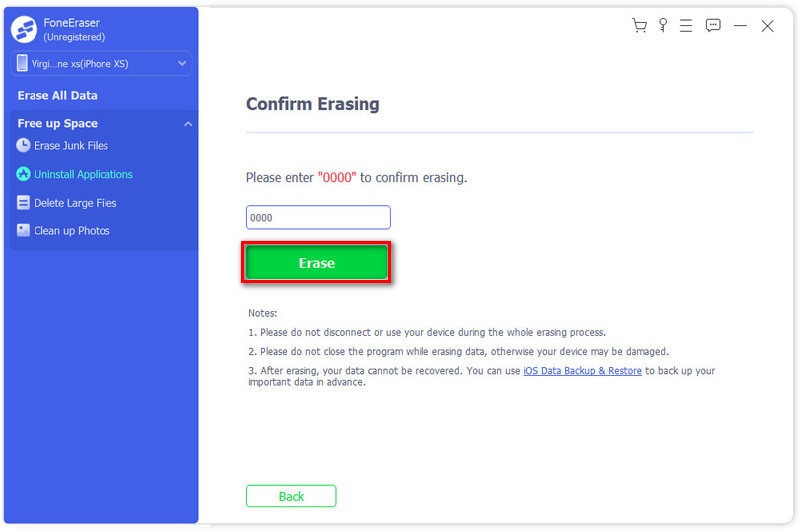
Step 4. After choosing erasing level, you can click the Start button to erase your iPhone, iPad or iPod data. Please enter 0000 to confirm the erasing. Then click Erase to erase all data on your device. Now, you have completed the whole process of erasing everything on your iOS device.
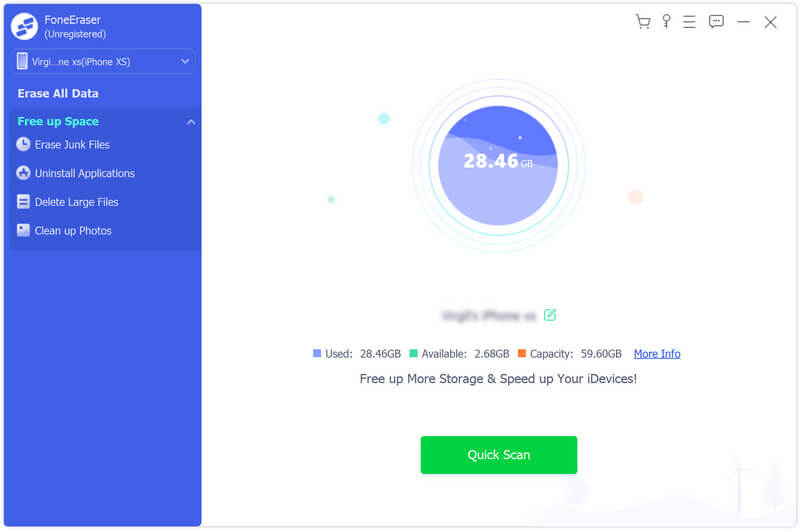
Step 1. If you want to view your iPhone storage, you can navigate to the Free up Space tab from the left panel. Then you will see the iPhone storage info on the right, including used space, available space and capacity. And you are able to view More Info to get more detailed information of your iOS device.
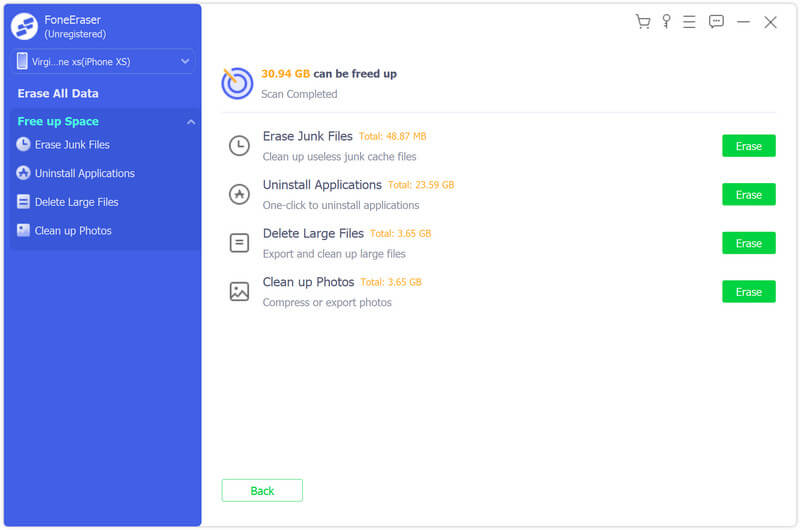
Step 2. When you need to free up the storage space and speed up your iPhone, just click the Quick Scan button. FoneEraser will scan your iPhone automatically. Wait for a moment, and you can get the total storage of the junk files, applications, large files and photos. Then you can decide what to erase according to your need.
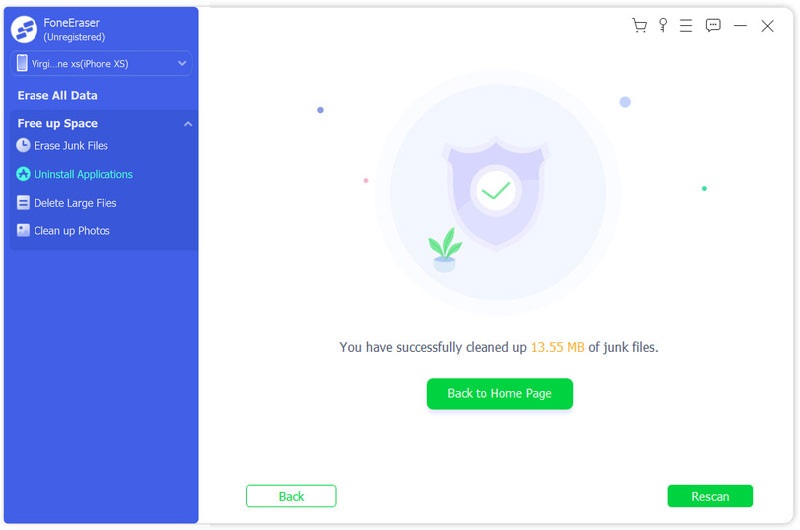
Step 1. Find the Erase button behind the Erase Junk Files option to clean up useless junk cache files on your iPhone. You can also click the drop-down arrow next to Free Up Space in the left panel and pick Erase Junk Files to view the junk files.
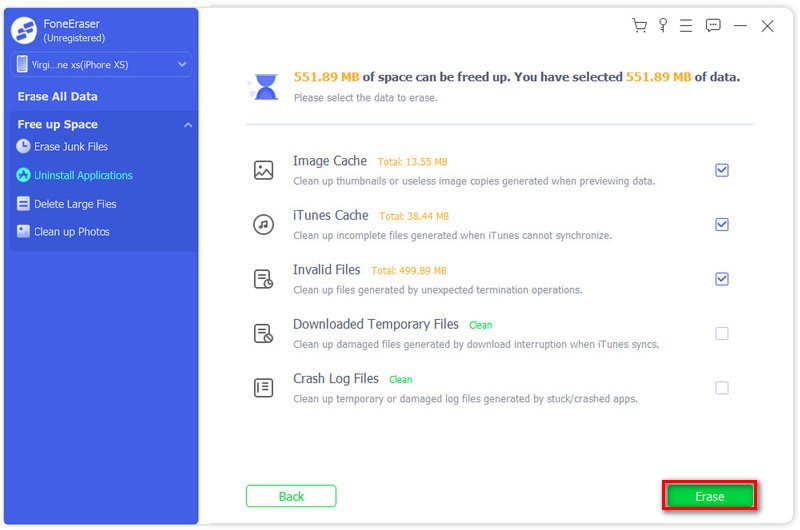
Step 2. The erasing tool allows you to remove junk files like image cache, iTunes cache, invalid files, temporary files and crash log files. Just check the box behind and click the Erase button to clean the selected junk files on your iPhone.
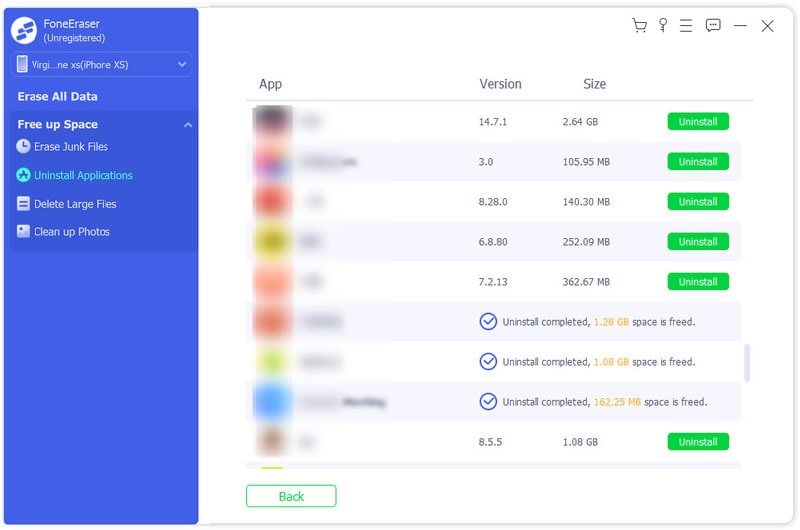
Step 1. Choose Uninstall Applications option to view all applications on your iPhone. You can also click the drop-down arrow next to Free Up Space in the left panel and pick Uninstall Applications to start scanning out the applications on your iPhone.
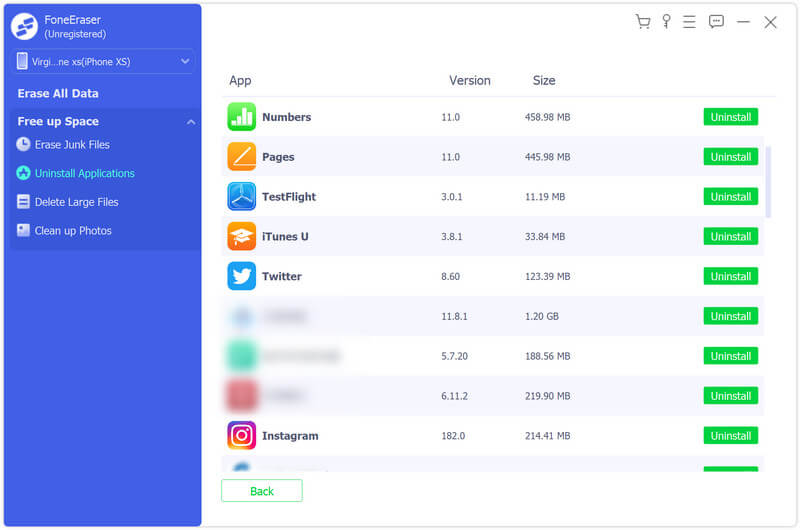
Step 2. Scroll and view all the apps installed on your iPhone. Find the unwanted app and click Uninstall button to delete it from your iPhone.
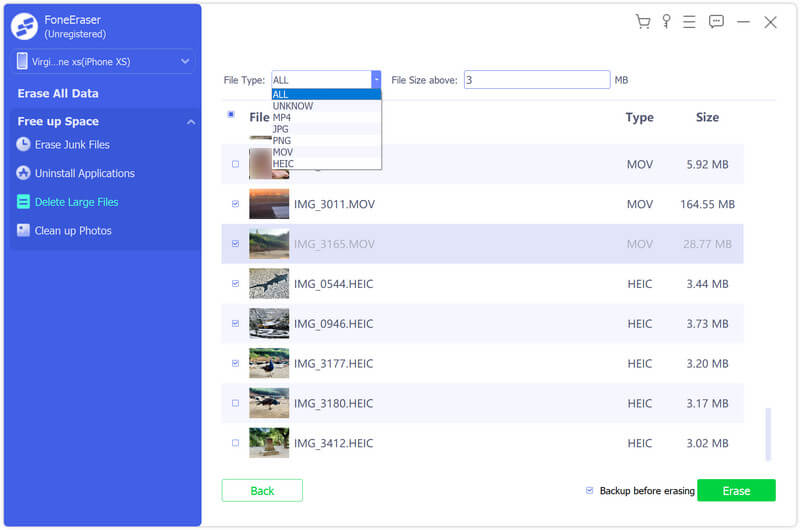
Step 1. Select Delete Large Files if you want to get rid of large files on your iPhone. You can also click the drop-down arrow next to Free Up Space in the left panel and pick Delete Large Files to find out all extremely large files.
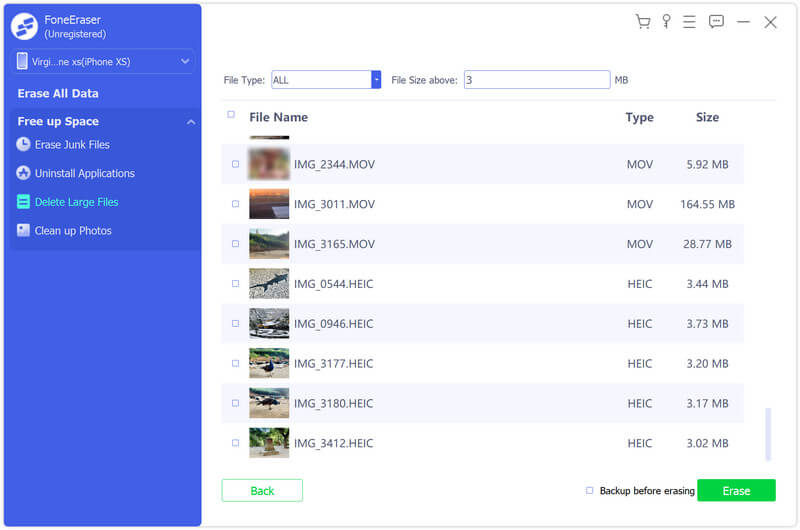
Step 2. You can filter and find the specific files by setting file type and the minimum file size. After you find the large file that you want to erase, click Erase button to start the deleting process. And in case you want to make a backup of the large file, you can tick Backup before erasing box next to the Erase button.
Step 1. To manage your photos, you can go to the Clean up Photos option. You can also click the drop-down arrow next to Free Up Space in the left panel and pick Clean up Photos option to apply this feature. You are allowed to manage your photos with 2 handy features: Backup & Compress and Export & Delete.
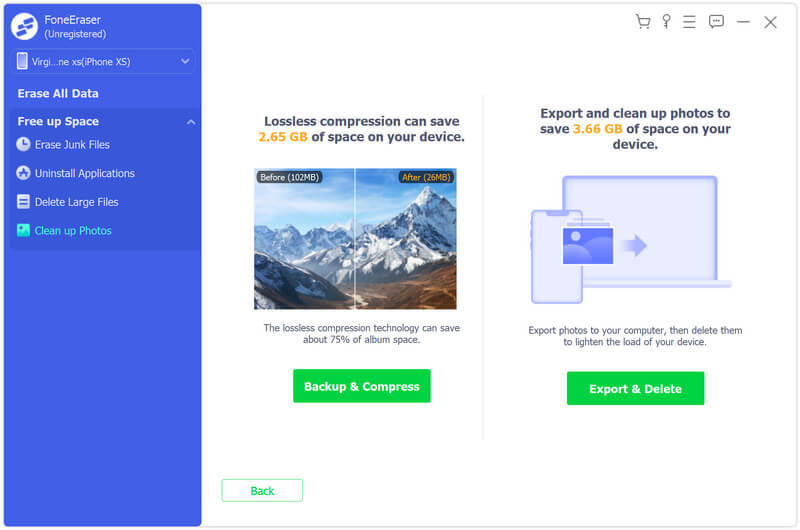
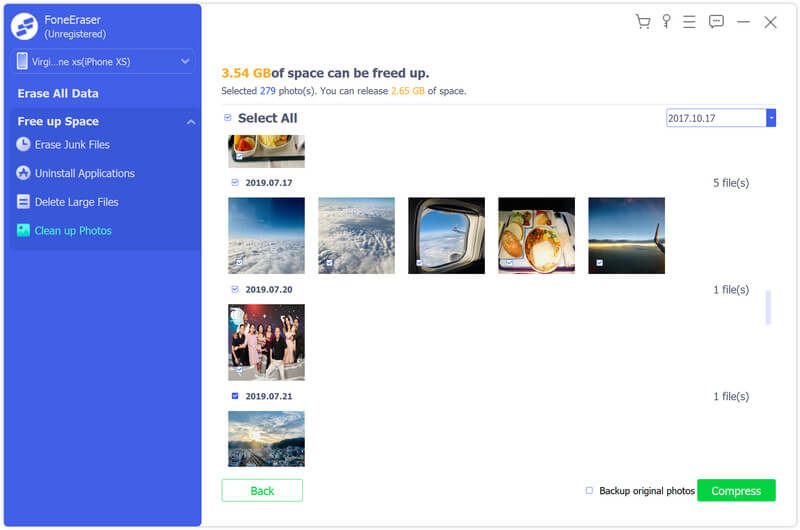
Step 2. If you don’t want to delete photos, you can choose Backup & Compress to make a backup of original photos and then compress these photos. Select the photos that you want to reduce the file size of and click Compress to compress the photos. You can also enable Backup original photos if necessary.
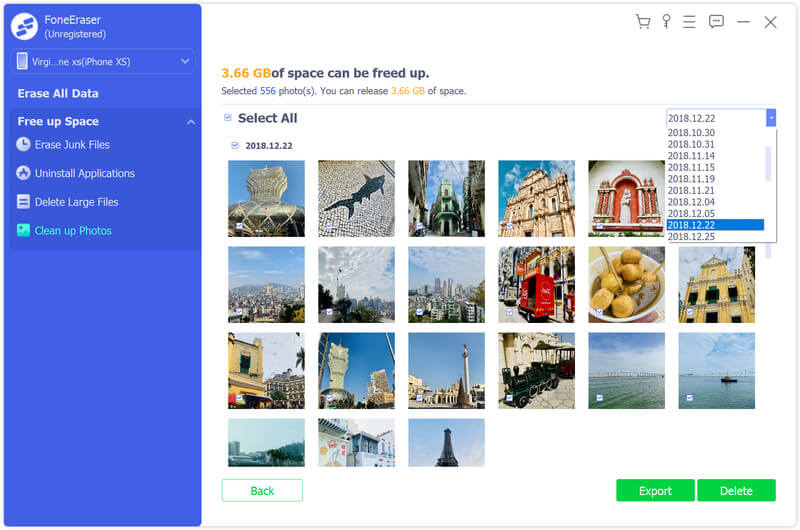
Step 3. As for Export & Delete, it can help you back up and delete your photos. You can select the date from the drop-down menu. Then Export or delete the selected photos as you like.
 Related Articles


 Retail Price: $
 Buy Now
 Download


 Copyright © 2012 Z0DOWNLOAD.COM. All rights reserved.