
 Home >


If you want to reset your Samsung Galaxy S20/S11/S10/Note 10 to factory settings,you must to make your Samsung backup at first,then restore them to the phone or other Android phones;If you want sell the old phone,you need to back up all files from Samsung to computer,and then erase everything from Samsung phone before selling it.
It’s necessary to backup and save everything off of your Samsung phone, then reset and erase all data so you’re ready for selling it.Here,I teach you how to backup your Samsung Galaxy to computer,and how to erase data from the phone permanently before recalling it.
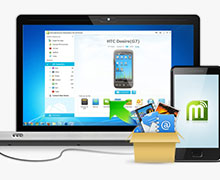
Android Data Backup & Restore can help you backup everything from Galaxy Samsung Galaxy S/Note/A/J to computer, including calendar, call history, gallery, video, messages, contacts, audio, applications and even application data (for rooted devices). You can also preview and selectively export any type of data you want. The Android Data Backup & Restore also allows you to easily restore the data to your new phone from backups whenever you need to.However,if you have get a new Galaxy S20, S11, S10,S9 or other Android phone,like HTC, Samsung,LG,Motorola,ect.You also can use this program to selectively restore backed up content to Samsung Galaxy directly.
.png)
.png)
What to do Selling the Phone?
Step 1. Connect your Android phone to computer
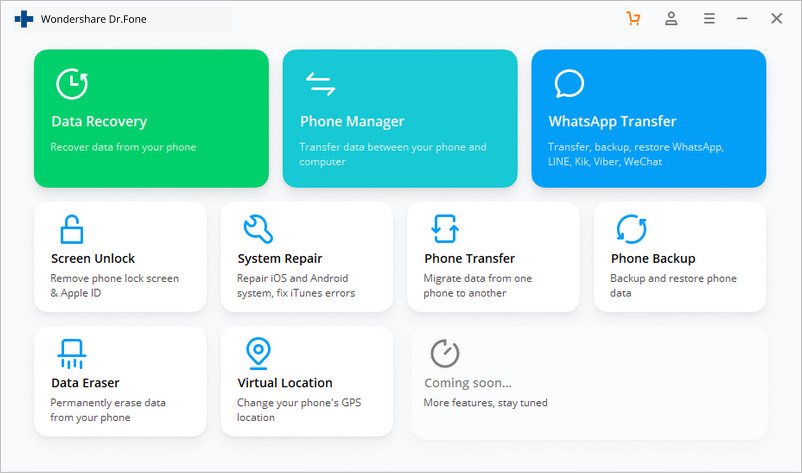
Launch Dr.Fone on your computer, select "Phone Backup" among all the functions.
Then connect your Android phone to the computer using a USB cable. Please make sure you have enabled USB debugging mode on the phone. If your Android os version is 4.2.2 or above, there will be a pop-up window on the Android phone asking you to allow USB Debugging. Please tap on OK.
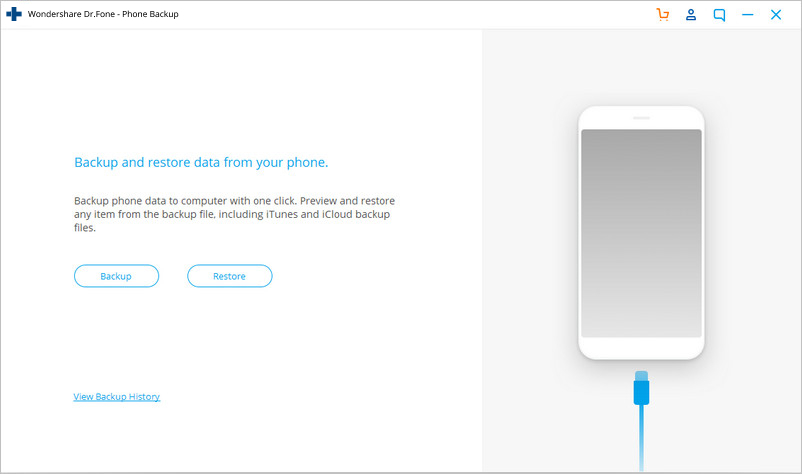
Click Backup to start the backup Android phone data.
If you have used this program to back up your device in the past, you can view your past backup by clicking on "View backup history".
Step 2. Select file types to back up
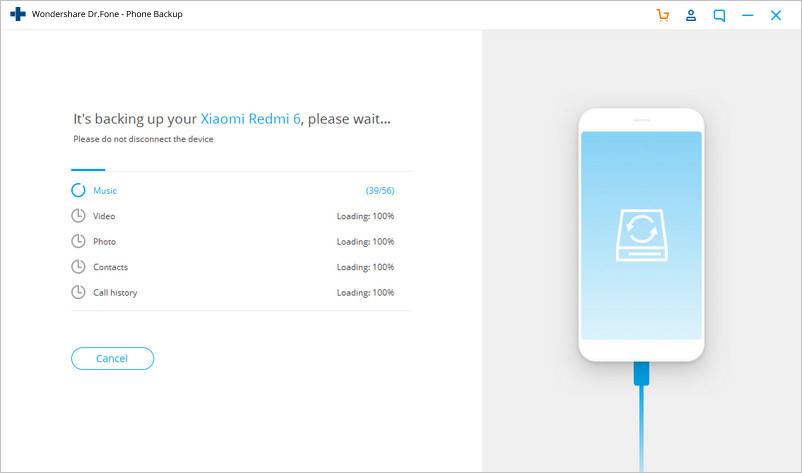
After the Android phone is connected, select the file types you want to backup. By default, Dr.Fone has checked all the file types for you. Then click on Backup to start the backup process.

The backup process will take a few minutes. Please don't disconnect your Android phone, don't use the device or delete any data on the phone during the backup process.
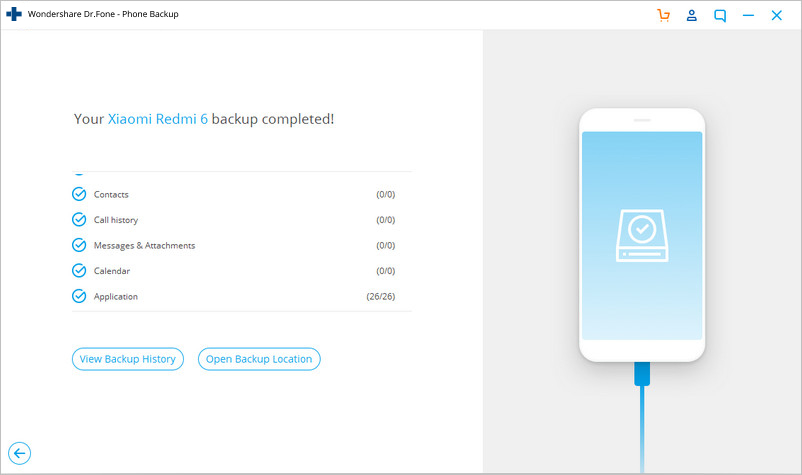
After the backup is completed, you can click on View the backup button to see what's in the backup file.
Step 1. Connect your Android phone to computer
Launch Dr.Fone on your computer and select "Phone Backup" among all the tools. Connect your Android phone to the computer using a USB cable.
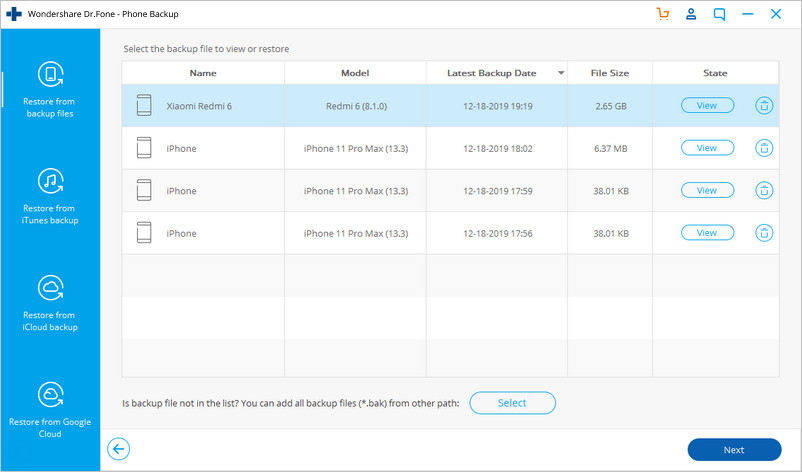
Step 2. Select the backup file you would like to restore
After you click on the Restore button, the program will display all the Android backup files on this computer. Select the backup file you need and click View next to it.
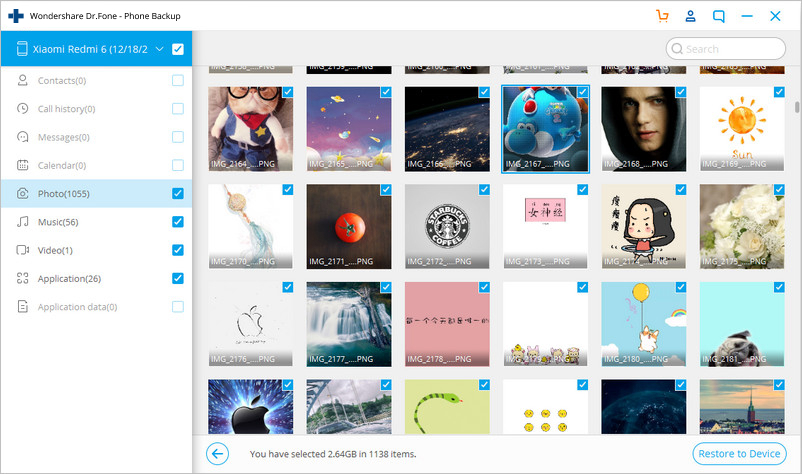
Step 3. Preview and restore the backup file to Android phone
Here you can preview each file in the backup. Check the files you need and click on Restore to them to your Android phone.
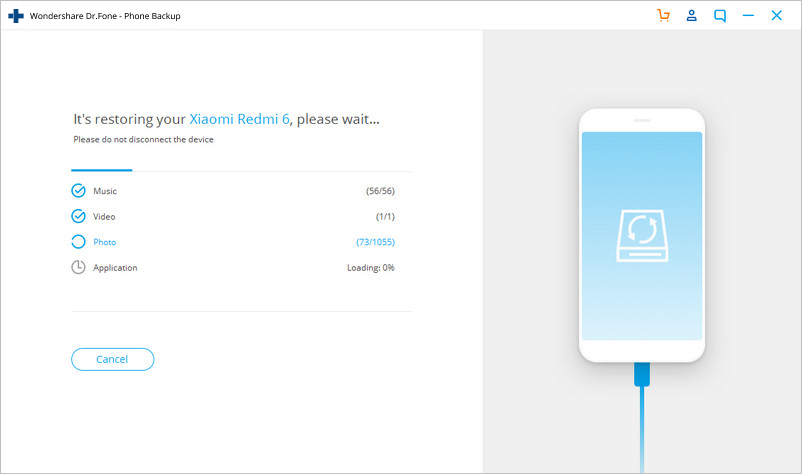
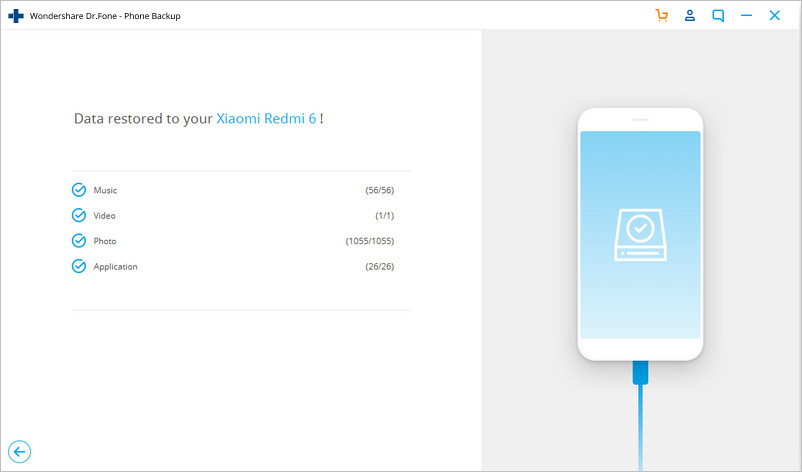
The whole process only takes a few minutes. Please don't disconnect your Android phone or open any Android phone management software.
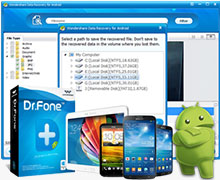
Tips:To avoiding you phone explosion,damages,lost or other unknown unexpected happened,I recommend you make your Samsung backup regularly.If you never backup your Samsung data and it damaged,don’t worry,you can use the Broken Android Data Recovery to extract data from broken Samsung phone,but if your phone is explosion,you can’t get your important data back forever!
Free download the Android Data Backup & Restore
Erase & Reset Your Samsung Galaxy before Selling
You must to erase everything on Samsung Galaxy Note 7 before exchanging or returning it for recall,in order to protecting your private data never be stolen after exchanging it,including contacts,sms,photos,videos and other personal Information.
There are two ways for you factory reset Samsung Galaxy phone,go head into Settings > Accounts > Backup & reset > and scroll down to "Factory Data Reset". From here look at the list and at the bottom click “Reset Device”. This will take a few minutes and will erase your Samsung phone.
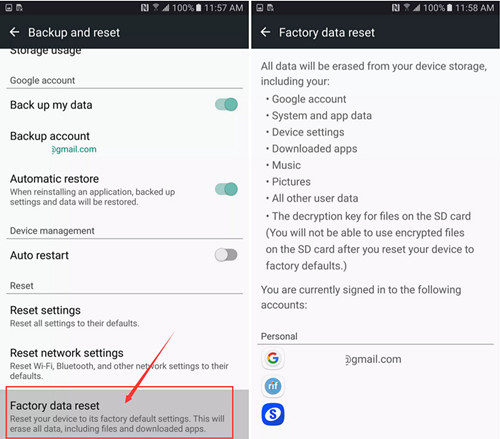
Way 1.Factory Reset Samsung Galaxy from Settings
Step 1.Open Settings page on your Samsung phone.
Step 2.Select Backup and reset under Settings.
Step 3.Select Factory data reset from the list of options,then click “Reset Device”.
Way 2.Hard Reset Samsung Phone from Recovery
Step 1.Switch Off your Samsung Galaxy.
Step 2.Press and hold Home + Power + Volume Up buttons for a few seconds and as soon as you see Samsung logo on-screen, release three buttons altogether.
Step 3.Your phone will show a blue screen with a broken Android in center.
Step 4.Now press Volume UP button once while holding the Power button to show the stock recovery options.
Step 5.Use Volume down button to scroll to Wipe data / Factory reset option, and select it by pressing the Power button.
Step 6.Select Yes to confirm factory reset.
That’s all. Now start fresh with your phone cleaned of all user files and apps.
Note: Factory resetting the phone will delete all files on the device, including your photos, videos, documents, apps, game progresses and other files. So make sure backup your Samsung data before performing a factory reset.
But factory resetting does not completely erase the data completely,the deleted data is being rewritten and can be recovered by Android Data Recovery in market.
Learn more:Recover Data after Factory Reset Samsung Galaxy
However,how to permanently erase data from Samsung Galaxy without restored?Please keep reading below.
And before you recall, resell, donate or trade in your phone, you need to wipe out all your personal data beforehand so as to prevent a data leaking problem.
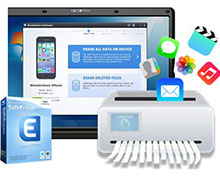
To wipe everything from Samsung Galaxy permanently & completely,you should use a professional Android Data Eraser tool,which allows you erase existing data,wipe off everything on Android Samsung phone;erase deleted data,erase all deleted data in the Samsung Galaxy Note 7 memory without recovery,including photos, videos, call history, contacts, SMS, Apps and other private data.In additional,the Android Data Erase also can help you cleaning up junk files to take up space and speed up your Samsung Galaxy S8/S7/S6/S5.ect.It supports all Android devices ever created, such as Samsung, HTC, LG, Sony, Motorola, Windows phone, Google Nexus, ZTE, Huawei and so forth.
Permanently Wipe Data on Samsung with Android Secure Eraser
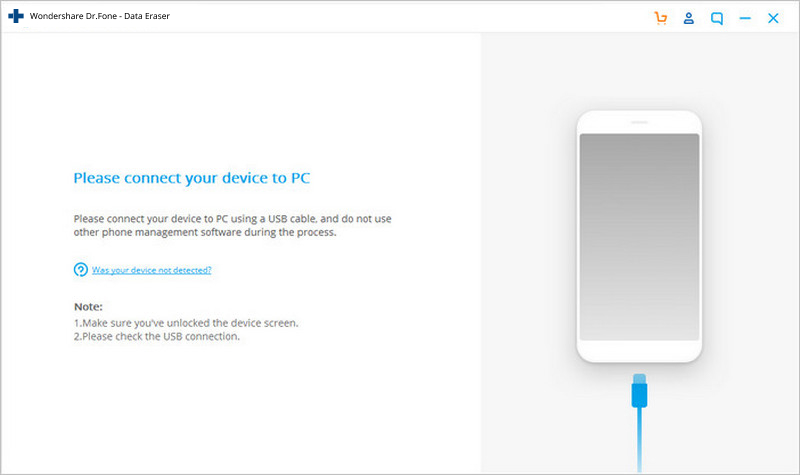
Step 1. Connect Your Android Phone
Launch Dr.Fone on your computer. Select "Data Eraser" among all the tools.
.jpg)
Connect your Android phone to the computer using a USB cable. Make sure you have enabled USB debugging on your phone. If the Android os version is above 4.2.2, there will be a pop-up message on your phone asking you to allow USB debugging. Tap on "OK" to continue.
Step 2. Start Erasing Your Android Phone
Then Dr.Fone will automatically recognize and connect your Android device. Click on the "Erase All Data" button to start erasing all your data.
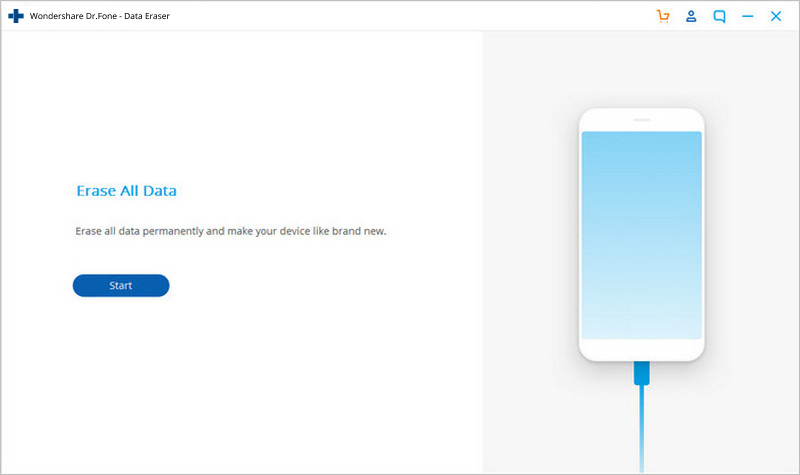
Since all the erased data are not recoverable, make sure you have backed-up all the needed data before you proceed. Then key in “000000” into the box to confirm your operation.

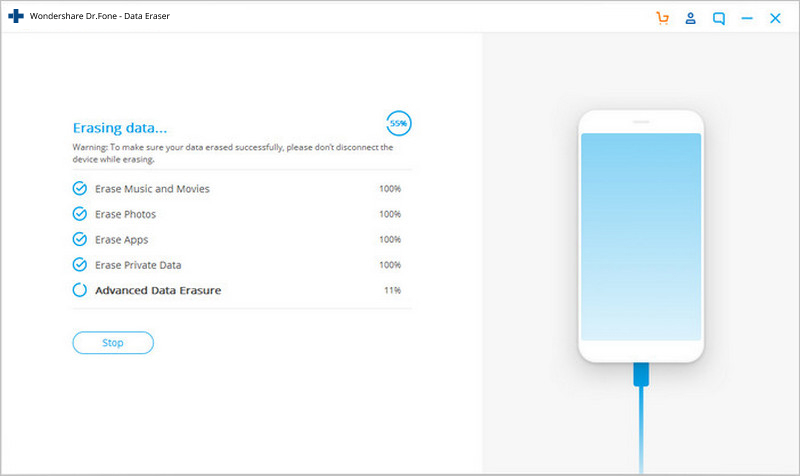
Then Dr.Fone will start erasing all data on your Android phone. The whole process takes only a few minutes. Please don't disconnect the phone or open any other phone management software on the computer.
Step 3. Perform Factory Data Reset on Your Phone
After all app data, photos, and all other private data have been completely erased, Dr.Fone will ask you to tap on Factory Data Reset or Erase All Data on the phone. This will help you completely wipe all the settings on the phone.

Now your Android phone has been completely wiped and it's like a brand new one.
.jpg)
Free download the iOS & Android Data Eraser:
Well done!You have successfully erase all the data and settings on your Samsung phone as new one,now you can safely to selling the phone.If your friend confused about the Samsung Galaxy resale,now you can tell him/her what to do before resale or exchange the faulty phone:Backup Data and Factory Reset Samsung Galaxy,then Erase Everything on your phone permanently.
Read More:
How to Recover Deleted Data from Samsung Galaxy Note
How to Transfer Everything from Samsung to iPhone 7/6S
Switch Contacts from old Samsung to new Samsung Galaxy
How to Backup Contacts from Samsung to Computer
How to Transfer SMS from Android to Computer


 Copyright © 2012 Z0DOWNLOAD.COM. All rights reserved.