
 Home >


“I deleted all photos and videos in my photo library to free up space on my iPhone X. However, in usage it still shows the photo library used more than 6GB space. in "about" page of setting, it shows 900 photos and 40 videos on my iPhone X. but I cannot find any photos in photo library, as well as from iTunes. It bothered me for several times. Does anyone can help me Delete and Compress Photos on iPhone to Free Up Storage?”
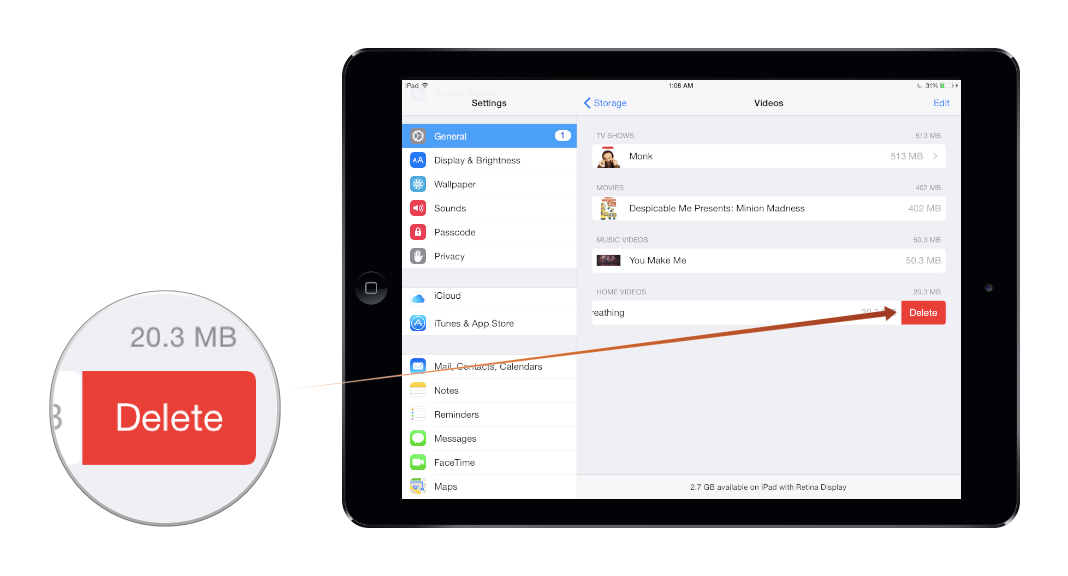
Everyone knows that today's world of advanced applications, high-end cameras producing detailed photos and quality video, it's all too easy for your iPhone to fill up storage. Even iPhone users with massive 64GB storage models can find things get out of hand fast, so it's even worse if you're on the entry-level 16GB, or if you're using an older 8GB model such as the iPhone 5C. Photos take up a lot of rooms on our devices, any new photos that you take get put into the Camera Roll folder. And deleted photo automatically gets put into the Recently Deleted folder, meaning that it’s not truly deleted from your iPhone or iPad device. Therefore, they may appear to be deleted, but upon checking the iPhone's Settings>General>Usage>Manage Storage screen, the facts imply the photos still take up space on the device. These deleted photos are still taking up a large number of precious storage space on your iPhone device. What’s worse, the deleted images will still remain on your device for 30 days, taking up space and still being accessible and can be recovered by anyone with access to your iPhone.
Here is a direct way for iPhone users to delete photos from iPhone device, fast but not completely.
Step 1. Select “photos” icon on the home screen.
Step 2. Select one photo to be deleted from the camera roll.
Step 3. Tap “trash” icon located at the screen’s bottom.
Step 4. Select “delete photo” button to delete the photo to be removed from the camera roll.
Repeat the process for each photo to be removed.
In general, the photos stored in the Photos application on your iPhone can begin to take up some too much space on your iPhone, causing it to slow down or operate poorly. Clearing out photos that you don't use anymore can keep your device performing well and give you plenty of room for fun new apps and new memories. It is time to release your iPhone storage space. Here are two ways you are recommended to permanently clean up your photos on iPhone and compress photos to free up storage.
Here, you are strongly recommended that using the following safe and effective methods to release your iPhone storage space.
| Part 1: Permanently Deleted Camera Roll/Photos/Videos from iPhone to Free Up Storage Part 2: Compress All Photos on your iPhone to Save Space Up to 75% |
Simply deletion won't erase your iPhone photos really. A data recovery tool can easily recover deleted pictures on iPhone. iPhone Data Eraser is such a tool to perform a permanent data erasing on your iPhone. This tool supports to erase all photos from iPhone permanently, as well as text messages, contacts, videos, account info, password, etc. And it works with all iPhone, iPad and iPod series, including jailbroken iPhone and carrier-locked iPhone, protecting your personal information by removing it permanently and preventing them from being recoverable.
Click and download the trail version:
.png)
.png)
Key Features of iPhone Data Eraser:
* Permanently erase your Android & iPhone files, including text messages, contacts, photos, videos, account info, password, notes, ect;
* Clear private data on iOS devices for iPhone 5S/6/6S/7/8/X/XS/XR/11, iPad Mini/Pro/Air, iPod Touch;
* Free up storage space and speed up iDevices;
* Compress large volumes of data on iDevice;
* Support iPhone(iOS 6.1.6 and higher).
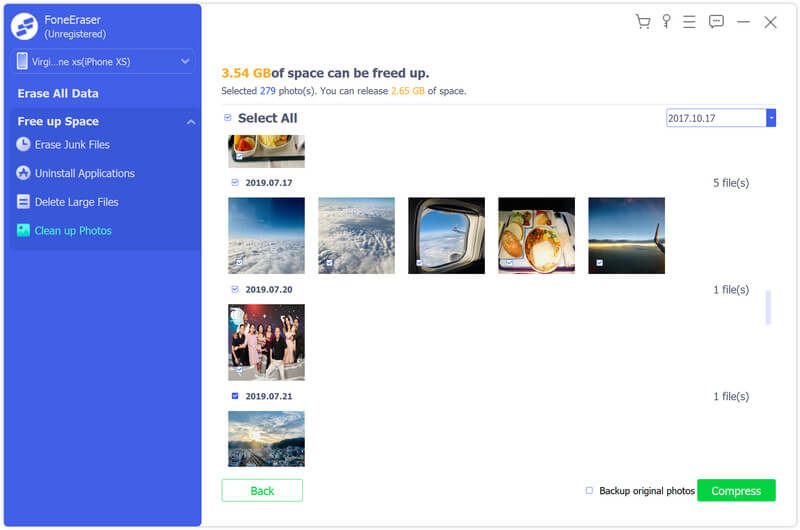
Step 1. To manage your photos, you can go to the Clean up Photos option. You can also click the drop-down arrow next to Free Up Space in the left panel and pick Clean up Photos option to apply this feature. You are allowed to manage your photos with 2 handy features: Backup & Compress and Export & Delete.

Step 2. If you don’t want to delete photos, you can choose Backup & Compress to make a backup of original photos and then compress these photos. Select the photos that you want to reduce the file size of and click Compress to compress the photos. You can also enable Backup original photos if necessary.
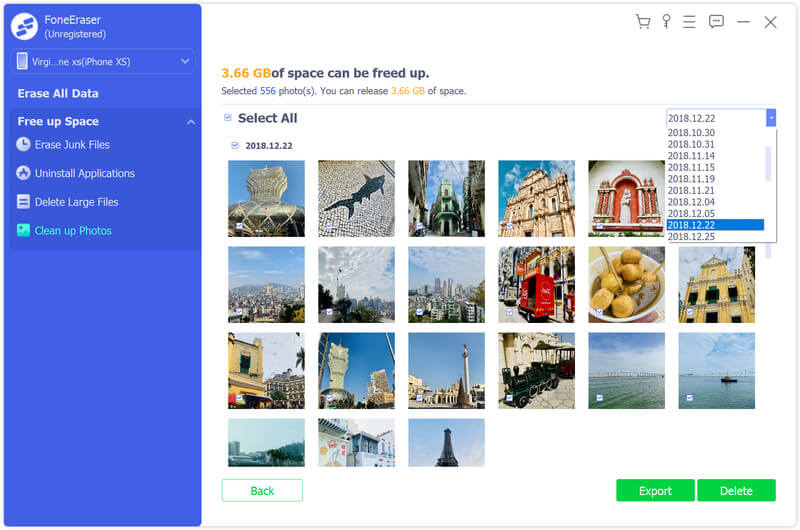
Step 3. As for Export & Delete, it can help you back up and delete your photos. You can select the date from the drop-down menu. Then Export or delete the selected photos as you like.
In addition, if you do not want to delete your photos because they are precious and unique for your life, you still have another choice. iPhone Data Eraser allows iPhone users to compress all photos to free up space on your iPhone, so that they occupy a minimum of space. And it will not affect your iPhone normal operation.


Below is the detailed guide showing you how to erase everything on iPhone by using iPhone Data Eraser:
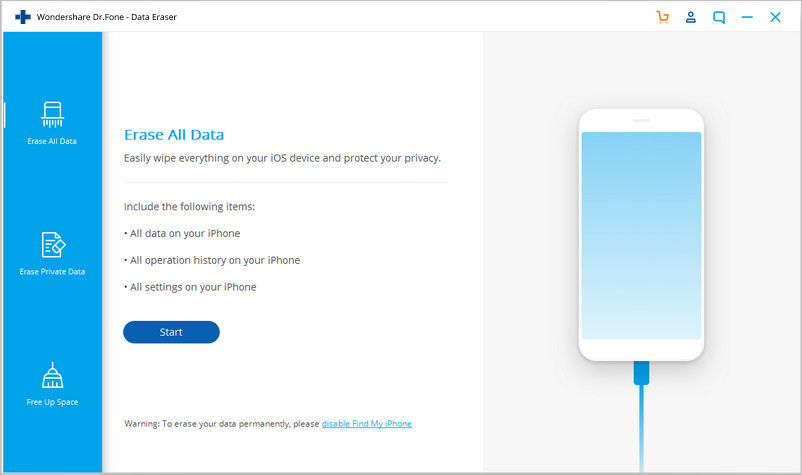
Once running the Dr.Fone on your computer and you'll see all features inside as following. Select "Data Eraser" among all the functions.
.jpg)
Next, let's check how to use Dr.Fone - Data Eraser (iOS) to erase all data on the iPhone in steps.
Step 1. Connect your device to the computer
Connect your iPhone or iPad to the computer using a lightning cable. Once it recognizes your device, it displays 3 options for you. Choose Erase All Data to start the data erasing process.
Step 2. Start erasing your iPhone completely and permanently
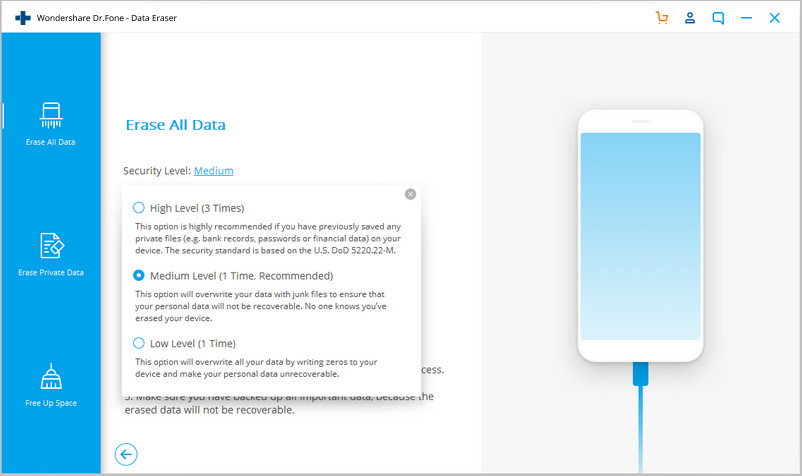
When the program detects your iPhone or iPad, you can select a security level to erase iOS data. The higher the security level, the lower possibility your data can be recovered. Meanwhile, a higher security level takes a long time to erase.
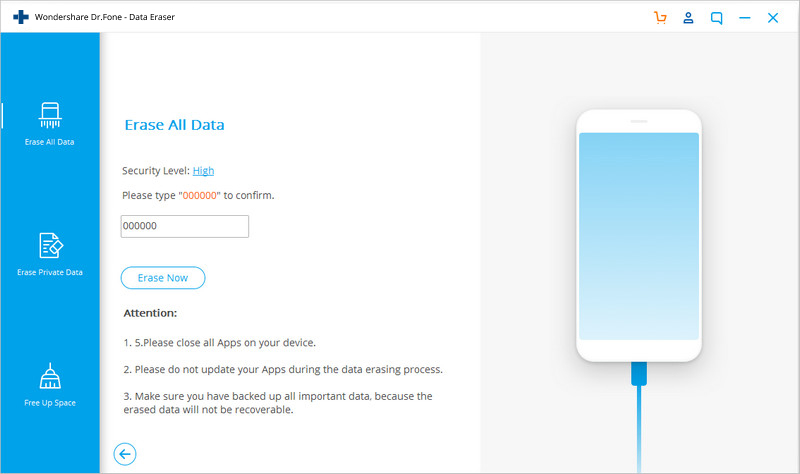
Since the erased data can't be recovered, you need to be careful and enter "000000" to confirm your operation when you are ready.
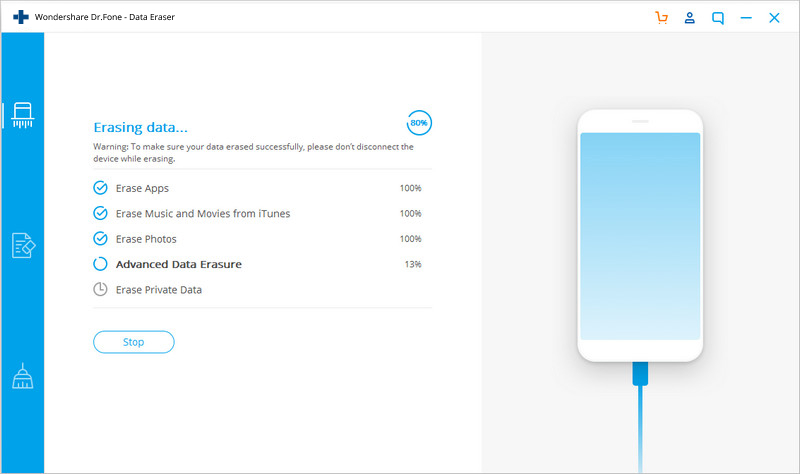
Step 3. Wait until the data erasure is complete
Once the erasure begins, you don't need to do anything, but wait for the end of the process, and keep that your device is connected during the whole process.
The program requires you to confirm the rebooting of your iPhone or iPad. Click "OK" to continue.
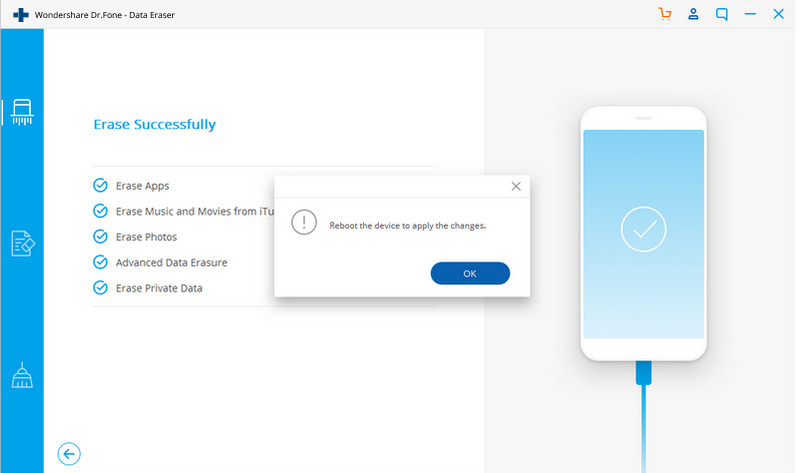
When the data erasure is complete, you will see a window appearing as follows.
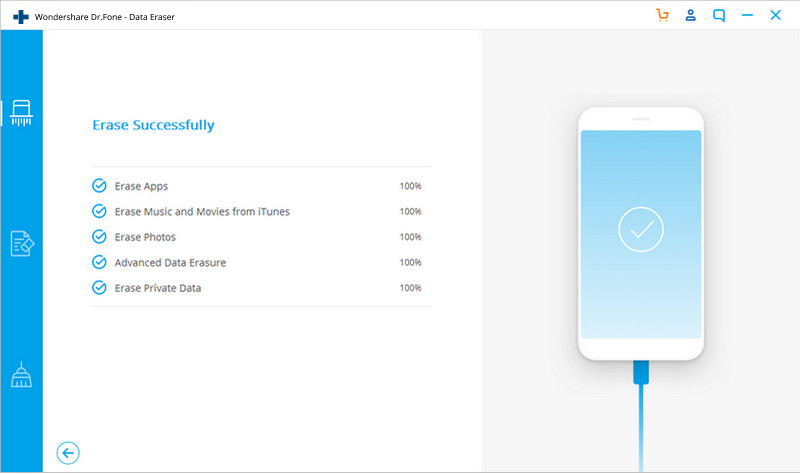
Now, your iPhone/iPad is fully erased and turns into a new device with no content, and you can begin to set it according to your need.
Free download the iOS Data Eraser:
Related Articles
How to Clean iPhone Memory and Free-Up More Memory Space
How to Permanently Delete iPhone Text Messages


 Copyright © 2012 Z0DOWNLOAD.COM. All rights reserved.