
 Home >
 Products
 Price:$39.20
macOS Sierra, Mac OS X 10.11/10.10/10.9/10.8/10.7/10.6


 Key Features
 How to use Video Converter Ultimate for Mac
We will tell you how to use Aiseesoft Mac Video Converter Ultimate from following three parts:
This Mac Video Converter Ultimate can easily help users enjoy any video file on Mac and portable devices. With its powerful converting features, it can convert video to MP4, AVI, MPEG, FLV, MOV, etc.
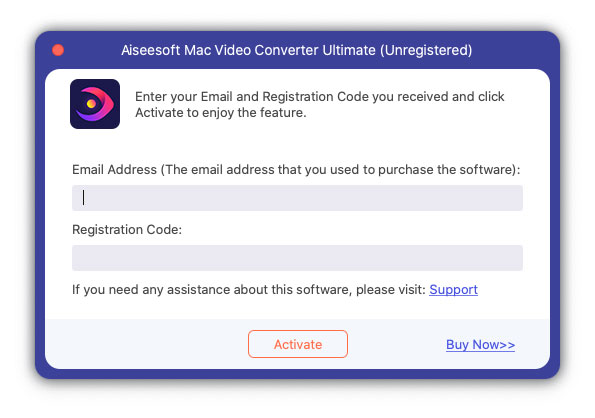
Step 1. Free download, install and open Mac Video Converter Ultimate. You can register with the email address and registration code.
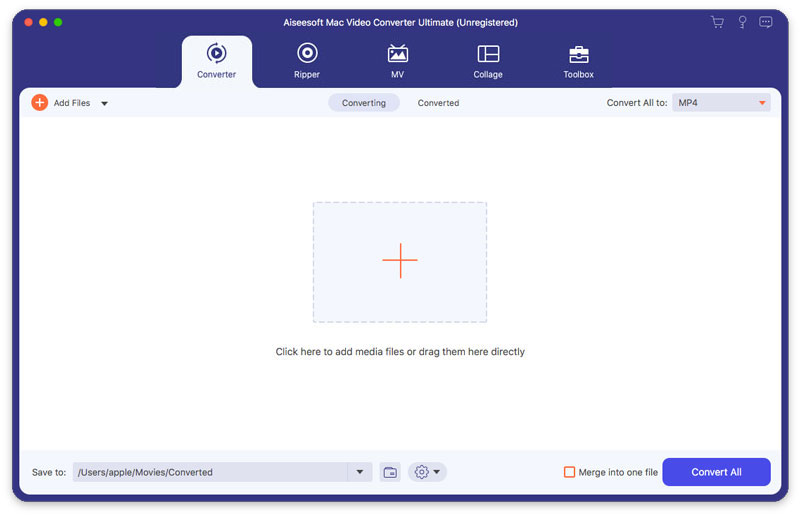
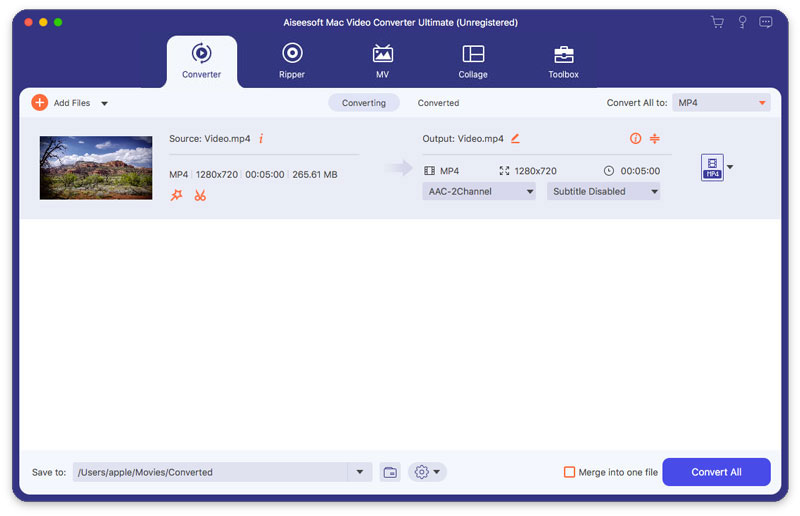
Step 2. Click "Add Files" button to add video files from computer, or click the drop-down arrow next to "Add Files" to add video/audio files or a file folder. You can also drag the video you want to convert into the main interface of Mac Video Converter Ultimate.
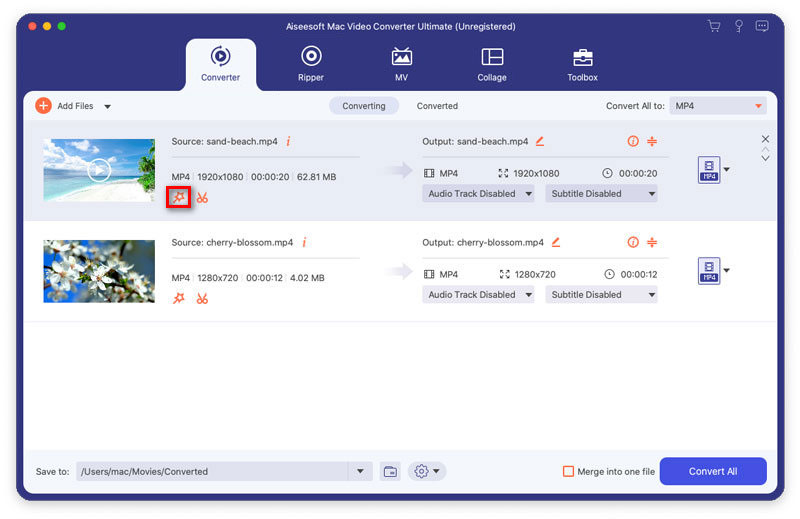
Step 3. After adding source file, you can choose to edit the source video effect by clicking the "Edit" or "Cut" icon. You can trim video length, crop video, add watermark, adjust video brightness/saturation/contrast/hue/volume, and so on.
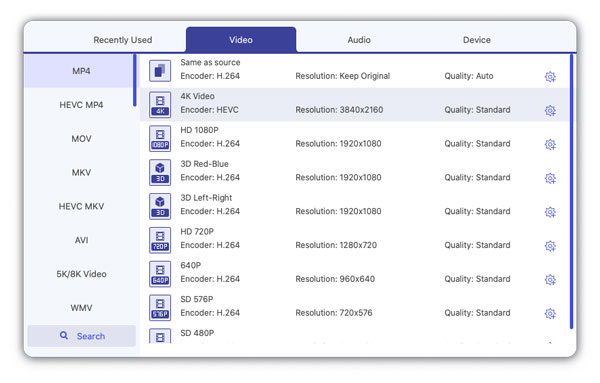
Step 4. Click on the Format icon or the drop-down arrow besides "Convert All to" to open the output format window. Here you can search in the quick search box and find the video format you want.
You can also click the Gear icon at the right side to customize the profile settings, including quality, encoder, resolution, frame rate and bitrate.
Step 5. If you have several videos to be combined, you can tick "Merge into one file" option at the bottom. Then click the "Convert All" button to start converting the video file on your computer.
Trim & Split Video
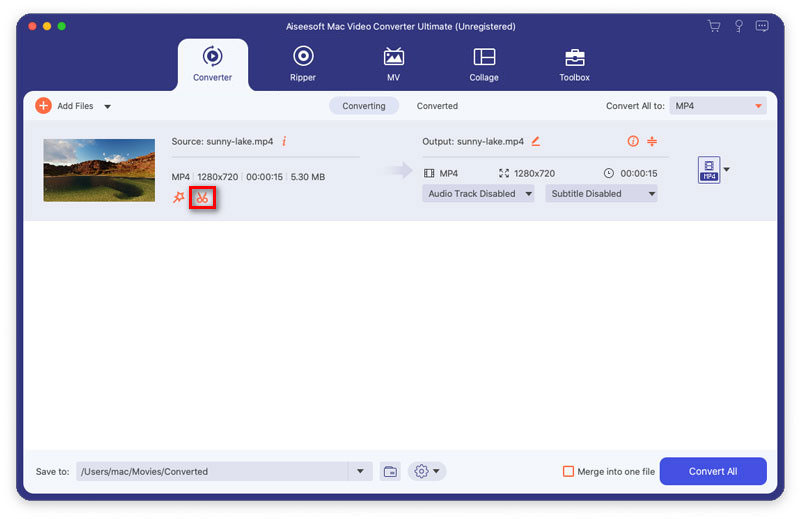
Step 1. Select a video clip and click the "Cut" icon.
Step 2. Drag the sliders in the progress bar to set the duration, or enter the start and end time to clip an accurate segment.
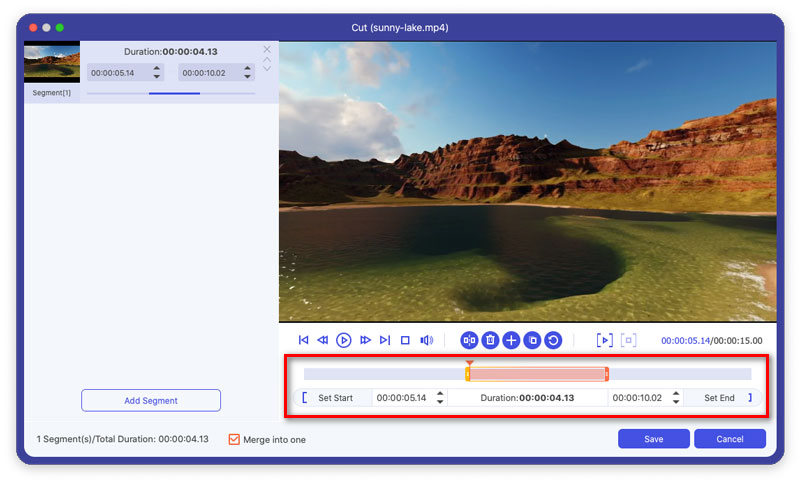
Step 3. With the above buttons, you can also split one video to two parts, delete one selected segment, add segment to the left list, or copy and create a new segment.
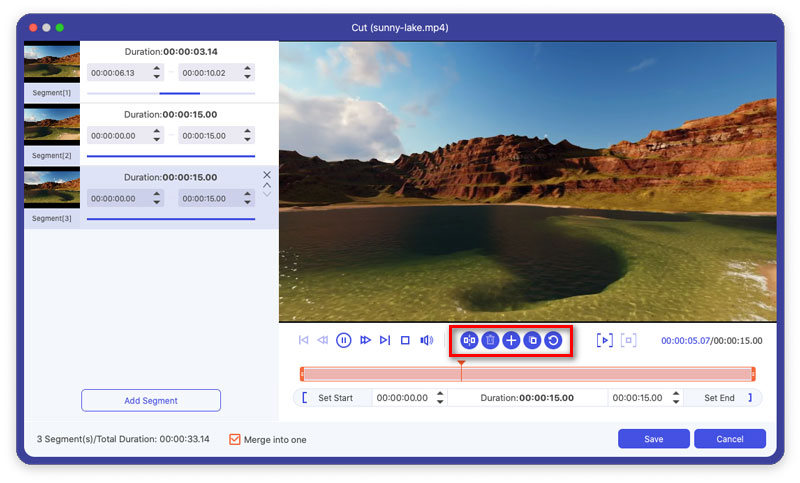
Step 4. You can rearrange the video segments in the left list and tick "Merge into one" option to combine these video clips. After that, you can click "Save" button to save the videos.
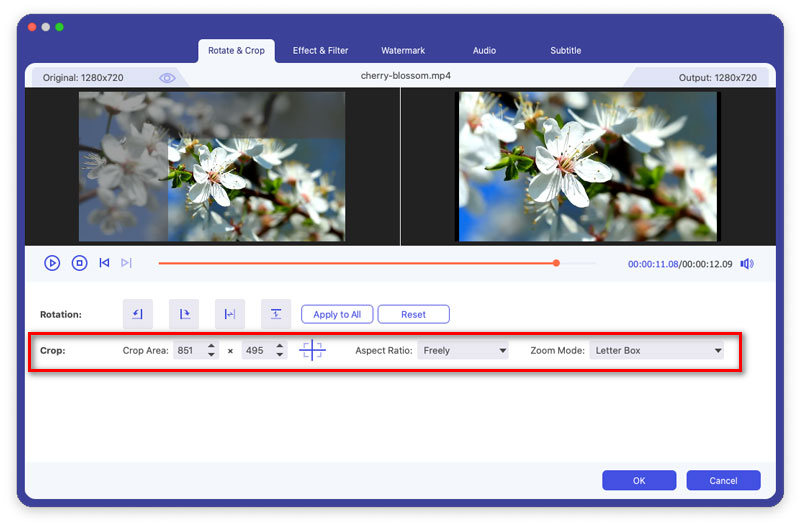
Rotate & Crop Video
Step 1. Select the video and click "Edit" icon. In the "Rotate & Crop" tab, you can rotate 90 degrees to the right or left, flip the video horizontally or vertically.
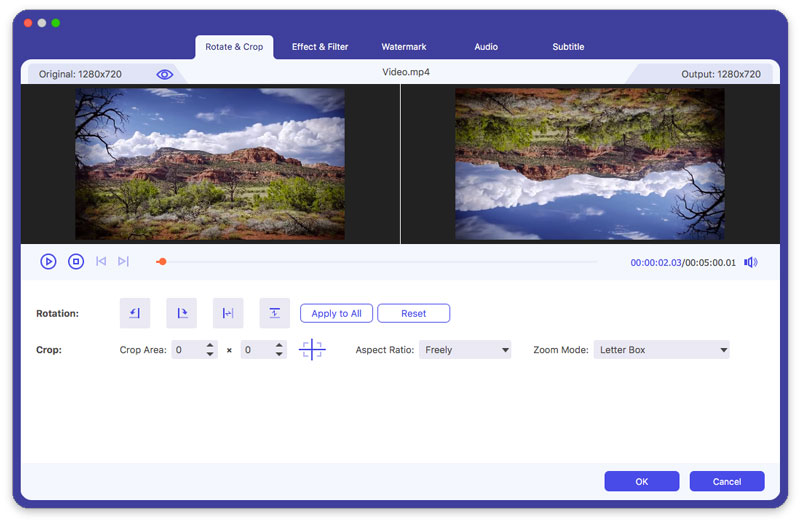
Step 2. The Crop function can remove the black edges of the video. You can set the crop area, select aspect ratio from 16:9, 4:3, 1:1 or 9:16. You can also select the Zoom mode from Letter Box, Pan & Scan or Full to get the best effect.
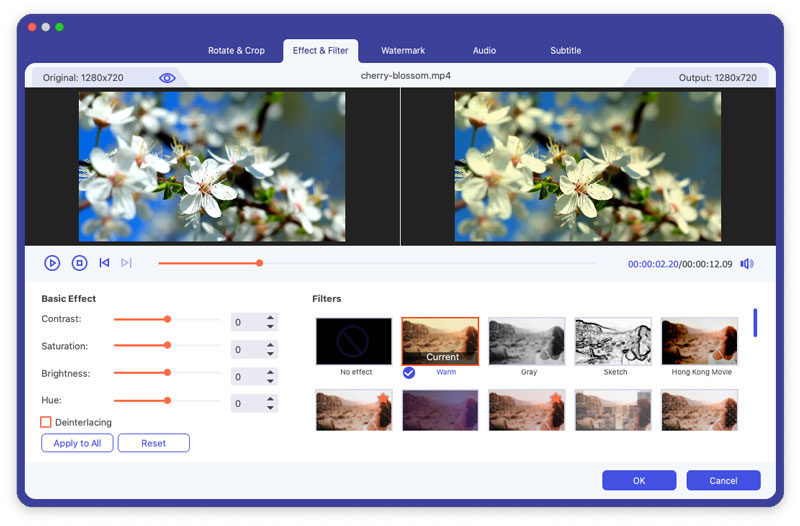
Add Filter & Effects
Step 1. Locate to "Effect & Filter" in the Edit window. Here you can adjust basic effects like contrast, saturation, brightness and hue.
Step 2. This Mac Video Converter Ultimate provides filters like Warm, Gray, Sketch, Hong Kong Movie, Orange Dots, Purple, Plain, Coordinates, Stars, etc. You can click on one filter and preview the effect. Then click "OK" button to apply the effect.
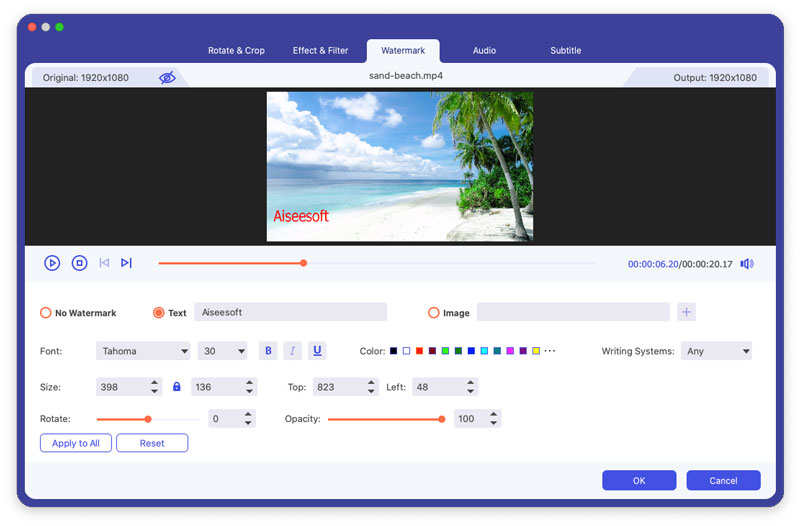
Add Watermark
Step 1. Select "Watermark" tab in the Editing window. Select "Text" option and enter the text in the blank space. You can change the text font, size, font style, color, position and writing system. Besides, you can drag the slider to rotate the text watermark to any angles or adjust the opacity from 1% to 100%.
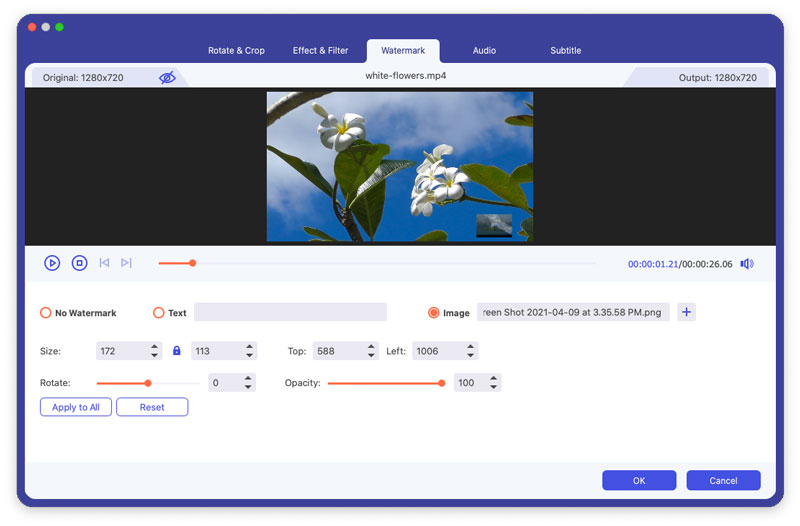
Step 2. If you want to add a logo to your video, you can select "Image" option and click "Add Picture" to add the picture logo. You can adjust the photo watermark size, position, rotation and transparency.
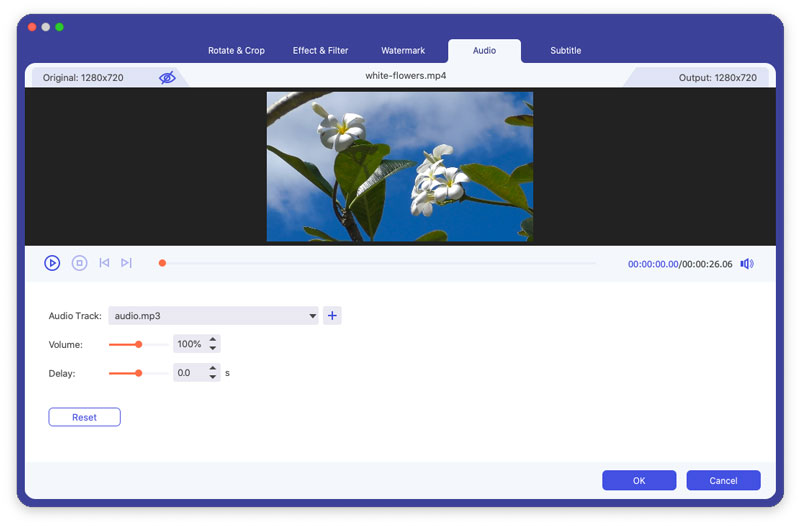
Adjust Audio
Step 1. Find "Audio" tab in Edit window. You can click "Add Audio" icon to add the audio track. If the audio not sync with video, you can adjust the volume and delay time to make them match.
Step 2. Click "OK" button to apply the changes.
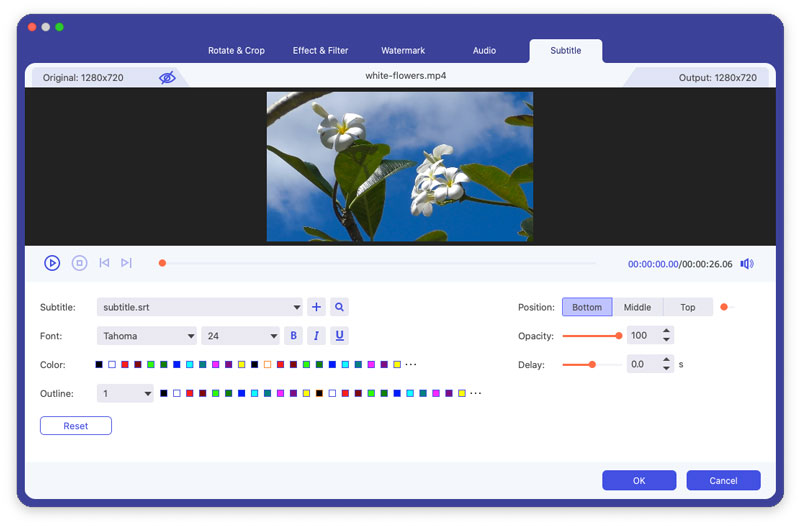
Add Subtitle
Step 1. Find "Subtitle" tab in the editing window. Click "Add Subtitle(s)" to add the (*.srt, *.ssa, *.ass) from your computer. You can adjust the font size, font style, color and outline.
Step 2. Click "OK" button to save the changes.
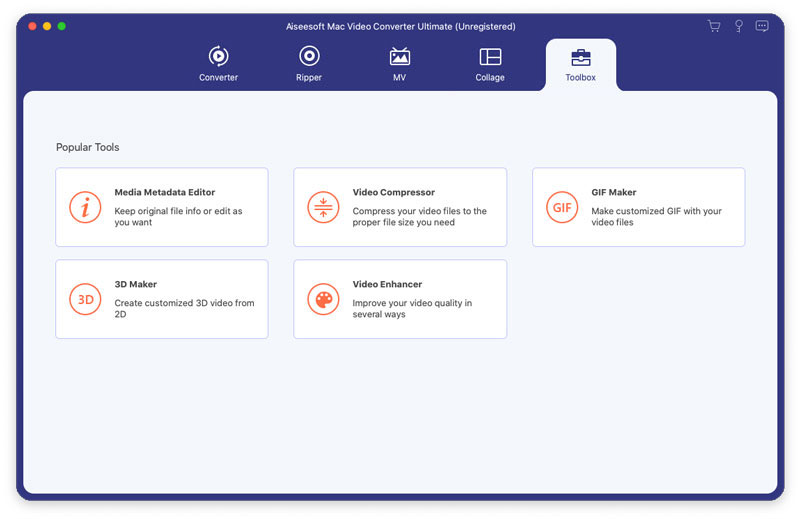
Step 1. Click "Toolbox" at the top and you can view all the popular tools. Click "Media Metadata Editor" to use this tool.
Step 2. Click the big plus button to add the media file you want to edit. Here, you can rename the media file, change media metadata like title, artist, album, composer, genre, year, track and comment.
Step 3. Click "Save" button to save the changes.

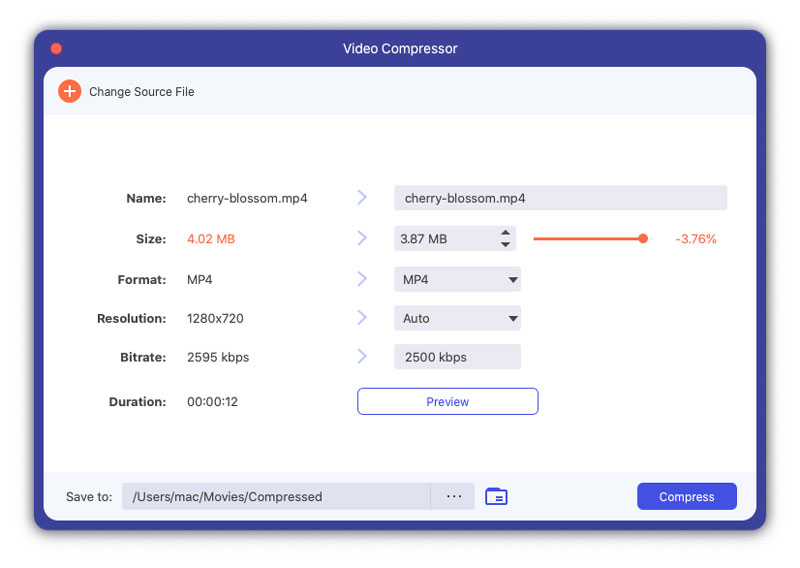
Step 1. Click "Video Compressor" from the Toolbox interface. You can upload the video by clicking the big plus button.
Step 2. You can change video name, adjust compression rate, select output format, resolution, bitrate and preview the compression effect.
Step 3. Click "Compress" button to compress your large video to small size.
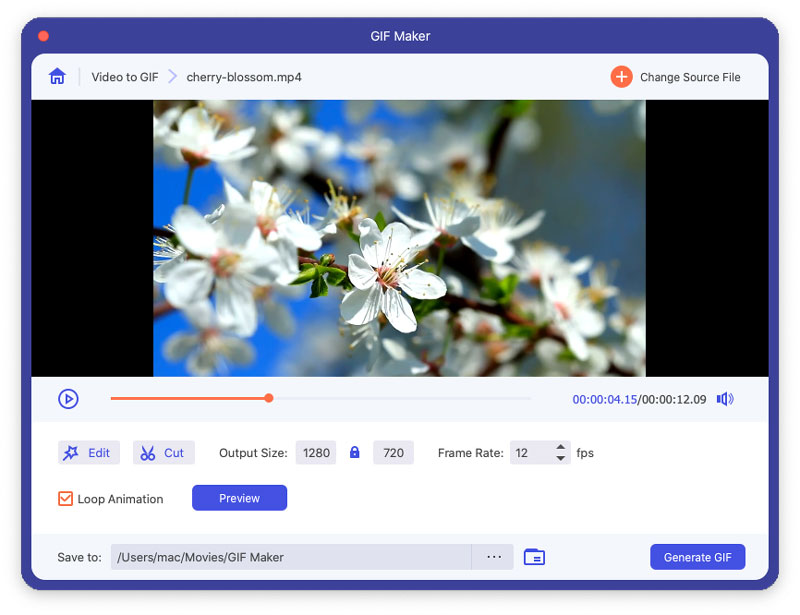
Step 1. Find "GIF Maker" from the Toolbox interface. You can add the video to the rectangle area.
Step 2. Check "Loop Animation" and click "Generate GIF" button to create your own GIF file.
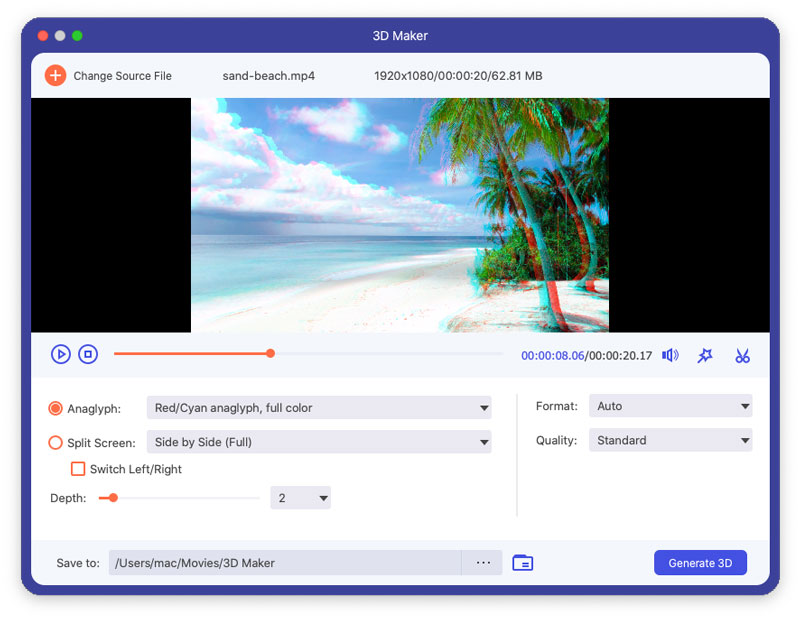
Step 1. Find "3D Maker" in Toolbox. Click the big plus icon to add the video to 3D Maker.
Step 2. You can choose Anaglyph 3D effect, or Split Screen 3D effect like Side by Side (Full/Half-Width) or Top and Bottom (Full/Half-Height).
Step 3. Click "Generate 3D" button to add 3D effect.
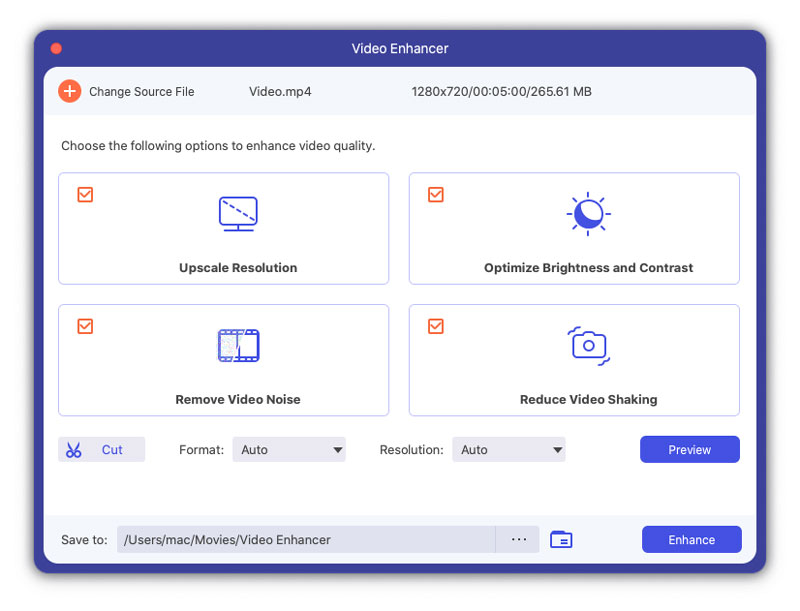
Step 1. Click "Video Enhancer" in Toolbox. Click the big plus icon to add the video to Video Enhancer.
Step 2. There are 4 options you can choose to enhance the video quality, like Upscale resolution, Optimize brightness and contrast, remove video noise, or reduce video shaking.
Step 3. Click "Enhance" button to enhance your video right now.
Apart from the best converting, editing and enhancingfeature, there are also more preference settings for Mac Video Converter Ultimate, including:
Update
For checking the new feature of this software, you need to make settings to get the update reminder. Click "Menu" > "Help" > Tick "Check Update...".
 Related Articles


 Retail Price: $
 Buy Now
 Download


 Copyright © 2012 Z0DOWNLOAD.COM. All rights reserved.